Deliciously Moist Almond Flour Blueberry Muffins Recipe

Delicious almond flour blueberry muffins, gluten-free and naturally sweet for a healthy snack.

almond flour blueberry muffins. Okay, you know those days where all you want is a big, fluffy bakery-style muffin but you glance in your pantry and only see almond flour? Maybe you’ve got some blueberries just begging not to shrivel up in the fridge, and you’re tired of dry or crumbly muffins that taste like disappointment. Been there. The hunt for a moist and actually tasty almond-flour muffin feels like looking for a unicorn, right? Well, stick with me. I’m kinda obsessed with making these muffins taste like a five-star bakery treat, and I’ll show you every trick. (By the way, if you’re into quick breakfast ideas, you might wanna check out my chia pudding tricks or even this epic way to make lemon drizzle cake extra moist.)
almond flour blueberry muffins

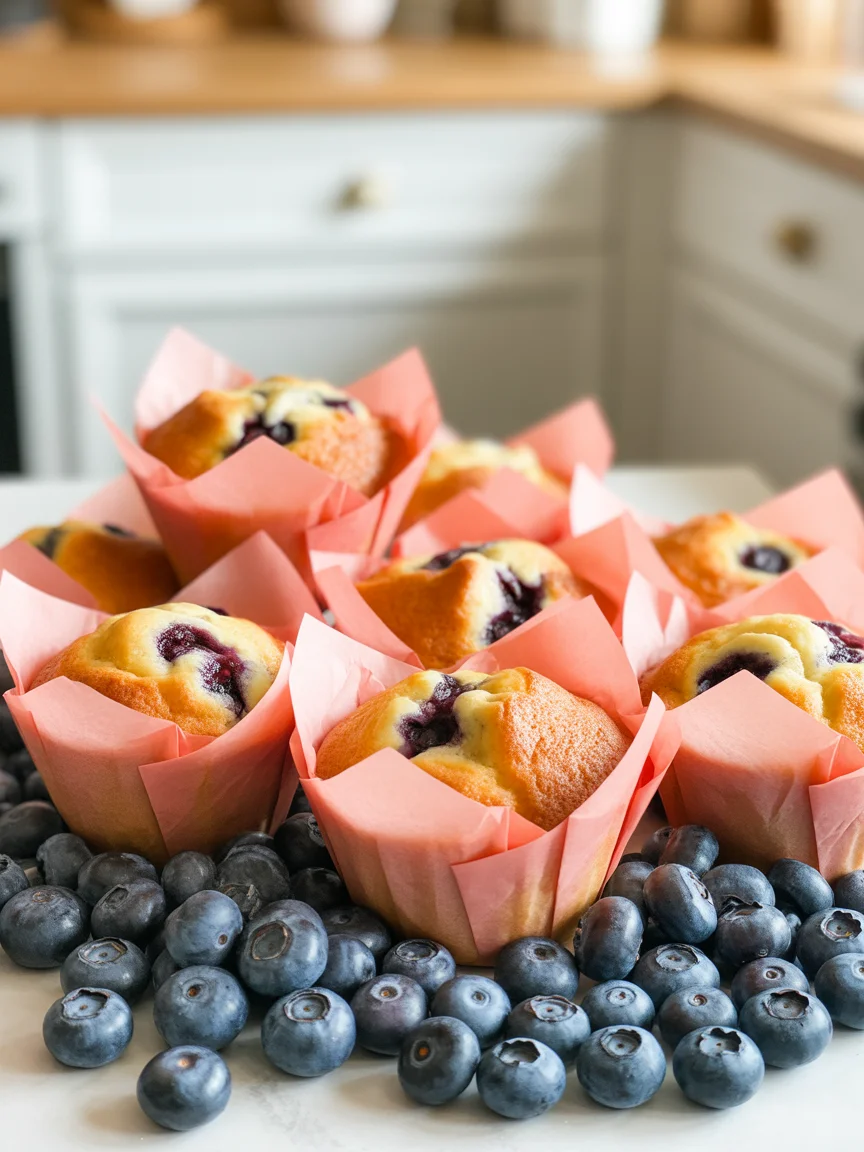
What is almond flour?

Almond flour is one of those ingredients that kinda sounds healthy and, honestly, downright fancy. But wait, let me just break it down. It’s literally just finely ground blanched almonds. That’s it. It’s a little different from almond meal. Almond meal includes the darker almond skins, so it’s not as fine or light. If you’re gluten-free, this is like, your BFF for baking. Some folks use it for that naturally sweet, nutty flavor. It doesn’t act exactly like wheat flour, but it does make your baked goods unbelievably moist.

I mean, the first time I tried baking with almond flour I was nervous. It felt like cheating, skipping the regular flour. But, wow—my muffins came out soft, kinda buttery, and didn’t stick in my throat the way some gluten-free bakes do. If you haven’t played with almond flour yet, you’re about to level up your baking game.
Deliciously Moist Almond Flour Blueberry Muffins Recipe

“I have celiac disease, so I’m always searching for good gluten-free recipes. These almond flour blueberry muffins totally nailed it for me — so fluffy, and nobody knew they were gluten-free at our brunch!” – Jamie V.

Why you’ll love this recipe

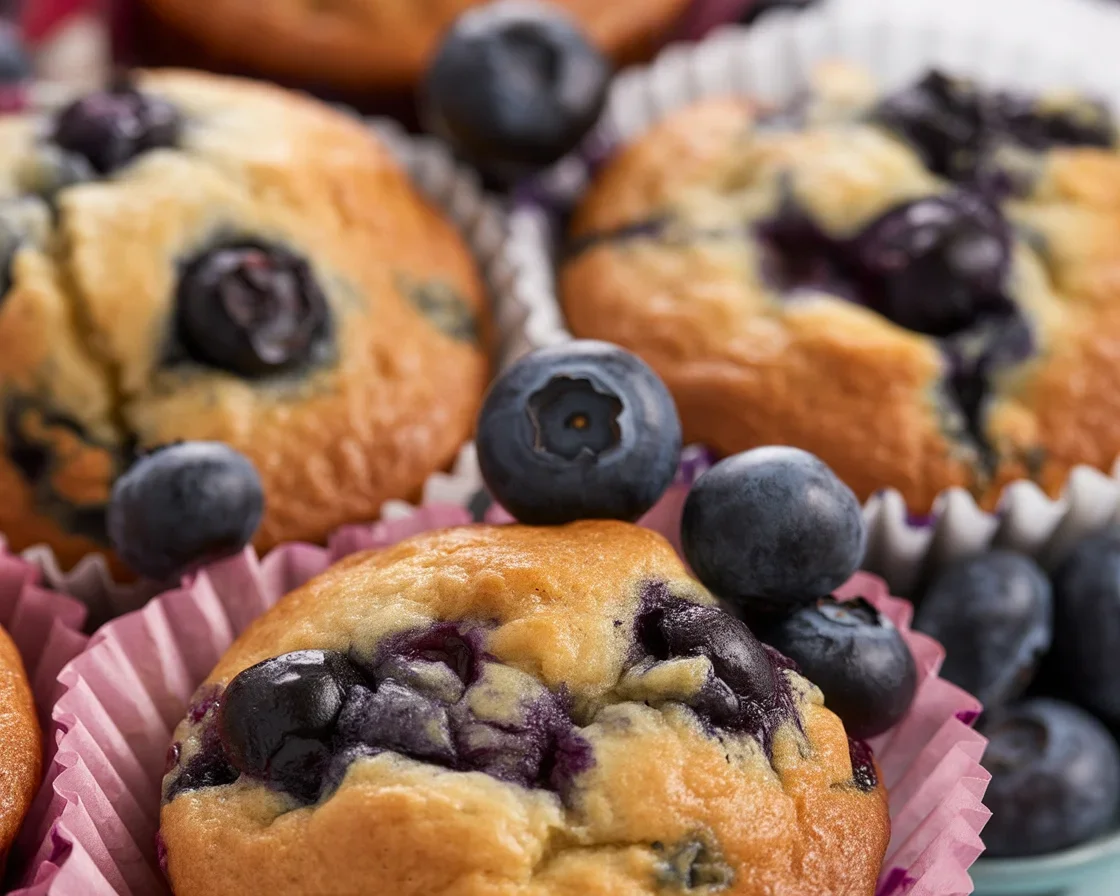
Alright, let me put it out there (maybe a little too boldly): these almond flour blueberry muffins might just be the fluffiest, juiciest muffins you’ll ever make without a bakery card. They’re super simple, barely take 10 minutes to whip up, and my kitchen always smells like a fancy café afterward. I always get told, “You could sell these” which honestly makes me laugh because, yeah, I’m not starting a bakery in my pajamas, but I’ll take the compliment.

They’re also not cardboardy or dry. They stay fresh and soft for days, which in my world is practically unheard of. And hey, you can freeze them if you want. Oh, and if you’ve got picky eaters? They never even realize they’re munching on something gluten-free and even a little healthier than the norm. Bonus: They’re perfect for grab-and-go breakfast or, like, random midnight snacks.
Deliciously Moist Almond Flour Blueberry Muffins Recipe

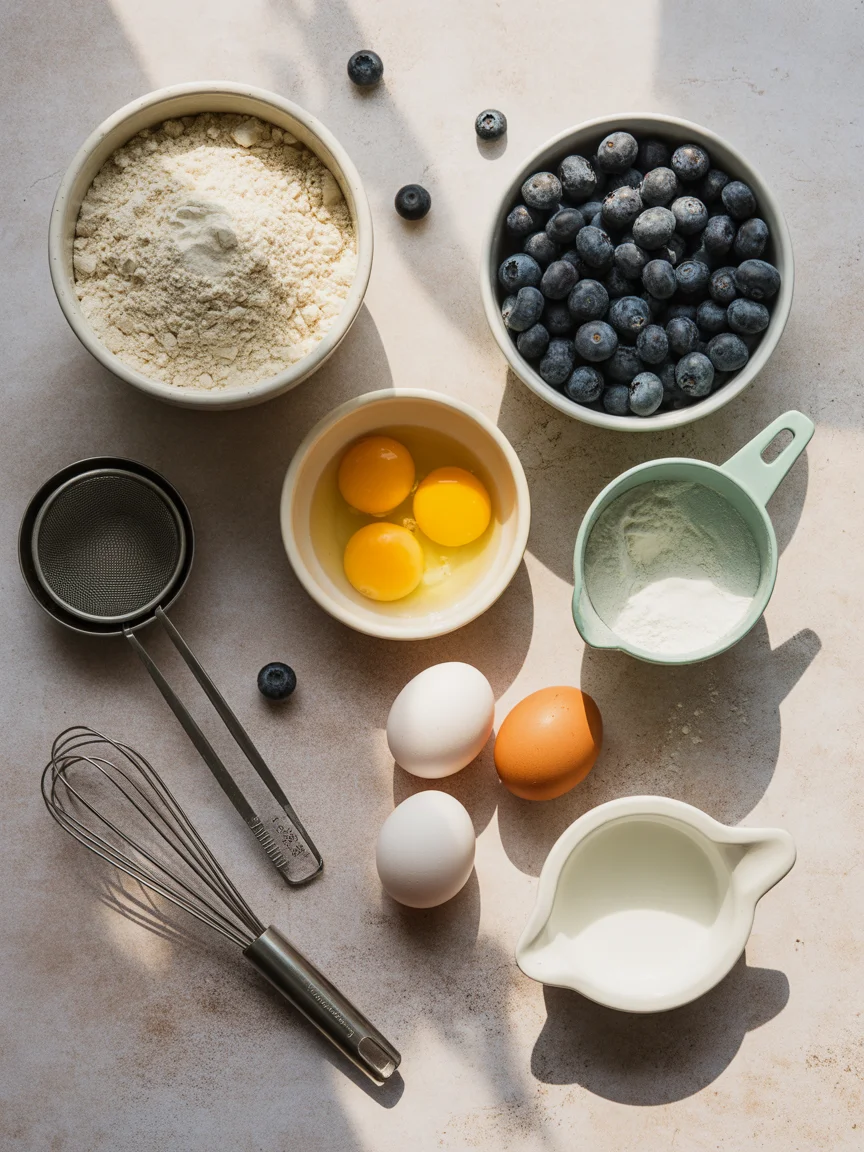
Here’s what you need to make them

Okay, ingredients! Simple stuff, nothing weird or hard to pronounce. Here’s the hit list:

  • Almond flour (finely ground is key for texture)
  • Eggs (for fluffiness)
  • Maple syrup or honey (for sweetness — I always go with maple)
  • Baking powder
  • A pinch of salt
  • Coconut oil or melted butter (whatever you like best)
  • Vanilla extract
  • Fresh or frozen blueberries (just don’t thaw if using frozen)
  • A squeeze of lemon (optional, but adds a zesty punch)

One little heads up: if you don’t have coconut oil, totally fine — just swap it for melted butter and you’re golden. I’ve even mixed in a banana when I was out of sweetener once and survived to tell the tale.

How to make these muffins

Right, let’s do this in real-life language, not some chef-y jargon.

First, preheat the oven to 350°F and line a muffin tin with those cute paper liners (trust me, almond flour can be sticky). In a bowl, stir together the almond flour, baking powder, and salt. In a separate bowl, whisk the eggs, maple syrup, coconut oil, and vanilla till it’s kinda frothy, but don’t overthink it. Pour the wet stuff into the dry and mix just until it all comes together.

Fold in your blueberries super gently. No need to go wild — just make sure every muffin will actually get a blueberry or two. Scoop into the liners (fill them up pretty high for that bakery look). Bake for about 23–27 minutes until they look all golden and a toothpick dunked in the center comes out mostly clean.

Now, patience…let them cool a bit in the pan so they don’t fall apart. But if you pop one out warm and slather it with butter, I will not judge.

Helpful Tips

Look, baking can be finicky, especially with almond flour. Here’s the actual stuff I learned from trial and error (and, let’s be honest, a few disasters):

  • Always use fine-blanched almond flour, not almond meal. It gives that soft, “is this really gluten-free?” texture.
  • Don’t overmix the batter. More like gently persuade it to combine — this keeps your muffins tender.
  • Fresh blueberries can burst and streak the batter. Roll them in a bit of almond flour before folding in for prettier muffins.
  • If you want your muffins extra pretty diner-style, sprinkle a little coarse sugar or slivered almonds on top before baking – it’s like magic.

Seriously, trust these. And browse my site’s gluten-free desserts section for even more keeper recipes if you’re into this vibe.

Common Questions

Q: Can I use frozen blueberries?
Absolutely. Don’t thaw them first or you’ll end up with purple (but still tasty) batter.

Q: How do I store these muffins?
Just toss them in an airtight container at room temp for two days, or pop ’em in the fridge to last up to a week.

Q: Can I swap almond flour for coconut flour?
Not really. Coconut flour is kinda weird and soaks up way more liquid. Stick with almond flour for this one.

Q: Are these muffins dairy-free?
Yep, if you use coconut oil instead of butter.

Q: Help! My muffins are too wet inside.
That happens sometimes. Try baking for a few extra minutes or let them cool longer — almond flour muffins firm up as they cool.

Why these muffins are a must-bake

Honestly, these almond flour blueberry muffins just make me happier than they probably should. They tick all the boxes: easy, not bland, totally bakery-style, and you can feel a little smug about eating something with real ingredients. If you want an outside perspective (don’t just take my word for it), the Bakery-Style Almond Flour Blueberry Muffins from Hummusapien spell out how surprisingly good almond flour can be. There’s also the Almond Flour Blueberry Muffins post at The Food Blog if you like comparing notes. So, go ahead — try these for your next weekend breakfast or snack attack. You might just find yourself hiding the last muffin for yourself.

Almond Flour Blueberry Muffins

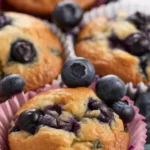
Deliciously fluffy and moist almond flour muffins loaded with blueberries, perfect for a bakery-style treat at home.

Main Ingredients

  • 2 cups Almond flour (Finely ground is key for texture)
  • 2 large Eggs (For fluffiness)
  • 1/3 cup Maple syrup or honey (For sweetness; maple is preferred)
  • 2 teaspoons Baking powder
  • 1/4 teaspoon Salt
  • 1/4 cup Coconut oil or melted butter (Whichever you prefer)
  • 1 teaspoon Vanilla extract
  • 1 cup Fresh or frozen blueberries (Do not thaw if using frozen)
  • 1 tablespoon Lemon juice (Optional, adds a zesty punch)

Preparation

  1. Preheat the oven to 350°F and line a muffin tin with paper liners.
  2. In a bowl, stir together the almond flour, baking powder, and salt.
  3. In another bowl, whisk the eggs, maple syrup, coconut oil, and vanilla until frothy.
  4. Pour the wet ingredients into the dry ingredients and mix just until combined.
  5. Gently fold in the blueberries.
  6. Scoop the batter into the muffin liners, filling them high.
  7. Bake for about 23-27 minutes, until golden and a toothpick inserted in the center comes out mostly clean.
  8. Let them cool in the pan briefly to avoid falling apart.

Store muffins in an airtight container at room temperature for up to 2 days or in the fridge for up to a week. They can also be frozen for later.

Breakfast, Snack
American, Gluten-Free
Almond Flour, Baking, Blueberry Muffins, Gluten-Free, Healthy Desserts

Savor These Tasty Keto Chicken Thigh Recipes for Dinner Tonight!

A plate of crispy baked keto chicken thighs served with a mushroom sauce.

Keto chicken thigh recipes always come to mind when my family says, “Hey, what’s for dinner?” but I’m short on time or just sick of boring meal options. Plenty of us find ourselves in that “new dinner rut” and need a dish that’s tasty, low-carb, and not a total chore to prep. Honestly, crispy, juicy chicken thighs? They’re magic for keto and don’t taste like “diet” food at all. If you love simple meals that fill you up, this guide’s totally for you and oh, you might want to peek at these keto chicken nuggets too if you’ve got kiddos or snackers around.
Savor These Tasty Keto Chicken Thigh Recipes for Dinner Tonight!

Ingredients needed

Let’s keep it real. You do not need fancy groceries for knockout keto chicken thigh recipes. Most of this stuff was already lurking in my kitchen. First off, grab bone-in, skin-on chicken thighs. That crispy skin? Irresistible. You’ll also want olive oil or avocado oil because both taste great and won’t mess up the recipe. Garlic powder, onion powder, smoked paprika, and a little Italian seasoning—basic, but trust me, they turn ordinary chicken thighs into something you’d happily serve to company. Oh, and salt and pepper. Don’t skimp on seasoning, okay?

For some zing, toss in a squeeze of fresh lemon or a sprinkle of grated Parmesan if you’re feeling fancy. Optional, but wow. Sometimes I throw in fresh herbs if my garden looks half alive. Simple, not stressful.

keto chicken thigh recipes

How to make keto chicken thighs in the oven

Alright, so here’s how it goes down in my kitchen. First, pat your chicken thighs dry with paper towels. This super basic step? It leads to the crispiest results, trust me. Next, rub those thighs all over with olive oil. Don’t be shy. Coat them generously in all your seasonings too, so every bite gets a little punch.

Lay the thighs skin-side up on a baking rack (or just a foil-lined tray if you don’t want to dirty extra pans). Into a hot oven, around 425 Fahrenheit. Bake for 35-40 minutes — no peeking — until the skin looks golden and crackly and the smell is driving everyone wild. Need to be sure they’re done? A quick poke with a meat thermometer should hit 165°F.

Halfway through, sometimes I spoon the juices back on top. Is it necessary? Not really, but wow, it does something. Let them rest a few minutes afterward unless you want that cloud of steam singeing your taste buds. Hard won advice there.

Savor These Tasty Keto Chicken Thigh Recipes for Dinner Tonight!

Expert tips

I’m not kidding, some tiny tweaks can make your keto chicken thigh recipes absolutely sing. Drying the skin well is non-negotiable — get those thighs as dry as the Sahara before seasoning, otherwise the skin? Sog city, and nobody likes weird soggy chicken.

Another one: arrange the thighs so they aren’t touching in the pan. Crowded chicken steams, not crisps. Give ’em a little personal space! Oh, and let’s talk about seasoning for a sec; don’t just shake it all over and walk away. Massage those flavors in—like you mean it. And, if you’re feeling bold, try adding a pinch of cayenne or a sprinkle of chili flakes for extra heat. I like ‘em spicy.

One time, I experimented with brushing the thighs with a mix of Dijon mustard and mayo just before baking. Wild, I know. But the result? Absolutely mind-blowing and probably belongs on a five-star restaurant menu… but way easier.

“I tried these tips and finally nailed the crispy skin! My husband couldn’t believe they were keto. He even asked for seconds, which never happens,” says my neighbor, Lana.

Swaps and substitutions

Life happens, ingredients disappear from the fridge. If chicken thighs are tricky to find, swap in drumsticks or even boneless thighs. Just cut the baking time a bit so they don’t dry out. No olive oil? Go for avocado oil or ghee for a different flavor (actually, the ghee thing was an accident at my house, now I do it on purpose).

Spice cabinet nearly empty? Cajun or taco seasoning is surprisingly great on chicken thighs, just check carb content if you’re committed to the keto thing. Sometimes I’ll even ditch the Italian seasoning for a little curry powder. Suddenly, dinner feels… exotic.

No fresh lemon or herbs? Don’t sweat it. Most dried versions work fine, or just amp up the garlic and onion powder. Keto chicken thigh recipes are weirdly forgiving, which is why I circle back to them constantly.

Serving suggestions

Okay, so your chicken thighs came out looking gorgeous. Now what? Here’s how I usually dress ‘em up:

  • Pair with steamed broccoli or roasted asparagus for a super easy side
  • Add a dollop of homemade cauliflower mash (honestly, almost as good as potatoes)
  • Make a simple salad with arugula, cucumber, and loads of lemon juice
  • Oh, or tuck leftovers into lettuce wraps for a breezy lunch

If you’re feeling casserole vibes tomorrow, chop up leftovers and toss them into an easy keto chicken casserole.

Common Questions

Q: Can I use boneless skinless thighs?
A: Yep, but you’ll lose the crispy skin kick. They cook a little faster, too.

Q: How do I store leftovers?
A: In the fridge, airtight, for up to four days. Reheat in the oven for max crispiness. Microwave works in a pinch if you’re rushed.

Q: Do I need to marinate the chicken first?
A: Not at all. Seasoning right before baking is totally fine for these keto chicken thigh recipes. If you do have extra time, 30 minutes in a lemon-garlic marinade never hurts.

Q: Can I cook these ahead for meal prep?
A: Absolutely. Make a big batch and portion out for lunches with greens or cauliflower rice.

Q: Are chicken thighs really better than chicken breasts for keto?
A: Honestly? They taste better, they’re juicier, and the extra fat is actually a good thing on keto.

This Dinner’s Going to Win You Over

So, there you have it! The magic of keto chicken thigh recipes isn’t just about flavor, but how crazy simple and flexible they are. You get huge flavor and crispy skin with literally no fuss, and you’ll be way less tempted by boring meal options. For something fun, try the Keto chicken thighs recipe with mushroom sauce, or maybe you want pure crunch with these Crispy Baked Keto Chicken Thighs. More into Mediterranean flavors? I’m eyeing these Sheet Pan Greek Chicken Thighs for my next easy night. Trust me, give these a whirl and you’ll see chicken thighs in a whole new light. Let me know what you try and hey, save some leftovers for yourself this time!

Keto Chicken Thighs in the Oven

Crispy, juicy chicken thighs that are perfect for a low-carb dinner. Easy to prepare and packed with flavor, these thighs will impress without the fuss.

Chicken Thighs

  • 4 pieces bone-in, skin-on chicken thighs (Fresh is best for maximum flavor.)

Seasonings

  • 2 tablespoons olive oil (Can substitute with avocado oil.)
  • 1 teaspoon garlic powder
  • 1 teaspoon onion powder
  • 1 teaspoon smoked paprika
  • 1 teaspoon Italian seasoning
  • to taste salt
  • to taste pepper

Optional Additions

  • 1 tablespoon fresh lemon juice (For a citrus zing.)
  • 2 tablespoons grated Parmesan cheese (Optional for added flavor.)
  • to taste fresh herbs (For added freshness, if available.)

Preparation

  1. Pat the chicken thighs dry with paper towels to ensure crispy skin.
  2. Rub the thighs generously with olive oil.
  3. Season the chicken thighs with garlic powder, onion powder, smoked paprika, Italian seasoning, salt, and pepper.

Cooking

  1. Preheat your oven to 425°F (220°C).
  2. Place the chicken thighs skin-side up on a baking rack or a foil-lined tray.
  3. Bake for 35-40 minutes until the skin is golden and crispy, and the internal temperature reaches 165°F (74°C).
  4. If desired, baste the chicken with juices halfway through the cooking time.
  5. Let the chicken rest for a few minutes before serving.

For extra heat, consider adding cayenne or chili flakes. Store leftovers in an airtight container in the fridge for up to 4 days.

Dinner, Main Course
American, Keto
Crispy Chicken, Easy Dinner, Gluten-Free, Keto Chicken Thighs, Low Carb

Delicious Keto Crunchwrap You Can Whip Up at Home!

Homemade Keto Crunchwrap Supreme with crispy cheese, fresh veggies, and low carb tortillas.

Keto Crunchwrap cravings hit differently, right? You want something crispy, gooey, and savory, all while keeping the carbs in check. I totally get the struggle. Taco night used to leave me feeling left out, watching everyone else wolfing down wraps while I poked at lettuce. Hang tight, because this recipe is about to fix your problem. Oh, and if you’re a side dish fanatic, you’ve gotta check out these air fryer spaghetti squash ideas or maybe even try a hearty beef heart stew keto recipe for next week.
Delicious Keto Crunchwrap You Can Whip Up at Home!

Low Carb Crunchwrap Supreme Video Tutorial

Some folks like to read, others (like me) love to see the process. Grab your apron, prop up your phone, and let the step-by-step video play along. You’ll catch every flip, fold, and sizzle. I might mumble, drop a spatula, or forget the cheese for a minute (totally happens). But you’ll see just how doable this Keto Crunchwrap really is—even if your kitchen’s a bit chaotic. Visuals help a ton, trust me. My first one came out shaped like a sad pentagon but tasted like victory.

People constantly message me saying, “Oh my word, my Crunchwrap came out just right!” So, if you’ve ever feared keto recipes are complicated, this video’ll change your mind. Real talk: melted cheese waits for no one.
Delicious Keto Crunchwrap You Can Whip Up at Home!

Healthy Crunchwrap Ingredient Swaps

Let’s keep it real: the biggest barrier to making a Keto Crunchwrap at home? That regular tortilla situation. You need something cozy for those fillings—but without a carb disaster.

Here’s my kitchen-tested fix. Grab a low carb tortilla from the store (those big burrito-sized ones work). If you want full control, make almond flour wraps or even use cheese wraps (yes, those stretchy wonders made from straight cheese—nothing against a little cheese madness).

Ditch the usual refried beans, swap in a spread of well-seasoned cauliflower mash. Not lying, I was skeptical, but it works. I pile in browned ground beef or shredded chicken (leftover rotisserie is your friend), whatever you’ve got lurking. Add a scoop of guac for happy fats and, naturally, don’t skip the cheese.

Do I ever go wild with fillings? Oh, you bet. Bell peppers, chopped jalapeños, even a couple of leftover crispy low carb hash browns right in there—seriously, try it once!

As for the crunch? Pork rinds, my friend. Almost magical. Snap them up and layer inside before folding for that snap!
Keto Crunchwrap

How to Make a Crunchwrap: Cooking Tips

Let’s talk actual kitchen moments. This Keto Crunchwrap isn’t hard to make at all. But, keep your cool, because the first fold is always the trickiest.

Lay down your low carb tortilla. Pile the meat in the center, right? Now, cheese next, your veggie bits, sour cream if you want (careful, not too close to the edge—it sneaks out and burns). Pork rinds on top for crunch! Tuck the edges gently over everything, working in a circle (not kidding, this is origami for hungry folks). If you don’t have a perfect fold, who cares? Tastes the same.

Here’s where folks mess up: too much filling equals poor closure. Go lighter. Flip your precious parcel onto a medium-hot skillet, seam-side down. Smash it a bit with a spatula. Wait for the golden brown magic—probably a minute or three. Flip and toast the other side. That’s it! If it falls apart, laugh it off and eat it anyway.

Give it a minute before slicing in, or you’ll get the “molten cheese flood” (I speak from experience).

This is my go-to keto lunch for work. Even my non-keto husband asks for these on Taco Tuesday! The pork rinds are a game-changer for crunch.

Recipe Variations

This Keto Crunchwrap is begging for tweaks. You get bored easily? I do. No shame in it.

Switch the protein—think spicy chorizo, even pulled pork from last Sunday’s dinner. For breakfast, you can go full-on brunch mode with scrambled eggs and bacon (check out more ideas on my breakfast keto page). Sometimes I skip beef and pack it with spicy shredded chicken, peppers, and a dollop of avocado cream.

Vegetarians, hey, don’t leave yet! Sautéed mushrooms, spinach, and a lake of melty cheese is unreal. For a tang, throw in pickled jalapeños. Want more of a Tex-Mex hit? Try some smoked paprika in the fillings.

And if you want to make dinner a cinch, pair your Keto Crunchwrap with a creamy spaghetti squash alfredo recipe for a real comfort night. You’ll thank me later.

How Many Carbs Are in a Crunchwrap Supreme

This is the sticky part, right? The classic fast food version can smash 50+ grams of carbs—ouch, no thanks. By hacking your Keto Crunchwrap at home, you’ll probably land closer to 7-10 grams of net carbs per wrap (depends on the tortilla and fillings, so check your labels and do quick math).

Pair it with a light side (maybe a salad or a soup from my soup keto collection) if you’re counting. The real trick: use the lowest net carb tortilla you can hunt down. Or better yet, make your own.

Don’t sweat the numbers too much for a one-off treat, though. One wrap, loaded smartly, will hardly nudge most daily macro goals.

Serving Suggestions

Okay, now for the fun—how to eat it and not look like a total dork while dipping.

  • Slice it in half for that classic fast food reveal photo (Instagram, anyone?).
  • Dunk in salsa, homemade ranch, or spicy guac—go nuts with the dips.
  • Add a crisp salad on the side, or go wild with spicy cauliflower rice.
  • Eat it at lunch, dinner, or sneak it for a midnight snack. No judgments.

Common Questions

Q: Will this crunch up like the real thing?
A: Yes! If you pan-sear it hot (and don’t overfill), you get a proper crunch thanks to the pork rinds.

Q: Can I freeze a Keto Crunchwrap?
A: Freeze wrapped in foil. Reheat in the oven or air fryer. Doesn’t get soggy, I swear!

Q: Do I need special tortillas?
A: Low carb or homemade almond flour ones work. Cheese wraps are unique but messier to fold.

Q: What sauce works best inside?
A: Salsa, sour cream, or even a little chipotle mayo bring it to life. Careful with watery salsas though.

Q: My wrap falls apart! What’s up?
A: Too much filling or weak tortilla. Go lighter on fillings, heat your tortilla first to help with folding.

Ready, Set, Crunch!

Honestly, this Keto Crunchwrap made me love taco night again. You can tweak it, make it your own, and not stress over carbs. Next time you want something actually fun and tasty, give this one a try. And if you want more ideas, there are awesome guides out there like the Low Carb Crunchwrap Supreme (Legit + Easy!) or this killer Low Carb Keto Crunchwrap Supreme that might help, too. Let yourself experiment, laugh at the flops, and trust me: you don’t need Taco Bell when you can make crunchwraps at home that taste like five-star comfort.

Keto Crunchwrap Supreme

A delicious low-carb version of the classic Crunchwrap Supreme, loaded with savory fillings and a satisfying crunch, perfect for a keto-friendly meal.

Wrap Ingredients

  • 2 pieces Low carb tortillas (Big burrito-sized tortillas work best.)

Filling Ingredients

  • 1 cup Browned ground beef or shredded chicken (You can use leftover rotisserie chicken.)
  • 1 cup Cauliflower mash (Used as a replacement for refried beans.)
  • 1 cup Shredded cheese (Use your choice of cheese.)
  • 1/2 cup Diced bell peppers (Add your choice of veggies.)
  • 1/4 cup Chopped jalapeños (Optional for added heat.)
  • 1/4 cup Sour cream (Optional, add carefully to avoid spillage.)
  • 1/2 cup Pork rinds (For added crunch.)
  • 1 tablespoon Guacamole (For healthy fats.)

Preparation

  1. Lay down one low carb tortilla on a flat surface.
  2. In the center of the tortilla, pile the browned ground beef or shredded chicken.
  3. Add shredded cheese on top of the meat.
  4. Layer the diced bell peppers, jalapeños, sour cream, and guacamole on top of the cheese.
  5. Sprinkle pork rinds on top for extra crunch.
  6. Gently tuck the edges of the tortilla over the fillings, working in a circular motion to form a wrap.

Cooking

  1. Heat a skillet on medium heat.
  2. Carefully place the crunchwrap seam-side down in the skillet.
  3. Press down slightly with a spatula and cook until golden brown, approximately 1-3 minutes.
  4. Flip the crunchwrap and toast the other side until golden.
  5. Remove from skillet, allow to cool slightly before cutting into halves.

This recipe allows for plenty of customization; feel free to switch proteins or add more vegetables. For a breakfast version, try scrambled eggs and bacon.

Dinner, Lunch
Keto, Mexican
Crunchwrap Supreme, Healthy Eating, Keto Crunchwrap, Keto Recipes, Low Carb

Keto Crunchwrap Supreme

A delicious low-carb version of the classic Crunchwrap Supreme, loaded with savory fillings and a satisfying crunch, perfect for a keto-friendly meal.

Wrap Ingredients

  • 2 pieces Low carb tortillas (Big burrito-sized tortillas work best.)

Filling Ingredients

  • 1 cup Browned ground beef or shredded chicken (You can use leftover rotisserie chicken.)
  • 1 cup Cauliflower mash (Used as a replacement for refried beans.)
  • 1 cup Shredded cheese (Use your choice of cheese.)
  • ½ cup Diced bell peppers (Add your choice of veggies.)
  • ¼ cup Chopped jalapeños (Optional for added heat.)
  • ¼ cup Sour cream (Optional, add carefully to avoid spillage.)
  • ½ cup Pork rinds (For added crunch.)
  • 1 tablespoon Guacamole (For healthy fats.)

Preparation

  1. Lay down one low carb tortilla on a flat surface.
  2. In the center of the tortilla, pile the browned ground beef or shredded chicken.
  3. Add shredded cheese on top of the meat.
  4. Layer the diced bell peppers, jalapeños, sour cream, and guacamole on top of the cheese.
  5. Sprinkle pork rinds on top for extra crunch.
  6. Gently tuck the edges of the tortilla over the fillings, working in a circular motion to form a wrap.

Cooking

  1. Heat a skillet on medium heat.
  2. Carefully place the crunchwrap seam-side down in the skillet.
  3. Press down slightly with a spatula and cook until golden brown, approximately 1-3 minutes.
  4. Flip the crunchwrap and toast the other side until golden.
  5. Remove from skillet, allow to cool slightly before cutting into halves.

This recipe allows for plenty of customization; feel free to switch proteins or add more vegetables. For a breakfast version, try scrambled eggs and bacon.

Dinner, Lunch
Keto, Mexican
Crunchwrap Supreme, Healthy Eating, Keto Crunchwrap, Keto Recipes, Low Carb

Delicious Keto Taquitos You Can Whip Up in No Time!

Delicious Keto Taquitos filled with chicken, cheese, and spices, perfect for low-carb lovers.

Keto Taquitos. Okay, first off, these rescued my Tuesday night dinner crisis more times than I can count. You know that moment—hungry outta nowhere, staring into a fridge that’s just kinda sad, and the urge to hit drive-thru is way too real. But if you already tried my favorite air fryer spaghetti squash or want something way more satisfying than a plain egg, you’re in the right place. Keto Taquitos are one of those easy dinners you can slap together fast—plus, they feel slightly fancy, and hey, there’s cheese. That’s enough for me most days. Oh, and if you’re looking for more dinner inspiration, take a peek at these Keto dinner recipes.
Keto Taquitos

Ingredients for Making Keto Taquitos

I swear, half the beauty of Keto Taquitos is in how flexible and simple the ingredients are. Honestly, as long as you have some sort of protein and cheese, you’re 90% of the way there.

Most times, I use cooked shredded chicken (rotisserie is gold here), but don’t let that limit you. Ground beef, leftover steak, or even random turkey will work. Here’s a pretty classic line-up for keto taquitos:

  • Shredded chicken (about 2 cups or so—don’t stress the measurement)
  • Shredded cheese (mozzarella or cheddar are tasty)
  • Cream cheese (makes it creamy, optional but recommended)
  • Taco seasoning (the sugar-free kind— seriously, check those packets)
  • Low-carb tortillas (or cheese wraps, or even sheets of baked cheese if you’re feeling chef-y)
  • Oil for brushing (avocado or olive will do)

If I’m feeling wild, sometimes I’ll add diced green chilies or chopped jalapenos. Sometimes, I toss in leftover cooked ground beef and call it a day. Keto Taquitos are meant to be easy and fun.
Keto Taquitos

Tips, Tricks, & Variations

If I could hand you my notebook full of sticky-noted shortcuts for Keto Taquitos, it’d be kinda a mess (and probably sticky). But here goes a few solid ones.
First, don’t skimp on that oil brushing step before baking or air-frying—it’s what gives you that biting crunch and browned edges. Even if you’re using pure cheese wraps, a little oil helps.

Trying to save time? Use leftover rotisserie chicken, or whatever meat’s leftover. It all works.

Now, if you’re in the mood to shake things up, swap taco seasoning for buffalo sauce or curry powder. I did buffalo taquitos once—my kids thought I was a five-star chef. Dramatic, but I’ll take it.

And seriously, play around with dipping sauces. Salsa verde and sour cream are my go-to, but ranch has never failed me.

I did try vegan cheese once (don’t look at me like that) and, honestly, it melted weird. Regular cheese is king here. Just sayin’.
If you prefer beef, just check out this beef heart stew keto recipe for filling swaps—makes a hearty twist.
Delicious Keto Taquitos You Can Whip Up in No Time!

Wow, these Keto Taquitos are in our dinner rotation now. Super easy and so crispy. I use rotisserie chicken and my picky kid loves them too! — Maggie R.

Serving Suggestions

When you finally bite into these, you get that satisfying crunch—what a win, right? Keto Taquitos don’t need a lot of extras to shine, but a few sides or toppings and suddenly you’ve got a meal fit for a crowd… or a hungry Thursday night.

  • Pile on chunky guacamole and salsa—may as well dunk every bite.
  • Whip up a quick salad with lime juice, easy and crisp.
  • Serve with a bowl of cheesy spaghetti squash keto casserole if you’re feeding a crew—so filling.
  • Add sliced radishes or pickled onions for those who want a zingy punch.

Really, these are just the starting line. Scatter, stack, or dip ’em as you like.

Tools Needed to Make Low Carb Taquitos

Alright, confession time. I used to overthink gadgets, but Keto Taquitos don’t need much. Baking sheet and parchment paper if you’re oven-bound work fine. An air fryer? If you have it, even better (less oil, faster crisp). Tongs for rolling those hot wraps will save your fingerprints. Oh, and a good spatula for sneaking them off the tray.

Mixing bowl for your filling—plastic, glass, whatever isn’t in the dishwasher. Honestly, you could probably do the rolling with your hands alone if you want to keep it full-on casual. No need for anything fancy here, just tools you already got in your kitchen.

Storage

Now, here’s where I got your back. These Keto Taquitos are so snackable, most of the time they vanish in minutes, but on the rare chance you’ve got leftovers, stash them in an airtight container in the fridge. Usually, they’ll last about three days—unless they’re hidden behind last week’s mystery takeout and you forget (totally guilty).

To reheat, just pop ’em in a skillet or back in the air fryer to restore that crunch. Microwave in a pinch, but… well, it’s soggier. Personally, I freeze uncooked rolled taquitos and bake straight from frozen. Totally a lifesaver for mid-week meal emergencies: no recipe stress, just fast food without the weird guilt.

Common Questions

Q: Can I make Keto Taquitos without tortillas?
A: Heck yes! I bake dollops of cheese into circles and use them as the wrap. Kinda magical, to be honest.

Q: What protein works best for Keto Taquitos?
A: Shredded chicken is easiest, but beef, turkey, or even pulled pork are great. Honestly, use whatever’s leftover.

Q: How do I get them really crispy?
A: Brush with oil and don’t overcrowd your pan or air fryer basket. They need room to breathe. And crisp.

Q: Can I make them ahead?
A: Oh absolutely. Roll them up, stick them in the fridge, and bake right before you’re ready to eat.

Q: What’s a good dip?
A: Salsa (red or green), sour cream, and guacamole are awesome. Don’t overthink it!

Time to Get Cooking!

Keto Taquitos make legit fast dinners, tasty snacks, or even party food (seriously, they disappear first at potlucks, always). The best part is how you can keep things classic or get wild with the fillings and dips. If you ever get bored in the kitchen, recipes like the Best Keto Taquitos Recipe are amazing for new ideas, or try flavor twists from Keto Taquitos – Kicking Carbs. Those want something spicier should definitely check out Keto Green Chile Chicken Taquitos for a little heat.
You honestly don’t need chef skills or fancy gadgets to enjoy these keto taquitos. Just a hungry appetite and a little creativity—trust me, that’s all it takes. Go ahead and whip up a tray for dinner this week. I bet you’ll be surprised how quickly these keto taquitos will climb to the top of your easy-meal favorites.

Keto Taquitos

Keto Taquitos are an easy and flexible dinner option made with protein, cheese, and low-carb tortillas, delivering a satisfying crunch and gourmet feel.

Main Ingredients

  • 2 cups Shredded chicken (Cooked, rotisserie is recommended)
  • 1 cup Shredded cheese (Mozzarella or cheddar)
  • 4 oz Cream cheese (Optional but recommended for creaminess)
  • 1 tbsp Taco seasoning (Use sugar-free kind)
  • 8 pieces Low-carb tortillas (Or cheese wraps, or sheets of baked cheese)
  • 1 tbsp Oil for brushing (Avocado or olive oil)

Optional Additions

  • 1 cup Diced green chilies (Optional for added flavor)
  • 1/2 cup Chopped jalapenos (For a spicy kick)

Preparation

  1. Preheat your oven or air fryer to 400°F (200°C).
  2. In a mixing bowl, combine shredded chicken, shredded cheese, cream cheese, and taco seasoning.
  3. Fill each tortilla with the mixture and roll tightly, placing seam side down on a baking sheet or in the air fryer basket.
  4. Brush the rolled taquitos lightly with oil for added crispiness.

Cooking

  1. Bake in the oven for 15-20 minutes or air fry for about 10-12 minutes, until crispy and golden brown.

Serving

  1. Serve warm with salsa, guacamole, or your favorite dipping sauces.

For variety, feel free to explore different meats or sauces. These taquitos can also be made ahead of time and stored in the fridge until ready to bake.

Dinner, Main Course
Keto, Mexican
Easy Dinner, Healthy, Keto Taquitos, Low Carb, Snack

Deliciously Creamy Keto Butternut Squash Soup You’ll Love!

Creamy keto butternut squash soup in a bowl garnished with herbs.

Creamy keto butternut squash soup is your ticket to fall comfort when you want to keep it low carb but are starved for big, cozy flavors. Ever stood in your kitchen, staring blankly at a butternut squash, thinking “How do I even make this into soup that won’t mess up my keto?” Been there—definitely done that. Honestly, after trying just about every trick in the book (even giving up before I found my groove), I cracked the code and now it’s in our weekly dinner round-up. If you’re all about that creamy texture—like, the really good stuff—this is exactly what you need. You might want to peek at these other ideas for creamy low-carb soups or even a fun air fryer squash trick if you like mixin’ things up, too.
Deliciously Creamy Keto Butternut Squash Soup You’ll Love!

Ingredients and substitutions

I’ll keep it real—grabbing a big, solid butternut squash can be intimidating. But here’s what you actually need for a knockout creamy keto butternut squash soup:
A decent-sized butternut squash (get one that feels heavy, not hollow or you’re wasting time), fresh garlic, a decent onion, full-fat coconut milk or heavy cream (serious creaminess alert), chicken broth, and a good knob of butter or ghee. Easy, right?
If you hate coconut, swap for all heavy cream. No onion in the house? A couple shallots work in a pinch. And don’t even sweat it if you’re dairy free—olive oil or avocado oil works instead of butter. Toss in a dash of curry powder if you want heat, or smoked paprika for that earthy oomph. I admit I go wild some nights and add a sprinkle of nutmeg just because.
Basically, you can riff on the base as long as you keep it pretty low-carb. But please, please—don’t skip the fat. That’s what makes this soup so lush and stick-to-your-ribs hearty.

This soup is so velvety and quick, even my picky husband—who swears he ‘hates squash’—goes for seconds every time. Life-changer!

Creamy keto butternut squash soup

Carbs in butternut squash soup

So, the big question: can you have butternut squash and still stay keto? Actually, yes—but within reason. Butternut squash is kinda starchy, sure, but if you’re smart about portion size you’ll make it work.
A one-cup serving of plain, cooked butternut squash has around 15 grams of carbs. But in this creamy keto butternut squash soup, you’re diluting those carbs with broth, cream, and all the good stuff, which helps create a more keto-friendly bowl.
If you’re watching carbs closer than a hawk, you can always use a combo of squash and cauliflower. That sneaky move cuts the net carbs down, and honestly—no one will know unless you tell them. For strict keto, go light on the soup, add some shredded chicken for protein, and boom—it fits your macros and still feels totally decadent.
When you crave a cozy soup night, this is a soup that doesn’t wreck your carb budget (especially compared to regular potato or pumpkin soups).
Deliciously Creamy Keto Butternut Squash Soup You’ll Love!

How to thicken low carb butternut squash soup

Sometimes your soup needs a thicker, silkier feel—like restaurant-style, you know? That’s where I went a little nuts trying things out.
First, don’t be scared to blend longer. The smoother the blend, the thicker the soup seems. If you need even more “hold-my-spoon-up” thickness, try simmering the soup with the lid off for a few extra minutes. Stove magic!
If you still want more, cream cheese will get you that unbeatably creamy vibe. Splash in a little, blend, and thank me later. Or, parmesan works too for a salty punch and added body.
One time I got wild and tossed in some cauliflower florets with the squash before roasting—surprise, surprise, the soup came out thicker and lighter in carbs.
Those alternative thickeners can keep your carbs low while giving your creamy keto butternut squash soup a fabulous, substantial texture.

Serving ideas

How you serve creamy keto butternut squash soup can totally transform dinner from meh to wow. Here’s how I make it even better:

  • Sprinkle toasted pumpkin seeds or crispy bacon right on top (nobody’s mad about bacon)
  • Swirl a spoonful of heavy cream or, if you’re lazy like me some nights, just a pat of butter
  • Pair with a chunk of low-carb bread, or dunk with cheesy “chaffles” for a cozy night-in
  • For something extra, toss in shredded chicken or leftover turkey if you want a protein boost (holiday magic!)

Sometimes, I just keep it classic and dust with a bit of black pepper and fresh thyme. Comfort food at its best.

Storage & Meal Prep

Planning ahead can be a lifesaver, especially if you get a case of “the Mondays.” Creamy keto butternut squash soup is pretty much the boss of make-ahead recipes in my book.
Let your soup cool before shoving it in the fridge—otherwise you’ll fog up every shelf. Pour it into jars or containers with tight lids, and it’ll stay fresh for up to four or five days. (I’ve forgotten mine for longer, and it survives, but safety first!)
If you’re meal prepping, go ahead and freeze in single servings. Reheat gently (microwave, stovetop, whatever works), give it a big stir, and maybe add a splash more cream if things seem thick.
Pro tip: stash a few toppings separately, since bacon bits in soup will get soggy fast. Not what you want. If you like mixing things up, try making a batch of soup and a cozy casserole from this list for a delicious keto week.

Common Questions

Can I use frozen butternut squash for this soup?
Yeah, totally. Just let it thaw a bit and roast as usual. Still comes out creamy and delicious.

Can I make this soup dairy free?
Absolutely. Swap the cream for full-fat coconut milk or your favorite plant-based alternative.

How spicy can I make this?
Go wild! Add a chopped jalapeño or some chili flakes. I sneak in a pinch of cayenne when no one’s looking.

Will kids really eat this soup?
Most times, yes. With enough cream and a bacon topping, they don’t complain. Some even beg for seconds. True story.

What can I serve on the side?
You can keep it simple with a low-carb bread or check out more soup keto ideas for awesome pairings.

Why creamy keto butternut squash soup deserves a spot in your lineup

Here’s the gist: this creamy keto butternut squash soup isn’t just keto, it’s full-on comfort food you’ll keep coming back to, especially once sweater weather hits. Every bowl is velvety smooth and somehow feels fancy but takes hardly any effort (don’t tell your family how simple it is). If you want even more creamy inspirations, I totally recommend peeking at this creamy keto butternut squash soup recipe or this flavor-packed Sugar Free Londoner butternut squash soup for twists on the classics. Trust me: with a recipe like this, staying keto never felt so easy or—dare I say—delicious. Give it a try and let your taste buds do the happy dance.

Creamy Keto Butternut Squash Soup

This creamy keto butternut squash soup is the perfect low-carb comfort food for fall, combining velvety textures with rich flavors.

Main Ingredients

  • 1 large butternut squash (Choose one that’s heavy and solid.)
  • 2 cloves fresh garlic (Minced.)
  • 1 medium onion (Can substitute with shallots.)
  • 1 cup full-fat coconut milk (Can substitute with heavy cream for more richness.)
  • 4 cups chicken broth (Use low-sodium if preferred.)
  • 2 tablespoons butter or ghee (Use olive oil for a dairy-free option.)

Optional Ingredients

  • 1 dash curry powder (For added heat and flavor.)
  • 1 dash smoked paprika (For earthy flavor.)
  • 1 dash nutmeg (Optional for added warmth.)
  • 1 cup parmesan cheese (Use for creaminess and flavor.)
  • 1 cup cauliflower florets (Can be added for a thicker soup.)

Preparation

  1. Peel and cube the butternut squash.
  2. Chop the onion and mince the garlic.
  3. In a large pot, melt the butter or ghee over medium heat.

Cooking

  1. Add the chopped onion and minced garlic to the pot. Sauté until translucent.
  2. Add the cubed butternut squash and chicken broth.
  3. Bring to a boil, then reduce heat and simmer until the squash is tender.
  4. Blend the soup until smooth using an immersion blender or in batches in a countertop blender.
  5. Stir in coconut milk or heavy cream until incorporated.
  6. Adjust seasoning with salt, pepper, and optional spices.

For meal prep, let the soup cool before storing in airtight containers. It can be kept in the fridge for up to five days or frozen in portions.

Main Course, Soup
American, Keto
Butternut Squash, Comfort Food, Creamy Soup, Keto Soup, Low Carb