Deliciously Creamy Greek Yogurt Treats You’ll Love

Delicious Chocolate Chip Peanut Butter Greek Yogurt treat, a healthy dessert option.

Greek yogurt treat cravings always seem to hit me right after dinner—like, suddenly, just as the sink is filling with dishes, there’s this overwhelming urge for something sweet, creamy, and a thousand percent satisfying. But, let’s be honest, I don’t always want to slice fruit, bake, or (let’s be real) even unbox fancy snack bars. That’s how I got hooked on making easy, homemade treats with Greek yogurt. If you love guilt-free snacks, you’re going to want to check out my favorite Greek yogurt treat tricks below. These are crazy simple, so grab your tub of yogurt and let’s make dessert actually fun. There’s more on easy snack meal prep ideas and clever hacks for yogurt on this post about healthy snacks, and the quick high-protein snack ideas are a game changer too!
greek yogurt treat

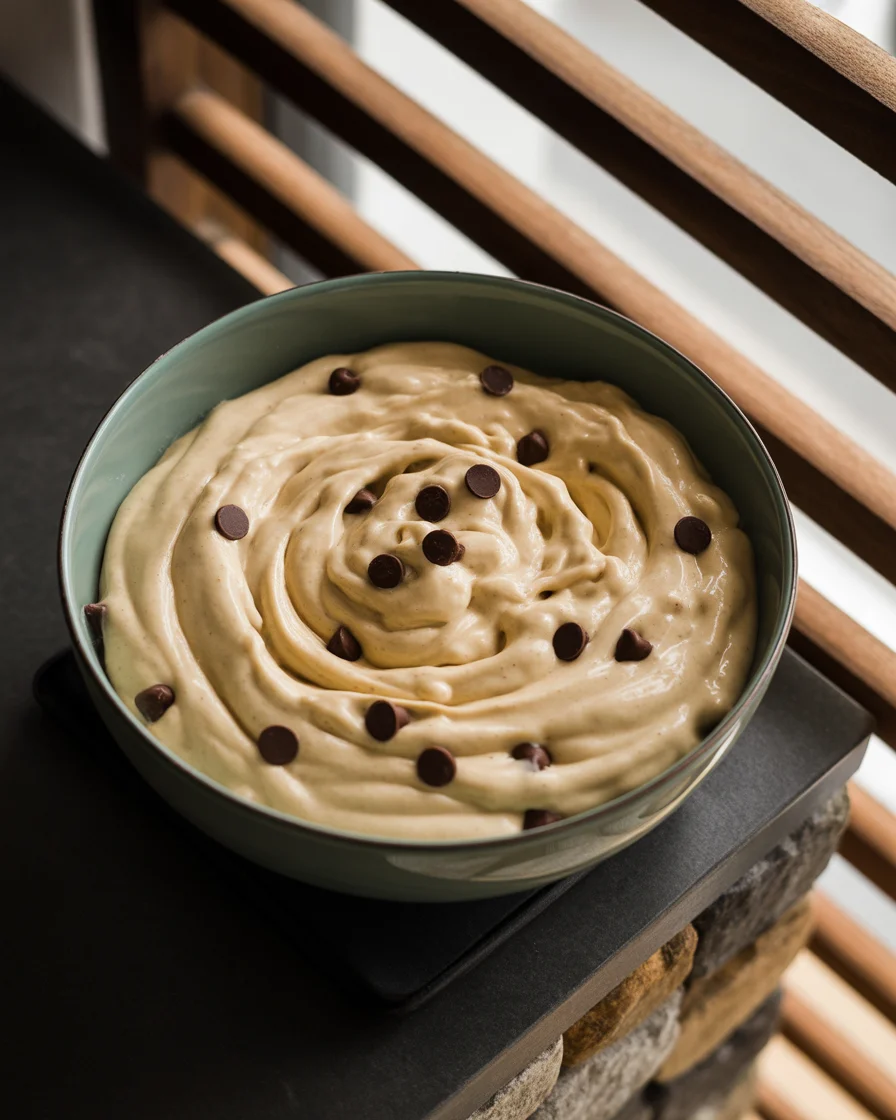
Key Ingredients and Substitutions

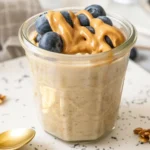
So, the backbone here is obviously Greek yogurt. This stuff just hits different compared to regular yogurt—it’s thick, creamy, and honestly makes most desserts feel a little more “five-star restaurant” (yup, little dramatic, but you get my point). If you don’t love dairy or maybe you’ve got an allergy situation going on, don’t sweat it. Coconut or almond milk yogurt works in a pinch and keeps things plant-based.

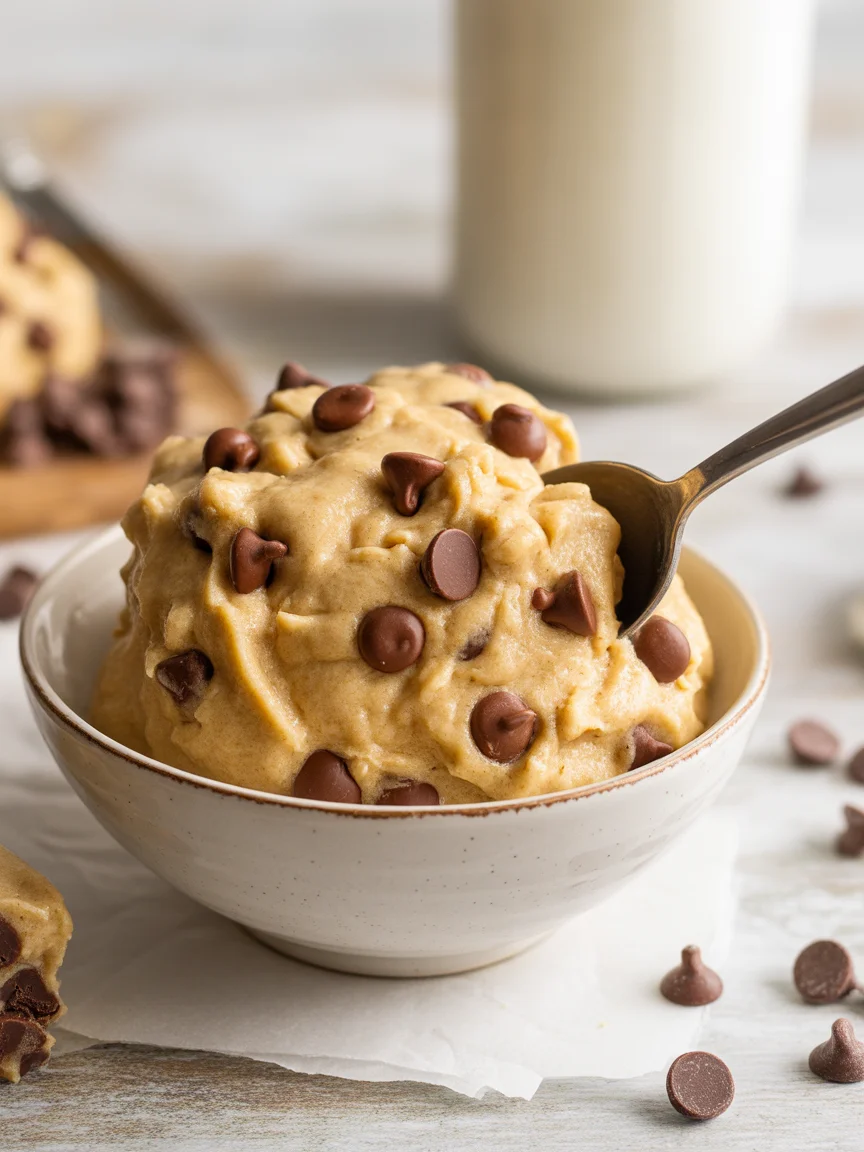
Now, about the add-ins: honey, maple syrup, or heck, even a little agave if that’s what you’ve got, all work as sweeteners. I like honey for classic vibes, but once in a while I’ll grab my maple bottle and go wild. Fruit? Think berries or mango—fresh or frozen, both are fine. Chocolate chips are always a win (no debate). Oh and don’t forget a pinch of sea salt, especially if you’re tossing in something chocolatey. It makes it “pop,” as my aunt would say. Sometimes I’ll even swirl in a blob of peanut butter or almond butter if I’m feeling reckless with calories.

If you’re out of inspiration on what to add, check the fridge or pantry and grab whatever looks snackable. No rules here except, you know…don’t add pickles. Please.

“I never realized Greek yogurt treats could be so versatile. Swapping strawberry for pineapple blew my mind—don’t be afraid to get creative!” — M. Lawrence

Deliciously Creamy Greek Yogurt Treats You'll Love

How to Make Frozen Greek Yogurt Bites

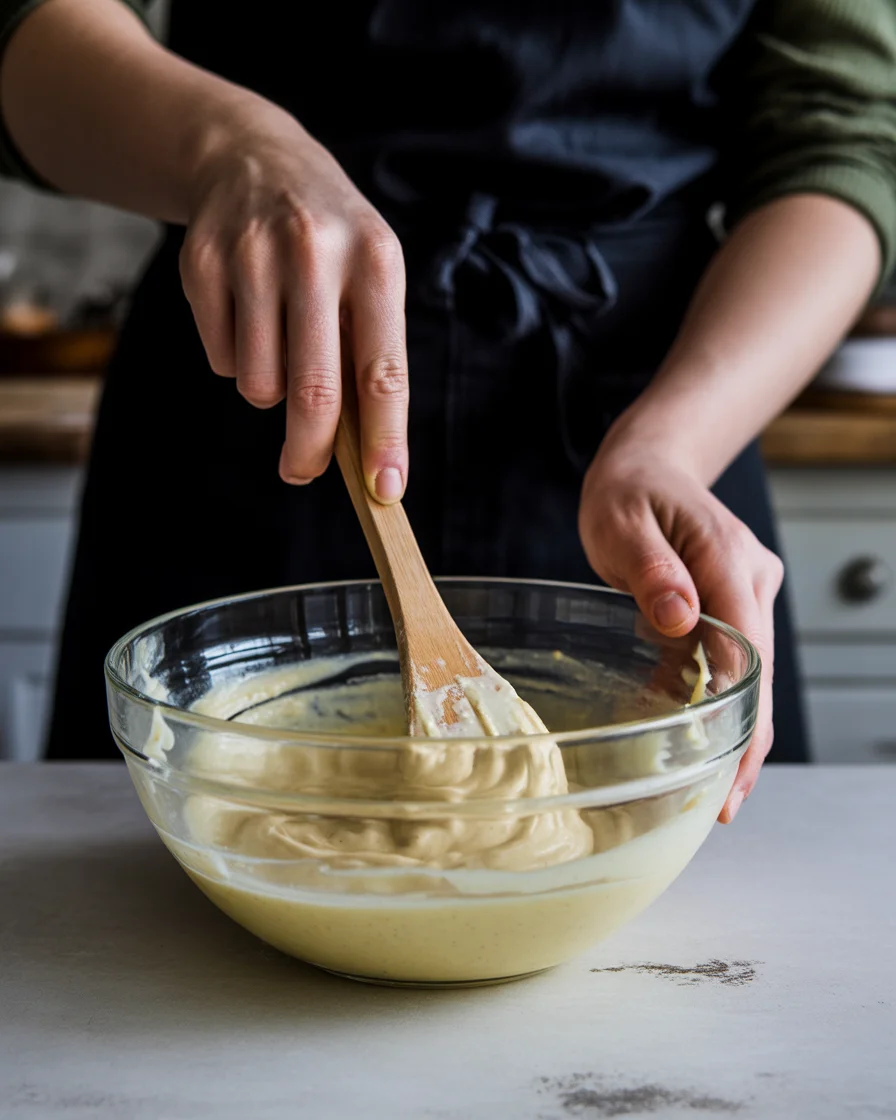
Let’s talk steps—super casual, nothing fancy or intimidating. First, you’ll need a bowl. Scoop about 1 cup of Greek yogurt into it. Toss in some honey or your sweetener of choice. If you like it extra sweet, add a bit more. Stir like you mean it. You want the sweetener mixed in really well because plain yogurt can be super tart.

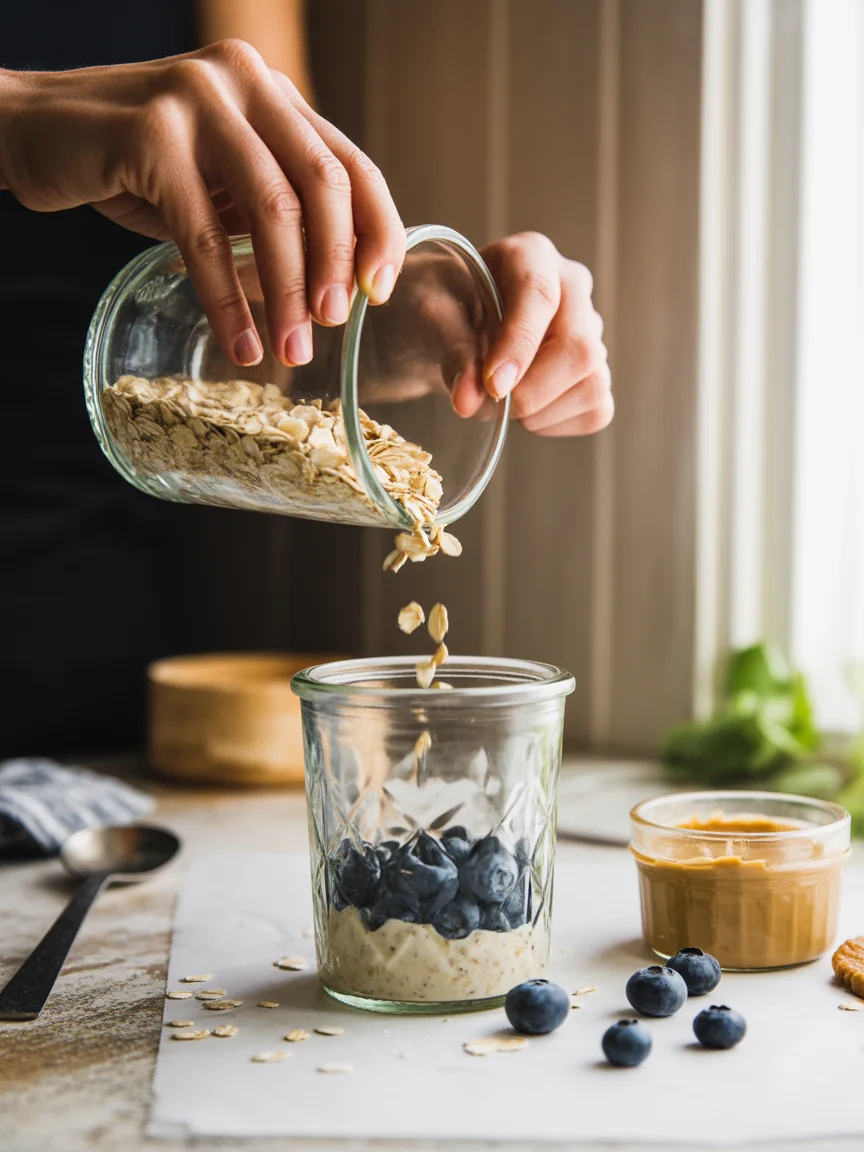
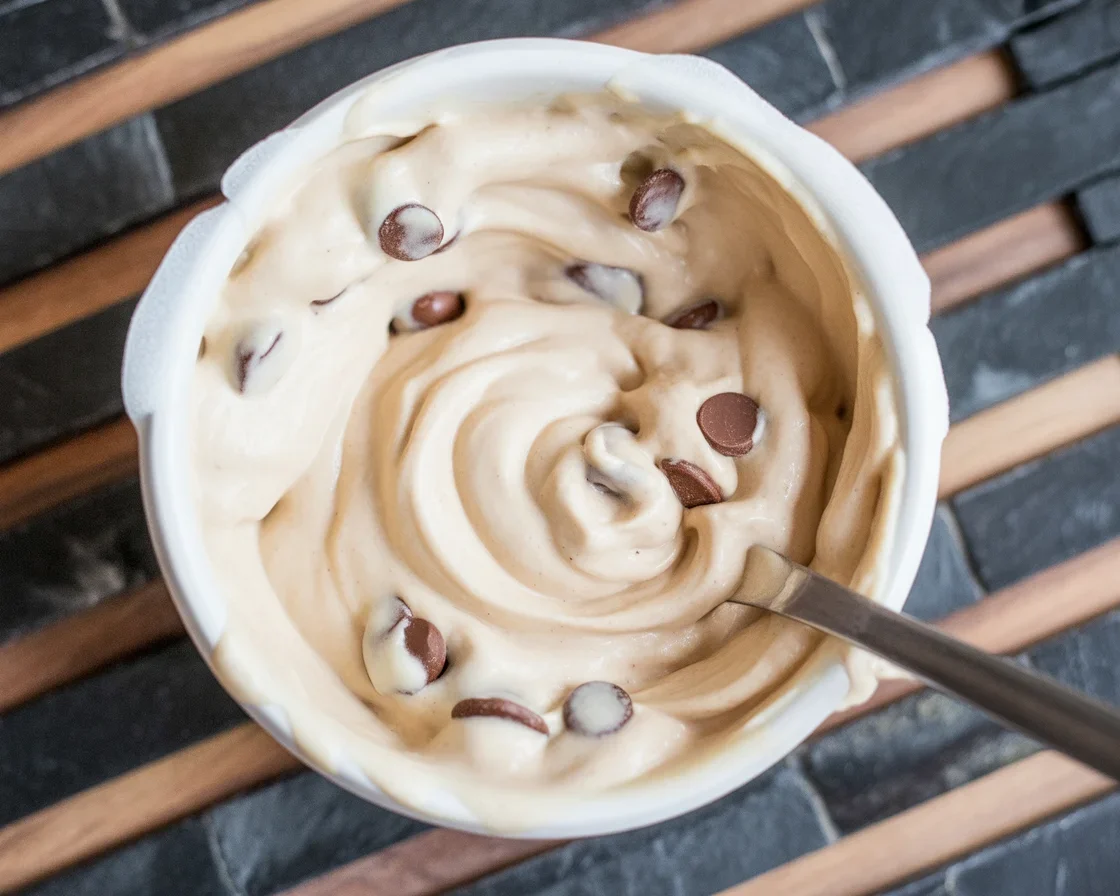
Once your base is ready, gently fold in any extras—think berries, tiny chocolate chips, maybe chia seeds if that’s your thing. Take a mini muffin tin or use some little silicone molds if you’re one of those organized kitchen people. Spoon your yogurt mixture in, about 2 tablespoons per slot. Tap the tray gently, so everything settles nice and even.

Freeze them for 1-2 hours. Sometimes, I forget and leave them overnight. No worries, they’re still good (just let them sit out a minute before eating or you’ll break a tooth). Pop ‘em out when they’re solid—boom, you’ve got frozen Greek yogurt treats. My nieces go absolutely wild for these.

Just a quick note: If you skipped molds and use baking paper on a tray, it works, but be ready for some janky shapes. Delicious, though.

Variations

I mean, honestly, the possibilities are endless here. Want a dessert vibe? Drizzle melted chocolate on top before you freeze. I sometimes do half-vanilla, half-strawberry by splitting the batch and mixing in a drop or two of vanilla extract on one half and a tiny bit of strawberry jam (microwaved until runny) in the other. Swirl them together, and suddenly, you’re a dessert genius (pat on the back).

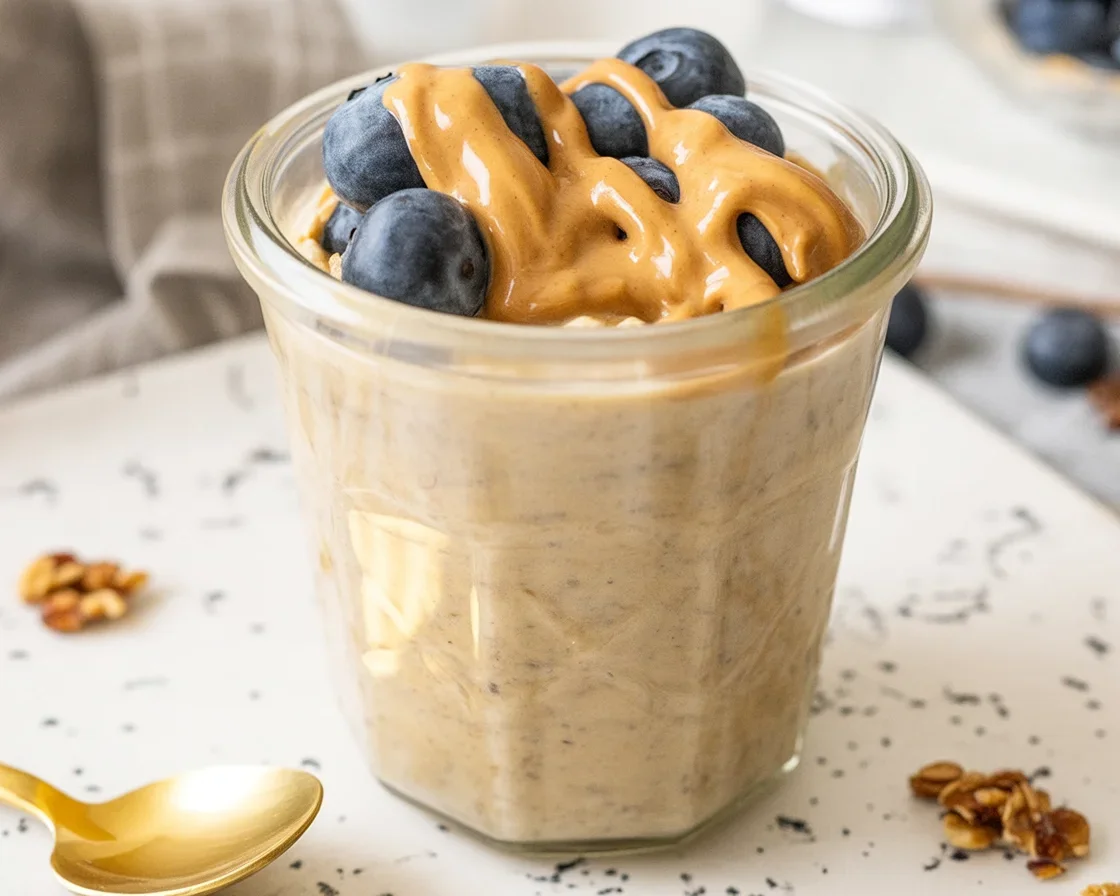
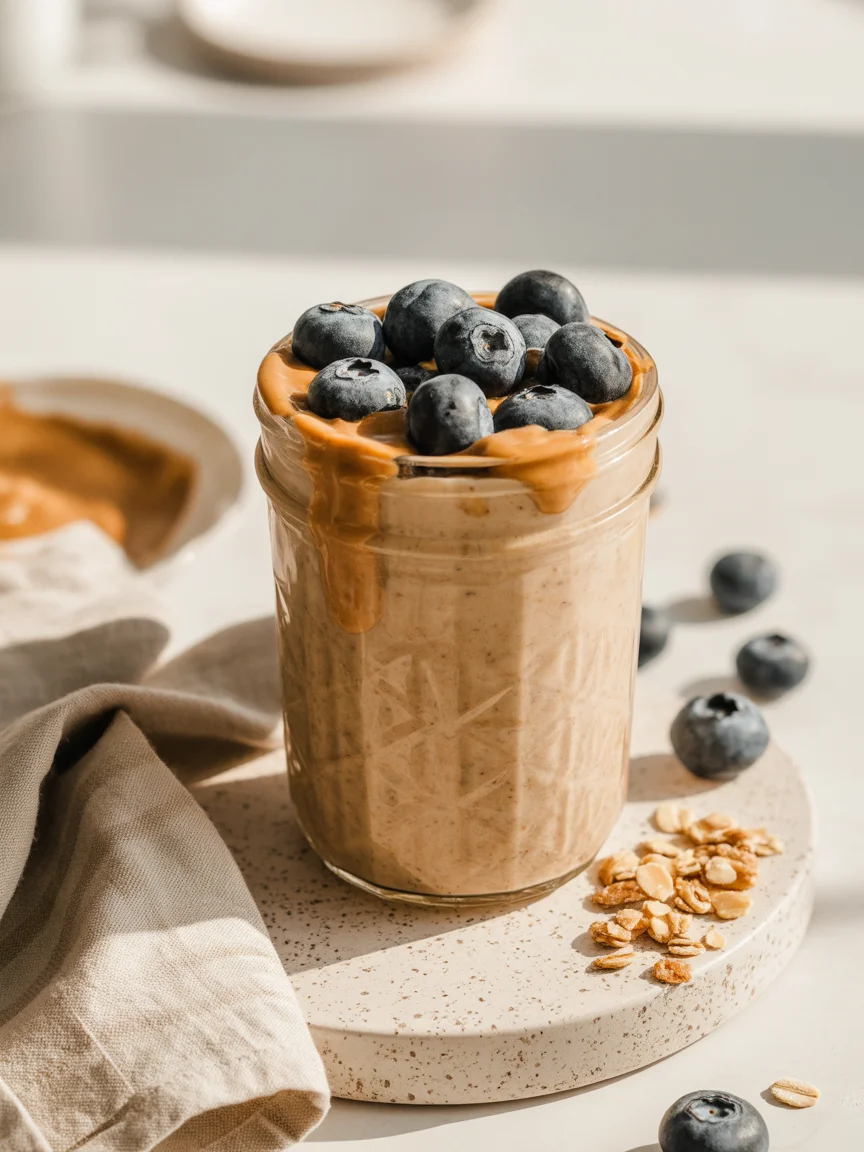
No fruit on hand? Raid the pantry. Granola adds crunch. Raisins, coconut flakes, or pumpkin seeds all totally work. My favorite hack is adding a swirl of nut butter in the center—surprise filling! Oh, and if you like breakfast vibes anytime, add a spoon of oats for a totally different texture.

One time, I threw in chunks of leftover banana bread—whoa. That was a weird week, but honestly, would do again. The point? Don’t overthink it. Whatever flavor combos call your name, give ‘em a shot.

Expert Tips

If you’re going for that picture-perfect, Instagram-ready look, use silicone molds. Makes popping out the bites way easier—seriously, metal tins are a pain. Another thing: after mixing, let your greek yogurt treat base sit for five minutes before freezing. The flavors kinda blend together, and, yes, it tastes better (I don’t make the rules).

Don’t skip the pinch of salt. It’s like this secret ingredient that makes your add-ins go from “yep, that’s yogurt” to “wait, why does this taste bakery-level?”. And if you want even creamier texture, stir in a splash of milk or coconut milk before you mix everything up—sounds weird, but trust me on this.

Last tip: store your bites in a container with parchment paper between layers. Keeps them from sticking like crazy. Also, label it or else your family will eat them all before you get home. Learned that one the embarrassing way.

Serving Suggestions

  • Stack 2-3 frozen bites and top with a little extra honey before serving.
  • Crumble one over your morning oatmeal for a creamy twist.
  • Pair with a hot mug of tea (let ‘em melt a little—it’s weirdly comforting).
  • Sneak a few into lunchboxes for a midday sweet fix.

Storage for Frozen Greek Yogurt Bites

Alright, let’s chat about leftovers (if you even have any—I rarely do). These frozen Greek yogurt treats actually keep really well. Grab a container with a tight lid and, like I mentioned, slap some parchment paper between the layers so they don’t morph into one weird mega-bite.

Toss ‘em in the freezer and you’re good for about two weeks, maybe a tad more. If you leave them too long, they can get a bit icy, but still taste good. Let them sit out for five minutes before eating. Too hard and you’ll be wondering if your dentist is on speed dial. And never, ever refreeze once thawed. That’s just a sad, soggy mess.

Common Questions

Q: Can I use nonfat Greek yogurt?
A: Yep. Texture is slightly less creamy, but it’s still awesome and way lower in calories.

Q: Are these okay for kids?
A: Totally! Just watch the sweetener and skip choking hazards like big nuts or seeds for the little ones.

Q: How can I make these vegan?
A: Easy swap. Use plant-based yogurt and agave or maple syrup for sweetener.

Q: Can I prep these in advance?
A: Absolutely. Make a double batch and keep ’em ready in the freezer for easy snacking.

Q: Are frozen Greek yogurt bites healthy?
A: Yes! Loads of protein, no weird ingredients… unless you add candy, then, uh, it’s up to you.

Give Your Snack Game a Creamy, Dreamy Upgrade

Alright, that’s the rundown—these Greek yogurt treats are the definition of easy. They’re versatile, let you use up whatever’s lurking in the fridge, and genuinely taste awesome. Seriously, if you’ve been looking for inspiration, take a peek at this Chocolate Chip Peanut Butter Greek Yogurt twist for more flavor ideas or find even more mixes at 10 Greek Yogurt Recipes – Healthy & Sweet Treats (everyone needs more inspiration). For those who live on Reddit like me, check out the Greek yogurt — quick and easy desserts thread; it’s full of wild combos from legit home cooks. Go experiment with your own Greek yogurt treat creations—I genuinely hope you’ll have as much fun (and as many snack spoilers) as I do. Happy snacking!

Frozen Greek Yogurt Bites

These creamy, frozen Greek yogurt bites are the perfect guilt-free snack that you can customize with your favorite add-ins.
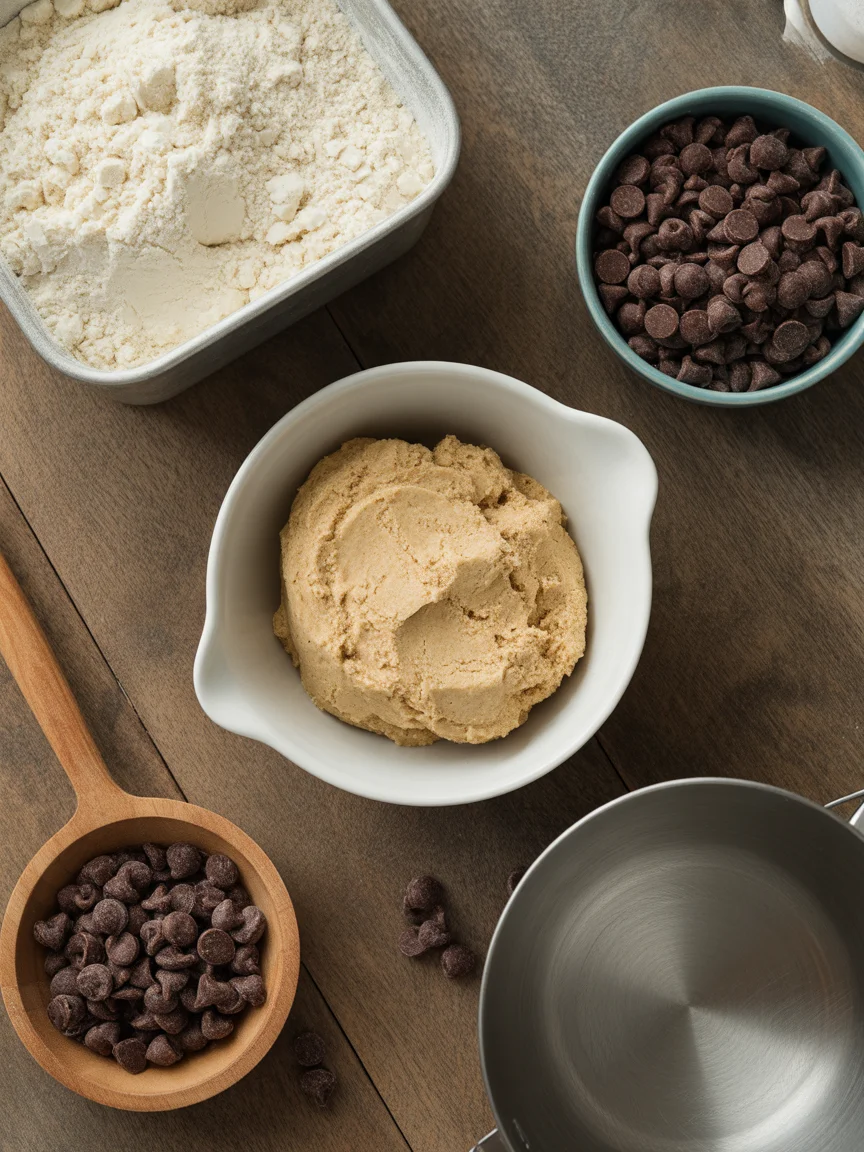
Base Ingredients

  • 1 cup Greek yogurt (Can substitute with coconut or almond milk yogurt for a dairy-free version.)
  • 2 tablespoons honey or other sweetener (Maple syrup or agave can also be used.)
  • 1 pinch sea salt (Enhances flavor.)

Add-ins

  • 1 cup berries (fresh or frozen) (Any berries of your choice.)
  • 1/4 cup chocolate chips (Optional.)
  • 2 tablespoons peanut butter or almond butter (Optional for a creamy swirl.)

Preparation

  1. Scoop about 1 cup of Greek yogurt into a bowl.
  2. Add honey or your sweetener of choice and stir until well mixed.
  3. Gently fold in any desired add-ins such as berries or chocolate chips.

Freezing

  1. Spoon the yogurt mixture into a mini muffin tin or silicone molds, about 2 tablespoons per slot.
  2. Tap the tray gently to settle the mixture.
  3. Freeze for 1-2 hours or until solid.
  4. Once solid, pop out the yogurt bites.
  5. Let them sit at room temperature for a minute before eating.

Store in a container with parchment paper between layers and label to avoid confusion. They last up to two weeks in the freezer. Don’t refreeze if thawed.

Dessert, Snack
American
Easy Recipes, Frozen Greek Yogurt Bites, Greek Yogurt Treats, Guilt-Free Desserts, Healthy Snacks

Keto Apple Fritter Cookies

Keto Apple Fritter Cookies topped with glaze, perfect for a low-carb diet

Keto Apple Fritter Cookies


Keto Apple Fritter Cookies are a delicious and healthy treat that fit perfectly into a low-carb lifestyle. They bring together the flavors of classic apple fritters while keeping the carbs in check. With the sweetness of apples and a light glaze on top, these cookies make a delightful snack or dessert.

Why Make This Recipe

If you’re following a ketogenic diet, finding tasty low-carb snacks can be challenging. These Keto Apple Fritter Cookies are easy to make and are filled with fresh apples and sweet spices. They satisfy your sweet tooth without compromising your health goals. Plus, they’re simple enough for anyone to whip up, making them a perfect choice for baking any day of the week!

How to Make Keto Apple Fritter Cookies

Ingredients

  • 1 cup almond flour
  • 1/2 cup coconut flour
  • 1/4 cup erythritol (or other keto-friendly sweetener)
  • 1 teaspoon baking powder
  • 1/2 teaspoon cinnamon
  • 1/4 teaspoon salt
  • 1/2 cup unsweetened applesauce
  • 2 large eggs
  • 1/2 teaspoon vanilla extract
  • 1 cup diced apples (keto-friendly options like Granny Smith)
  • For glaze: 1/2 cup powdered erythritol and water (or almond milk) to thin

Directions

  1. Preheat the oven to 350°F (175°C) and line a baking sheet with parchment paper.
  2. In a large bowl, mix together almond flour, coconut flour, erythritol, baking powder, cinnamon, and salt.
  3. In another bowl, combine applesauce, eggs, and vanilla extract.
  4. Combine the wet and dry ingredients and stir until well mixed. Fold in the diced apples.
  5. Scoop spoonfuls of the dough onto the prepared baking sheet, spacing them apart.
  6. Bake for 15-20 minutes or until the edges are golden.
  7. While cookies are baking, mix powdered erythritol with just enough water or almond milk to create a glaze.
  8. Once cookies are cooled, drizzle the glaze on top and enjoy!

How to Serve Keto Apple Fritter Cookies

These cookies are best served warm or at room temperature. You can enjoy them plain or with a cup of tea or coffee. They also make a great addition to a breakfast spread or as an afternoon snack.

How to Store Keto Apple Fritter Cookies

To store your cookies, place them in an airtight container. They can be kept at room temperature for a few days. If you want to keep them fresh for longer, store them in the refrigerator for up to a week. You can also freeze them for up to three months.

Tips to Make Keto Apple Fritter Cookies

  • Make sure to use keto-friendly sweeteners like erythritol or monk fruit to keep the cookies low-carb.
  • Dice the apples into small pieces to ensure they bake evenly throughout the cookies.
  • For a touch of extra flavor, add chopped nuts or a sprinkle of nutmeg to the dough.

Variation

You can customize this recipe by adding chopped nuts, such as walnuts or pecans, for added crunch. Additionally, try using different types of low-carb fruits like blueberries or raspberries for a twist on the original flavor.

FAQs

1. Can I use a different sweetener?

Yes! You can substitute erythritol with other keto-friendly sweeteners like monk fruit or stevia, but be sure to check the conversion rates for sweetness.

2. Are these cookies gluten-free?

Yes! All the ingredients used in Keto Apple Fritter Cookies are gluten-free, making them suitable for those with gluten sensitivities.

3. Can I substitute the applesauce?

If you don’t have applesauce, you can use mashed ripe bananas, but it may change the carb count. Just ensure it’s a suitable option for your diet.

Keto Apple Fritter Cookies

Keto Apple Fritter Cookies are a delicious and healthy low-carb treat that combines classic apple fritter flavors with a light glaze, perfect for satisfying your sweet tooth.

Dry Ingredients

  • 1 cup almond flour (Base flour for the cookies)
  • 1/2 cup coconut flour (Adds texture and coconut flavor)
  • 1/4 cup erythritol (Keto-friendly sweetener)
  • 1 teaspoon baking powder (Leavening agent)
  • 1/2 teaspoon cinnamon (For flavor)
  • 1/4 teaspoon salt (Balances sweetness)

Wet Ingredients

  • 1/2 cup unsweetened applesauce (Moisture and natural sweetness)
  • 2 large eggs (Binding agent)
  • 1/2 teaspoon vanilla extract (Vanilla flavor)

Add-ins

  • 1 cup diced apples (Use keto-friendly options like Granny Smith)

For Glaze

  • 1/2 cup powdered erythritol (For sweetness in glaze)
  • as needed water or almond milk (To thin the glaze)

Preparation

  1. Preheat the oven to 350°F (175°C) and line a baking sheet with parchment paper.
  2. In a large bowl, mix together almond flour, coconut flour, erythritol, baking powder, cinnamon, and salt.
  3. In another bowl, combine applesauce, eggs, and vanilla extract.
  4. Combine the wet and dry ingredients and stir until well mixed. Fold in the diced apples.
  5. Scoop spoonfuls of the dough onto the prepared baking sheet, spacing them apart.

Baking

  1. Bake for 15-20 minutes or until the edges are golden.

Glazing

  1. While the cookies are baking, mix powdered erythritol with just enough water or almond milk to create a glaze.
  2. Once the cookies are cooled, drizzle the glaze on top and enjoy!

Serve these cookies warm or at room temperature. Store in an airtight container at room temperature for a few days, or refrigerate for up to a week. Freeze for up to three months.

Dessert, Snack
American
Apple Fritters, Healthy Snack, Keto Cookies, Keto Treats, Low-Carb Dessert

Creamy Chorizo Pasta That Will Wow Your Taste Buds

Creamy Chorizo Pasta served with rigatoni in a rich tomato cream sauce.

Creamy Chorizo Pasta. You’ve probably heard about it or maybe you saw someone cook it online and suddenly, your regular weeknight pasta feels… kinda boring. I used to fall back on my safe tomato sauce routine, but let me tell you: this recipe kicked that habit to the curb. Needed something new that wasn’t fussy, still comforting, and frankly, needed a bit of wow factor. If you’re chasing something fun and simple (but packs five-star restaurant energy), you’re in the right place. Stick around, I’ll show exactly how you can bring this Creamy Chorizo Pasta to life. Oh, and if keto eats are your vibe, check out my picks for creamy spaghetti squash alfredo or my hearty favorite, creamy tuscan chicken soup.
Creamy Chorizo Pasta That Will Wow Your Taste Buds

Key Benefits of the Topic

Let’s start with the obvious: Creamy Chorizo Pasta isn’t your typical, boring dinner. This stuff’s got layers. The smoky, spicy chorizo brings real warmth, and then there’s that lush, velvety sauce that hugs every noodle. To me, it’s one of those meals that gets everyone talking at the table. Kids, adults, picky “no spice!” folks… somehow, they all want a second plate. The creaminess keeps you coming back for bite after bite (dangerous, but worth it).

You know those days when you want comfort food but also crave something a little extra? That’s where this pasta comes in. Plus, it’s quick. I’m talking done in 30 minutes if you’re not wandering off to scroll your phone in the kitchen like I do. One pan, few dishes, huge flavor. If you’ve been hunting for a practical way to spice up your weeknight meals or impress friends without working up a sweat, this is it.

I once made it for a family birthday when I forgot to plan ahead (so relatable, right?) and still managed to pull off what everyone swore was “the best dinner in ages.” I mean, how can you say no to that?
Creamy Chorizo Pasta That Will Wow Your Taste Buds

Common Challenges and Solutions

Now, a couple of honest bumps here. First off, not all chorizo is the same. There’s the crumbly Mexican kind and the firmer Spanish style. Don’t panic — either one works, but you might need to adjust. The Spanish one? Slice it thin so it gets those crispy edges. The Mexican kind? Crumble it, so it melts right into the sauce for max flavor.

Another challenge: cream sauces split if you go full blast heat-wise. Don’t do what I did that one frazzled Tuesday — I cranked the burner, turned my back, and poof, curdled sauce. Medium-low heat is your best buddy. And please, don’t skip draining the chorizo if it’s super oily. Otherwise, the sauce ends up sad and greasy.

For the right pasta texture, always save a splash of cooking water. Helps the sauce cling and fixes up too-thick issues if you’re heavy-handed with the cheese (we’ve been there). Oh, and if you want something lighter, I’ve swapped in this awesome keto pasta and honestly? Next-level. Grandkid approved, too.

Now, not every challenge can be fixed (sometimes you just burn the onions, it happens), but most are easy to dodge once you know what to look for.

“I’ve made this Creamy Chorizo Pasta twice now. Got rave reviews at a potluck and my picky teenager even wanted leftovers for lunch. I appreciated the practical tips on adjusting the sauce — finally nailed that silky texture!”

Creamy Chorizo Pasta

Expert Tips for Success

Alright, here’s the fun part. I’m not a pro chef, but these are the little hacks that rocket this dish into “wow, you made that?” territory. Don’t skimp on browning the chorizo. Let those edges get slightly crispy for a bold, toasty taste. Deglaze the pan with a splash of white wine or pasta water after cooking the chorizo — trust me, it scoops up all those flavor bits and builds depth.

Now about the sauce — use heavy cream for peak richness, but light cream or half-and-half works for less decadence. Season as you go. Chorizo is salty and spicy on its own, so don’t go wild with salt until the end.

Load it up with grated parmesan for savoriness, but if all you have is the pre-grated kind, it’ll do (no judgment here; that’s all I had last Tuesday). Finish with handfuls of chopped parsley for brightness or, for a southwest flair, a squeeze of lime.

One thing I only learned after several go-arounds — let the pasta finish cooking in the sauce for the last minute or two. Makes a huge difference. Oh, and don’t forget the bread to mop up the leftover sauce. You’ll thank yourself.

Frequently Overlooked Aspects

One thing I see all the time: folks skip the taste test before serving and then wonder why half the table is reaching for the salt. Always taste and tweak before you plate up. Chorizo varies batch to batch. Some are fiery, others are pretty tame. So, taste and make it yours. Another sneaky point? Don’t overcook the pasta. Mushy pasta is just plain sad, especially in a creamy dish.

People sometimes toss all the pasta water, but keeping just a small mugful makes rescue missions possible if the sauce dries out. And for leftovers, reheat low and slow with a splash of cream or milk. Don’t nuke it on high, or the sauce becomes a weird, gritty mess. Trust me — learned that the hard way.

If you’re thinking ahead, this pasta also freezes OK (surprise), though the texture changes a bit. Still tastes great for lunch, especially if you’re not looking for perfection. Just stir a bit and you’re good.

Case Studies or Examples of Implementation

Last winter, I brought Creamy Chorizo Pasta to a family party where everyone’s a self-declared food snob (there’s always one, right?). First, folks quietly poked at it, then — next thing I knew — the pot was empty. My cousin tried it again swapping the pasta with zucchini noodles just to see if it would hold up. Turns out, that variation was even good cold. Kinda blew my mind.

Another friend, totally new to cooking, gave it a whirl after I shared the recipe link. Hers looked a little “rustic” (she says this means messy), but flavor-wise, she texted, “Wow, this slaps!” That’s high praise from someone who usually avoids her own kitchen.

I even tried halving the recipe when I was just cooking for myself. It’s straightforward and doesn’t make a kitchen disaster zone. There’s just something magic about throwing together a meal that’s this impressive without a whole lot of effort.

Serving Suggestions

Here’s a quick lineup of my favorite sides to serve with it:

  • Crusty garlic bread or, honestly, any loaf you’ve got around.
  • Simple green salad for a fresh, crisp contrast.
  • Steamed broccoli or green beans, if you’re up for sneaking in veggies.
  • A glass of cold white wine, if that’s your jam.

Common Questions

Q: Can I use regular sausage instead of chorizo?
Sure! It changes the flavor, but any flavorful sausage will work if that’s what you have.

Q: How spicy is this dish?
Depends on your chorizo. Mexican chorizo brings more heat, but you can always use mild and add a pinch of chili flakes if you want a kick.

Q: Can I make this ahead of time?
Absolutely. Make it in advance, then gently reheat with a splash of cream or milk so the sauce loosens up again.

Q: What pasta shape works best?
Short pasta shapes like rigatoni or penne grab more sauce, but spaghetti is still pretty darn good if that’s all you have.

Q: Is there a dairy-free option?
Swap heavy cream for coconut cream and use a dairy-free parmesan. Slightly different taste, but still delicious.

Ready to Try the Best Weeknight Pasta?

Alright, bottom line: Creamy Chorizo Pasta seriously wins for flavor, convenience, and crowd-pleasing vibes. Keep the few pro tips in mind, and you’re golden. And if you want to branch out, check out the Creamy Chorizo Pasta Recipe | Simple Home Edit for another twist, or try the unique spin in The Ultimate Creamy Chorizo Pasta | What Great Grandma Ate to mix things up. So, don’t wait — your weeknight dinner just got way more interesting. Give it a shot and let me know how it goes.

Creamy Chorizo Pasta

A comforting and flavorful weeknight pasta dish featuring creamy sauce and smoky chorizo, perfect for impressing family and friends.

For the Pasta

  • 12 oz pasta (short shapes like rigatoni or penne) (You can use spaghetti if that’s what you have.)

For the Sauce

  • 8 oz chorizo (Mexican or Spanish) (Either works, adjust cooking method accordingly.)
  • 1 cup heavy cream (Can substitute with light cream or half-and-half for less richness.)
  • 1/2 cup grated parmesan cheese (Pre-grated might suffice if fresh isn’t available.)
  • 1 tbsp olive oil (For cooking the chorizo.)
  • 1/4 cup fresh parsley, chopped (For garnish.)
  • 1 splash white wine or pasta water (For deglazing the pan.)

Cooking the Pasta

  1. Boil a large pot of salted water and cook the pasta according to package instructions until al dente.
  2. Reserve a splash of the cooking water before draining the pasta.

Making the Sauce

  1. In a large skillet, heat olive oil over medium heat and add the chorizo.
  2. Cook until the chorizo is browned and crispy around the edges.
  3. Deglaze the pan with a splash of white wine or reserved pasta water.
  4. Lower the heat, then add heavy cream and stir until combined.
  5. Mix in grated parmesan cheese until melted and smooth.
  6. Add the drained pasta to the sauce and toss to combine, adding more pasta water if necessary.

Serving

  1. Serve warm, garnished with chopped parsley and additional parmesan, if desired.

Taste the dish before serving to adjust the seasoning. Don’t forget to keep some pasta water handy to adjust sauce consistency. This pasta can be prepared ahead of time and reheated, just remember to add a splash of cream or milk.

Dinner, Main Course
Mediterranean, Spanish
Comfort Food, Creamy Chorizo Pasta, One-Pan Recipe, Quick Dinner, Weeknight Dinner

Super Simple Blended Overnight Oats Recipe to Fuel Your Day

Delicious blended overnight oats in a mason jar topped with fresh fruits.

Blended Overnight Oats. I know, sounds like another TikTok thing, huh? But actually, they save my mornings way more times than I’d like to admit. Rushing around, snoozing alarms, searching for socks that match (never happens). Breakfast can feel impossible. That’s why I landed on blended overnight oats and never looked back. Seriously, if you crave easy meal prep, these little jars are a lifesaver. Oh, and while I’m here, if you’re looking for more meal prep inspiration, don’t miss these awesome ideas in meal prep and planning and if you want to change up your base, gluten-free breakfast swaps have your back too.
Blended Overnight Oats

Why You’ll Love This Recipe

Okay, it’s sort of wild how this recipe earns five-star-restaurant status in my kitchen. Here’s the deal: you toss a bunch of stuff in a blender, let it hang out in the fridge overnight, and wake up to insanely creamy oats that taste fancy but took zero skill. Perfect if you’re running late or just tired of spending more than five minutes on breakfast. My cousin Jimmy? He swore he’d never eat oats. Then he tried these and… well, let’s just say the blender is now his best friend.

You call the shots with the flavor and texture. Like yours thick and scoopable? Use less milk. Silky and sippable? Pour a bit more in. You can sneak in veggies like spinach, not that anyone will actually notice! Plus, these keep you full till lunch (goodbye, cranky snack cravings). And if you forget them one day, they’ll be just as tasty the next. Seriously, try this once and you’ll wonder why regular oatmeal even exists.

“I never thought oats could taste this creamy. Saved so much time during my early shifts!” – Mia, nurse and sleep enthusiast

Super Simple Blended Overnight Oats Recipe to Fuel Your Day

Customize Your Blended Overnight Oats

You wanna know the real secret? Blended overnight oats can be your blank canvas. This recipe bends but never breaks. Got fruit that’s going a little wrinkly in the fridge? Chuck it right in. Frozen berries? Even better, add a chilled vibe. Hate chia seeds? Skip ‘em, nobody’s judging. I keep a big jar of different nut butters on standby—one day almond butter, next day maybe sunflower seed.

Some mornings I toss in a bit of cinnamon or cocoa powder. Other days, a handful of chopped dates. Or maybe you’re that person who loves your food bright—toss in a spoonful of spirulina if you dare. The milk is yours to pick too: oat milk, cow’s, whatever your heart dreams up. Play with it until it feels like you, breakfast edition. If your oats come out too runny, next time just use less liquid. Super forgiving.

Super Simple Blended Overnight Oats Recipe to Fuel Your Day

Can You Eat Them Hot?

You bet! Not everyone wants a chilly breakfast, especially on those gray winter mornings. If you’re someone who likes your oats warm and cozy, just zap your finished jar in the microwave for about thirty seconds. Give it a little stir and you’re good to go. Sometimes I’ll even heat up the milk before blending to give it a jumpstart (tiny trick, huge mood boost).

Some folks like to top their warm oats with a pat of butter—sounds weird, tastes downright nostalgic. If you’re in a hotel room with only coffee and hot water, set your mason jar in a bowl of hot water for a bit. Works like a charm. I’ll say, the flavor is still banging, hot or cold. Personal choice—no rules, that’s my breakfast motto.

How to Meal Prep & Store Leftovers

Listen, if you like being the person with a plan, blended overnight oats take you straight to Pro Level. Prep three or four jars on Sunday night, and you’re finished thinking about breakfast till Thursday. Toss them in the fridge, done. They’ll hold for up to four days—maybe even five, if you don’t add anything too mushy. No more rushing for a granola bar.

Leftovers look intimidating? Don’t sweat it. Just give the oats a quick stir or shake before eating. Sometimes I toss a few fresh berries or nuts on top at the last minute, just because. If things separate, that’s cool, a quick stir brings them back to life.

Expert Tips

Want to get the most out of your blended overnight oats? Here’s what I learned from way too many breakfast experiments:

  • Blend your oats dry first before adding liquids to avoid that chalky texture.
  • Always taste your mixture before stashing it in the fridge—sometimes a pinch of salt changes everything.
  • Try toppings like granola, coconut flakes, or even a drizzle of honey for extra pop.

Little things, big difference. Trust your taste buds and don’t stress if it’s not perfect the first time!

Common Questions

Q: Can I use quick oats instead of old-fashioned?
A: Yup, though you’ll get a smoother blend. Both work, honestly.

Q: How long do blended overnight oats last in the fridge?
A: Four days is the sweet spot for freshness. Don’t push past five.

Q: Are blended oats actually healthy?
A: Absolutely! They’re packed with fiber, keep you full, and you can add all sorts of healthy mix-ins.

Q: Can I use water instead of milk?
A: Sure, but it won’t be as creamy or satisfying. Try half water, half milk if you want it lighter.

Q: What’s the best fruit to blend with oats?
A: Bananas or berries get you the smoothest, tastiest results. But go wild with whatever you have.

Give It a Whirl—You’ll See!

So there you have it. Blended overnight oats really are the kitchen shortcut you didn’t know you needed. They’re fast, super easy, and wildly customizable. And let’s be honest—who doesn’t like waking up to something already delicious waiting in the fridge? I keep coming back to recipes like the ones at Blended Overnight Oats – Eating Bird Food for more variations, and this Best Blended Overnight Oats Recipe – How To Make Blended … always has fun ideas. Give these oats a spin and tweak to fit your vibe. Seriously—your future self will thank you every single busy morning!

Blended Overnight Oats

A quick and customizable breakfast option that allows you to prepare deliciously creamy oats overnight in just minutes with endless variations.

Main Ingredients

  • 2 cups rolled oats (Can use old-fashioned or quick oats.)
  • 2 cups milk (Dairy or non-dairy milk works.)
  • 1 banana ripe banana (Use for natural sweetness.)
  • 1 tablespoon chia seeds (Optional, can be omitted.)
  • 1 teaspoon vanilla extract (For added flavor.)

Optional Add-ins

  • 1/2 cup frozen berries (Great for added flavor and nutrients.)
  • 1 tablespoon nut butter (Almond butter, peanut butter, etc.)
  • 1 teaspoon cinnamon (For a warm flavor.)
  • 1 tablespoon cocoa powder (For chocolate flavor.)

Preparation

  1. In a blender, combine rolled oats, milk, banana, chia seeds, and vanilla extract.
  2. Blend until smooth and creamy.
  3. If desired, add any additional ingredients such as berries or nut butter and blend again.
  4. Pour the mixture into jars or containers.
  5. Refrigerate overnight or for at least 4 hours.

Serving

  1. In the morning, stir the oats if they have separated.
  2. Serve cold or warm them in the microwave for about 30 seconds.
  3. Top with additional fruits, nuts, or sweeteners if desired.

These oats can be customized in many ways—feel free to experiment with your favorite flavors! They can be stored in the refrigerator for up to four days.

Breakfast, Snack
American
Customizable Oats, Easy Breakfast, Healthy Recipe, Meal Prep, Overnight Oats

Satisfy Your Cravings with These Flavorful Keto Taquitos

Delicious keto taquitos filled with cheese and savory fillings for a low-carb snack.

keto taquitos have saved my cravings way more times than I’ll admit. You know that moment, right? It’s Saturday night. Everyone’s eating chips and wraps. Meanwhile, you’re thinking… will I really survive on celery sticks again? No way, friend. There’s better stuff, even if you’re trying to stick to your low-carb plan. Oh, and if you ever get bored and need breakfast inspo, here’s some breakfast keto ideas worth checking.
keto taquitos

Ingredients for Keto Taquitos

You’re gonna love how easy the ingredients are (half the time, I’ve got most of these chilling in my fridge already). Here’s what you need for keto taquitos:

  • Rotisserie chicken, or honestly any leftover chicken you have hanging around works. If you cook a fresh chicken, even better, but leftover is clutch.
  • Shredded cheese like cheddar, mozzarella, or that jack cheese you stole from taco night. Don’t go fancy unless you want to.
  • A couple cream cheese scoops. This keeps everything stick-together and creamy, instead of, well, dry cardboard.
  • Seasoning: Taco seasoning, a little salt, and pepper. Add chili powder or cumin if you dare.
  • Low-carb tortillas, or, listen, you can get super creative and use just cheese for the “shell.” (It gets all crispy and wild.)
  • Favorite toppings: guac, salsa, sour cream, or whatever stuff you’re feeling. Lettuce for crunch? I say yes.

“These keto taquitos taste just like my old favorite, but I don’t even miss the carbs! My kids even steal them off my plate!” – Jamie T.

keto taquitos

How to Make Keto Taquitos

So, let me keep it stupid-simple for you (because I hate super-precise instructions too). First, shred your chicken. If it’s cold, give it a 15-second zap in the microwave so you don’t freeze your fingers off.

Now, mix the chicken, shredded cheese, cream cheese, and seasoning together in a big bowl. This part always gets a bit messy but trust me, it’s worth it.

Next: take your low-carb tortillas (or cheese wraps, if you’re wild like me some days). Put a spoonful of your chicken-cheese mix on one side. Roll that bad boy up tight. Place each one seam-side down on a baking sheet.

Bake them at around 400 degrees until they look golden and the cheese bubbles. Usually 15 minutes max. If you’re using cheese shells, watch close. Cheese goes from bubbly to burned quicker than you’d think.

Once they’re done, let them rest for a couple minutes before moving or they’ll fall apart. Still, even if they do, scooping taquito pieces is kind of fun, not gonna lie.
keto taquitos

Tips, Tricks, & Variations

Okay, now here’s where I (maybe) go a little overboard, but, hey, trying stuff out is half the fun. Some days I use shredded beef if I’ve got some leftover. Or, breakfast for dinner? Yup, I’ve popped in scrambled eggs and bacon, then called it creative.

Want it spicy? Toss in diced jalapeños or use pepper jack cheese. If your shells are falling apart (it happens), stick with pure cheese shells. Just sprinkle cheese on a baking tray, bake till bubbly, let it cool for a sec, then roll fast! Yep, watch those fingers.

You don’t have cream cheese? Sour cream works in a pinch. Heck, I’ve even skipped it entirely and still loved the results.

Another game-changer? Freeze the chicken mix in portions, so you can make fresh keto taquitos whenever the mood strikes. Who says lazy can’t be smart? Sometimes I even double the batch for this very reason.

“I was shocked how kid-friendly these are. We even dipped them in ranch!” – Alex W.

Serving Suggestions

Alrighty, here’s what I like:

  • Pile on toppings like fresh salsa, guacamole, or sour cream. Makes it feel practically five-star.
  • These are killer beside a crunchy salad, especially if you drizzle a little lime juice on the greens.
  • Pair ’em with a warm bowl from here: soup keto options if you’re feeling cozy and want a nice warm-up.
  • Honestly, they make an A+ party snack if you cut ’em into halves or thirds.

If you serve these for lunch with a side of fresh veggies, people might just start coming to your house for food every day. Fair warning.

Storage

Storage is weirdly simple. If by some miracle you have leftovers (never happens here, honestly), just pop them in an airtight container. Fridge life, they’ll last up to three days; but any longer and they get a hint too soggy for my taste.

Reheat them in the oven or an air fryer if you’re picky about crunch (I am), but microwave works if you’re in a rush. Heck, cold isn’t too bad either! Oh, and they freeze great for those grab-and-go days. Just wrap them tight in foil or zip bags, so they don’t get freezer burn.

Common Questions

Can I make these ahead of time?
Absolutely yes, I often prep the filling the night before, roll them up and bake when I’m hungry.

Are these keto taquitos really low-carb?
They sure are, as long as you stick to low-carb tortillas or cheese shells, you’re golden.

What’s the best cheese to use for cheese shells?
I love cheddar or mozzarella for melting, but you can mix them for flavor punch.

Can I swap out chicken for another meat?
Definitely. Try cooked ground beef or turkey (even pork works great).

Do they crisp up without oil?
If you go with cheese shells, just the baking will crisp them up nice and crunchy. Tortillas may need a touch of spray if you like extra crunch.

Why These Keto Taquitos Will Win You Over

There you go – I spilled all my secrets for the best keto taquitos. They’re easy, fast, and yes, even my super picky brother likes them. Don’t let boring low-carb food get you down. Give these a whirl, and thank me later! If you want to see more versions and tips, the Best Keto Taquitos Recipe from Delish is honestly amazing, and Keto Taquitos from Kicking Carbs showcase even more clever ideas. Oh, and if you’re a green chile fan? Don’t sleep on these killer Keto Green Chile Chicken Taquitos by Maebells either. Happy taquito-ing – you’re gonna love every crunchy, melty bite!

Keto Taquitos

Delicious and easy-to-make keto taquitos that satisfy your cravings without the carbs.

Main Ingredients

  • 2 cups shredded rotisserie chicken (Or any leftover chicken)
  • 1 cup shredded cheese (Cheddar, mozzarella, or jack cheese)
  • 1 cup cream cheese (For creaminess)
  • 1 tablespoon taco seasoning (Add chili powder or cumin if desired)
  • to taste salt and pepper
  • 4 pieces low-carb tortillas (Or use just cheese for the shell)

Toppings

  • to taste guacamole
  • to taste salsa
  • to taste sour cream
  • to taste lettuce (For crunch)

Preparation

  1. Shred your chicken. If it’s cold, microwave for 15 seconds.
  2. In a large bowl, combine shredded chicken, cheese, cream cheese, and taco seasoning.
  3. Place a spoonful of the chicken mixture onto one side of each tortilla. Roll tightly and place seam-side down on a baking sheet.

Baking

  1. Bake at 400°F (200°C) for about 15 minutes or until golden and cheese is bubbly.
  2. Let the taquitos rest for a couple of minutes before serving.

These taquitos can be made ahead of time by prepping the filling the night before. Leftovers can be stored in an airtight container for up to 3 days. They can be reheated in the oven, air fryer, or microwave.

Appetizer, Snack
Keto, Mexican
Easy Recipe, Healthy Snack, Keto Taquitos, Low Carb, Taquitos

Irresistible Keto Cinnamon Rolls You’ll Crave Again and Again

Delicious keto cinnamon rolls topped with cream cheese frosting, low-carb and fluffy.

Keto cinnamon rolls are honestly one of those things you think will never quite taste like the “real” thing…until you actually get it right. You know that moment when Sunday morning hits and all you want is something fluffy and sweet, but you also want to stick with your low-carb goals? It’s rough! I’ve had disasters—sad half-baked rounds, rock-hard lumps—and then, finally, I found a perfect way that you could almost fool a carb-lover. If you’re all about finding more low-carb breakfast wins, check out the breakfast keto recipes that have actually worked for me.


keto cinnamon rolls

Tips for Perfect Keto Cinnamon Buns

Let me be straight: keto cinnamon rolls do take a little practice. Not hard, just…different. My first tries were a mess (sticky dough, cinnamon filling everywhere but where I wanted it). Here’s what I learned on my cinnamon roll “quest”:

You gotta use almond flour (not almond meal for Pete’s sake) for the texture. Coconut flour makes it dry, at least for my taste. If you’re working with almond flour for the first time, check out these Easy Almond Flour Bagels to get familiar with the texture.

Don’t overdo the sweetener. Too much, and things get strangely grainy. I stick with a blend of erythritol and a pinch of stevia.

When you’re rolling out the dough, a piece of parchment paper is your best friend. Seriously, just trust me and don’t skip this.

If your filling oozes out? No big deal. Mush it back in or drizzle it on top later. They’ll still taste like a five-star restaurant treat.

And this is huge: give them a minute to cool before you eat. They firm up, and the gooey-ness gets just right.

“I’d honestly given up on keto cinnamon rolls until I tried this way. They’re shockingly soft, no weird aftertaste, and the family ate half the pan before dinner. Life-changing for my Sunday brunch.”

keto cinnamon rolls

How to Make Keto Cinnamon Rolls (Step-by-Step)

Alright, this is where it gets real. Don’t worry, I’ll break it down (plain English, promise).

Start with your dough—you’ll melt some mozzarella and cream cheese together. (Yep, cheese in dough. Sounds odd, but just go with it.)

Mix the warm cheese with eggs, almond flour, baking powder, and a little sweetener. Knead it by hand or mix with a spatula. It gets sticky. If you panic, add a sprinkle more almond flour until it’s just workable.

Roll it out flat between two sheets of parchment. You might want to say a few words of encouragement to the dough if it sticks (I do).

Spread a simple filling of melted butter, cinnamon, and sweetener over your dough. Go bold with the cinnamon—more is good.

Roll it up from the short edge. Doesn’t need to be pretty. Slice into thick coins.

Place them, swirl-side-up, on a lined pan. Bake at 350F for roughly 20 minutes, but peek at 18—mine sometimes cook quick.

Don’t forget frosting. Mix cream cheese, a bit more sweetener, and a drop of vanilla until smooth. Spread over while they’re warm, but not hot.

I’m just sayin’, you’ll want to eat one right out of the pan.

Irresistible Keto Cinnamon Rolls You'll Crave Again and Again

Equipment Needed

You honestly don’t need fancy gadgets here. The basics will absolutely do the trick.

Grab a mixing bowl for your dough. One is plenty.

A microwave or stovetop for melting the cheese and cream cheese. If you use a microwave, zap it in short bursts to avoid weird lumps.

Parchment paper—I call this one “non-negotiable.” Without it, you’ll have more dough on your countertop than in your rolls.

A baking tray or pie dish to bake them on. I’ve used a cast iron skillet too—gives crispy bottoms, love it.

Sharp knife to slice the rolls, and that’s about it! No need for a bread machine or any wild equipment.

Variations

What I love about keto cinnamon rolls is how “tweakable” they are. Oh, you’re in a chocolate mood? Toss a tablespoon of chopped dark chocolate in the filling. Want something even more special for a holiday morning? Sprinkle chopped pecans over the cinnamon. Even better with a drizzle of sugar-free caramel (that’s how my cousin became obsessed).

Once, feeling extra, I swirled in a smidge of pumpkin puree, and oh boy—it was autumn in a bite. Speaking of pumpkin flavors, this Keto Pumpkin Pie is another seasonal treat you’ll crave. Other times, I’ve swapped out half the cinnamon for cardamom (surprisingly good, a little Scandinavian flair). If you like cream cheese frosting, make it almost as thick as the roll itself—nobody’s judging here.

And for anyone who wants a totally different main course after their treat, try pairing these with a cheesy spaghetti squash keto casserole for a full feast. Find what makes you happy. That’s the joy of keto kitchen experiments. For more sweet almond flour treats, try these Almond Flour Blueberry Muffins that use similar baking techniques. 

Storage and Reheating

Nobody likes a sad, dry roll the next day. Here’s how I keep my keto cinnamon rolls tasting fresh.

After baking, let them cool down (if you can resist). Store in an airtight container in the fridge. Two to three days is best. Any longer, and they dry fast.

To reheat, microwave for about 12-15 seconds each. Don’t nuke them to death or they’ll get rubbery. For more “fresh out of the oven” vibes, cover with foil and warm in the oven at 300°F for a few minutes.

If you want to freeze them, wrap them tightly with plastic wrap, then foil. Thaw overnight in the fridge, then warm gently. Frost them after reheating for the best texture.

Most days, if there’s any leftover (rarely at my house), they get snacked on cold, but they’re honestly tastier warm.

<table_seo>

Serving Suggestions

  • Pair with black coffee or your go-to bulletproof blend for a full café-at-home vibe.
  • Fresh berries on the side add a nice bite and a little color—if you’re feeling fancy.
  • Want more breakfast ideas? Browse the breakfast keto collection for meal inspiration.
  • Serve warm for the best ooey-gooey experience, but, hey, I’ve eaten them cold from the fridge and regretted nothing.
  • For another sweet baked treat to serve alongside, try this Keto Blueberry Bread that’s perfect for brunch gatherings.
  • If you prefer a lighter, sweet option in the morning, this Healthy Donut Chaffle satisfies those bakery cravings in minutes.

Common Questions

Can I use coconut flour instead of almond flour?
Not really. Coconut flour soaks up way more liquid. If you must, use way, way less of it and maybe add another egg. It’s tricky to swap without totally changing the texture.

Is there a dairy-free version?
Sort of, but dairy makes these soft and sweet. You could try dairy-free cheese and cream cheese for a similar feel, but the taste does shift.

Why is my dough so sticky?
That’s normal. Keto cinnamon roll dough is stickier than you expect, especially when warm. Let it cool a bit before rolling, and use parchment to avoid a dough disaster.

How do I keep my rolls from spreading too much when baking?
Pop them close together in the pan, leaving just a little space. They’ll puff up and help hold each other’s shape.

Can I prep them ahead of time?
Yes! Prep, slice, and stash in the fridge overnight. Bake fresh in the morning. Works like a charm.

Ready for the Best Keto Cinnamon Rolls of Your Life?

Don’t be shy—jump in and try these keto cinnamon rolls for yourself. Seriously, it’s less complicated than you think and twice as rewarding. If you’re like me, you’ll end up making them almost every week. And if you want to probe deeper, take a peek at these other keto cinnamon roll recipes over at BakeToBeFit or see what Bobbi’s Kozy Kitchen suggests—so many variations! Or go down the rabbit hole with reviews at r/ketorecipes. Trust me, once you give these a shot, your breakfasts might never look the same again.

Keto Cinnamon Rolls

Deliciously soft and gooey keto cinnamon rolls that are low in carbs, perfect for a cozy breakfast.

Dough Ingredients

  • 1 cup shredded mozzarella cheese (Melted with cream cheese)
  • 2 oz cream cheese (Melted with mozzarella)
  • 2 large eggs
  • 2 cups almond flour (Do not use almond meal)
  • 1 tbsp baking powder
  • 1 tbsp sweetener blend (Erythritol and a pinch of stevia)

Filling Ingredients

  • 1 tbsp butter (Melted)
  • 2 tbsp cinnamon (More is better for flavor)
  • 1 tbsp sweetener

Frosting Ingredients

  • 2 oz cream cheese
  • 1 tbsp sweetener
  • 1 tsp vanilla extract (For flavor)

Preparation

  1. Melt mozzarella and cream cheese together in a microwave or stovetop.
  2. Mix warm cheese with eggs, almond flour, baking powder, and sweetener until a dough forms.
  3. Knead by hand or mix with a spatula. If it’s too sticky, add a little more almond flour.
  4. Roll the dough flat between two sheets of parchment paper.
  5. Spread melted butter, cinnamon, and sweetener over the rolled dough.
  6. Roll the dough from the short edge and slice into thick coins.
  7. Place rolls, swirl-side-up, on a lined baking pan.
  8. Bake at 350°F for about 20 minutes, checking at 18 minutes.

Frosting

  1. Mix cream cheese, sweetener, and vanilla until smooth.
  2. Spread the frosting over warm rolls.

Allow the rolls to cool slightly before serving for the best texture.

Breakfast, Dessert
American, Keto
Breakfast Rolls, Keto Cinnamon Rolls, Low-Carb Desserts

Savor the Flavors of Chicken Foot Soup: A Cozy Recipe!

Bowl of chicken foot soup with vegetables and aromatic spices

Chicken foot soup always seemed a bit mysterious to me. Maybe you’re here because you saw it bubbling at your auntie’s house, or you heard it’s good for cold days when your bones ache. Or heck, you saw a wild Reddit thread! Either way, if you’ve ever stood in a grocery aisle clutching a pack of, well, feet—kinda wondering, ‘Now what?’ — you’re in the right place. If you’re a soup fanatic, you might also love stuff like this creamy Tuscan chicken soup for rainy days, just saying.
chicken foot soup

When Do You Eat Chicken Feet Soup?

Let’s get real. Chicken foot soup isn’t your everyday Tuesday dinner kinda dish for most folks, at least not where I’m at. Back home, it’s a Saturday staple. Some people call it “throw-it-in-the-pot-and-don’t-bother-me” soup, and I get why. The truth is, chicken foot soup has this cozy, almost magical feeling when it’s cold out or if… you might’ve had one too many the night before (hey, no judgment).

Jamaican families, for instance, do Saturday soup as a whole thing—kids, cousins, everybody. For me, it’s tied to childhood afternoons and laughter echoing from the kitchen. Plus, it smells so homey bubbling away. Folks eat it at family gatherings, during busy winter weeks, or whenever their soul feels drafty. Honestly, once you’re hooked, there’s no bad time.

“Chicken foot soup was my grandma’s I-love-you recipe. She’d start it early, shoo us out, and by dinnertime, the whole block smelled like heaven. I always slurped the bowl clean.”

Savor the Flavors of Chicken Foot Soup: A Cozy Recipe!

Recipe Ingredients

Let’s keep this down-to-earth. No need to make it fancy, but you want flavor, right? Here’s what’s in my classic chicken foot soup:

  • 2 pounds chicken feet (cleaned and tips cut off… trust me, do this first!)
  • 8 cups water
  • 4 medium potatoes (peeled and chopped)
  • 2 carrots (sliced thin)
  • 1 yellow onion (chopped)
  • 2 cloves garlic (smash ‘em up)
  • 1-2 sprigs fresh thyme (or a crank of dried thyme if you forgot fresh)
  • 1 Scotch bonnet pepper (don’t cut it if you don’t love spice)
  • 2 scallions (chopped up, green parts too)
  • 1 cup pumpkin or squash (optional, but color is nice)
  • 1 chicken bouillon cube (some say this is cheating, but who cares!)
  • Salt and black pepper (just to taste)
  • Water crackers or dumplings (if you want to go all in)

That’s what gets you started. If you have a secret ingredient, spill it in the comments, promise I won’t judge!
Savor the Flavors of Chicken Foot Soup: A Cozy Recipe!

How to Make Chicken Feet Soup

First things first: clean those chicken feet. I feel like no one warns you how weird this feels the first time. Snip the nails (I use kitchen shears and make faces), then rinse under cold water. My grandma used to make me scrub ‘em with lime. Okay, so now we can cook.

Get a big pot. Put in the chicken feet and enough water to cover them. Bring to a boil, let it simmer till the skin is softish—takes about 40 minutes. It helps to skim off that white foam as it pops up. Toss in the garlic, thyme, onion, and bouillon while you wait.

Once the feet are looking, uh… plump? Add carrots, potatoes, pumpkin, pepper, and scallion. If you want dumplings, just pinch off little pieces and drop ‘em in now.

Let everything cook together until the veggies are soft and the broth’s got that cloudy, golden look. Stir every now and then so it doesn’t stick. Salt and pepper to finish. Done! Ladle it up!

Tips and Tricks

Here’s where I spill all the little secrets that make chicken foot soup work in my kitchen:

If the chicken feet feel too… “out there” for you the first time, try mixing half feet and half chicken wings. Promise, it still works. Be patient boiling those feet. They look gnarly but after enough time, they go super soft and almost melt in your mouth. Scotch bonnet can be wild, so just float it whole unless you’re a spice warrior. Throw in extra veggies if you like. Celery is a sneaky add-in for flavor. Leftovers? This soup tastes even better the next day, no joke.

If you want more comforting soup ideas, check these keto soup recipes—you’ll find all sorts, even ones low-carb enough for your most gym-rat buddies.

Serving and Storage Instructions

Serving chicken foot soup is a whole vibe. Here’s how I do it:

  • Ladle the soup into bowls, making sure everyone gets at least one foot (don’t laugh, someone will ask for more).
  • Serve hot with crackers or a chunk of crusty bread for dipping.
  • If you made dumplings, those are always the first to vanish, so grab one quick.
  • Store leftovers in the fridge for up to three days. The flavors honestly get deeper overnight, so lucky you tomorrow!

Common Questions

Do I really have to cut the nails off the chicken feet?
Yes, please do. It makes eating and cleaning way easier (and less awkward later).

Will this soup be spicy?
Only if you burst the Scotch bonnet. Leave it whole for flavor without the fire.

Can I make it in a slow cooker?
Definitely. Just throw all the stuff in and let it cruise on low for six hours.

What other veggies could I use?
Go wild. Sweet potato, turnip, or even corn if you want a sweeter taste.

Do leftovers freeze well?
Totally. Just cool completely and stash in the freezer for up to a month.

Cozy Up With a Bowl Tonight

Chicken foot soup is pure comfort, plain and simple. It’s the kind of thing that brings people around the table (even people who squawk at the idea at first). If you want more traditional twists, check out this Chicken Foot Soup from Jehan Can Cook or dig deeper on Chicken Feet Soup by blackpeoplesrecipes.com for all the classic flavors. And for some Saturday magic, Triangle Traveling Caveman does a wild Chicken Foot Soup (Saturday Soup) version that might just knock your socks off. Grab some feet, face your fears, and savor the magic in every homemade bowl.

Happy slurping, friends!

Chicken Feet Soup

A cozy and soulful soup made with chicken feet, perfect for cold days and family gatherings.

Main Ingredients

  • 2 pounds chicken feet (cleaned and tips cut off) (Make sure to clean and trim the feet properly.)
  • 8 cups water (This will be used for boiling the feet.)
  • 4 medium potatoes (peeled and chopped) (Yukon gold or russet work well.)
  • 2 units carrots (sliced thin)
  • 1 medium yellow onion (chopped)
  • 2 cloves garlic (smashed)
  • 1-2 sprigs fresh thyme (Dried thyme can also be used.)
  • 1 unit Scotch bonnet pepper (Keep it whole for less spice.)
  • 2 units scallions (chopped) (Use both white and green parts.)
  • 1 cup pumpkin or squash (optional) (Adds color to the soup.)
  • 1 unit chicken bouillon cube (Optional, but adds depth of flavor.)
  • to taste none salt and black pepper (Add according to preference.)
  • as needed none water crackers or dumplings (Optional for serving.)

Preparation

  1. Clean the chicken feet by snipping off the nails and rinsing them under cold water.
  2. In a large pot, add the chicken feet and enough water to cover them. Bring to a boil.
  3. Let it simmer for about 40 minutes or until the skin is soft, skimming off any foam that appears.
  4. Add garlic, thyme, onion, and the chicken bouillon to the pot during the simmering stage.

Cooking

  1. Once the chicken feet are plump and soft, add the carrots, potatoes, pumpkin, Scotch bonnet, and scallions.
  2. If using dumplings, pinch off small pieces and drop them in now.
  3. Allow everything to cook together until the vegetables are soft and the broth has a rich, cloudy look.
  4. Season with salt and pepper to taste, then serve hot.

If you’re hesitant about using chicken feet, consider substituting half chicken wings. This soup develops more flavor as it sits, so leftovers are great the next day. Store in the fridge for up to three days.

Main Course, Soup
Caribbean
Chicken Feet Soup, Comfort Food, Family Recipe, Slow Cooker Recipe, Winter Warmer

Delicious Keto Avocado Toast for Quick Mornings!

Delicious keto avocado toast topped with fresh ingredients and crispy cauliflower thins.

keto avocado toast saves my butt on those chaotic mornings when I wake up thinking I have all the time, only to realize I’m five minutes away from getting hangry. You know the feeling. All you want is something fast, actually tasty, and hey, actually good for you. I used to scroll through those photos of towering breakfast platters (oh wow, look at all those pancakes, Gretchen) and sigh, but no more. Once I figured out the magic of keto avocado toast, things just got easier. If you need more fuss-free low-carb breakfast ideas, take a peek at this air fryer spaghetti squash side and my all-time favorite beef heart stew—both perfect for meal prepping or just mixing up your routine!

Delicious Keto Avocado Toast for Quick Mornings!

Why I Love This Recipe

Here’s the thing, keto avocado toast is absurdly easy. There’s no fancy equipment, no million-dollar ingredients, and it still tastes like something from a five-star brunch spot. You get creamy, rich avocado, that satisfying crunch, and a whole load of flavor for almost no effort. Honestly, I eat this so often that if they had a “frequent flyer” card at my own kitchen, I’d be platinum status.

And it’s not just a keto thing. It actually fills you up, so bye-bye mid-morning snack cravings. Plus, you can play around and top it a million ways depending on the mess in your fridge. Sometimes I toss on everything bagel seasoning, maybe a handful of microgreens if I’m feeling boujee, or just a squirt of lime and a sprinkle of salt. Speaking of bagels, these Easy Almond Flour Bagels make an incredible base for your avocado spread too. Even my carb-loving husband sneaks bites off my plate. Try it and see if you don’t get hooked too.

“I never thought anything healthy would taste this good. I used to roll my eyes at low-carb recipes till I tried keto avocado toast. Total convert now.”
— Jamie, self-proclaimed toast fanatic

Delicious Keto Avocado Toast for Quick Mornings!

Ingredients Needed

Not to sound too pushy about it, but keep these basics on hand and you’ll never be stuck.

  • 2 slices keto bread (store-bought works or make your own if you’re feeling ambitious)
  • 1 ripe avocado
  • Salt and pepper (seriously, don’t skip)
  • Fresh lemon or lime juice (optional but zingy)
  • Olive oil drizzle (for those fancy days)
  • Optional toppings: red pepper flakes, everything bagel seasoning, sliced radishes, leftover bacon, or even a fried egg

That’s really it. Wild how short the list is, right? If you love homemade bread alternatives, try these Jalapeño Cheddar Bagels for a spicy twist on your morning toast.

Delicious Keto Avocado Toast for Quick Mornings!

How to Make Keto Avocado Toast

So, no complicated instructions here. I do it half-awake most days.

Start by toasting your keto bread. You want it crispy because nobody likes soggy toast, yikes. Meanwhile, slice up your avocado and scoop it into a small bowl. Mash it quickly with a fork—don’t worry about perfect smoothness. Add just a pinch of salt, pepper, and a little squirt of citrus if you have it. Taste it (seriously, don’t skip tasting, trust yourself).

Spread that smash onto the toasty bread. Now, this is the time to get creative. Top with what you love or just keep it classic.

Take a second to stand there and admire your handiwork, then get eating before anyone tries to steal your breakfast (I’m looking at you, family).

Tips & Tricks

You learn a few things after making keto avocado toast 783 times. Here’s what I wish someone had told me sooner.

Let your avocado get ripe (brown spots? You’re a day too late. Hard as a rock? Wait a day). Sourdough-style keto loaves seem to toast best if you want that perfect crunch. Add a pinch of flaky salt on top if you’ve got it—trust me, it makes you feel like a pro. Craving extra protein? Throw a fried egg or some leftover chicken on top. Mix and match. No rules, just vibes.

Oh, and mash your avocado right before serving. It’s brighter, fresher, and doesn’t get that weird color.

What To Serve With Keto Avocado Toast

If you’re the type who needs a plate bursting with variety (same, honestly), here’s how I like to keep mornings interesting:

  • Pair with a mug of strong black coffee and voila, classic breakfast.
  • Serve alongside a bowl of keto soup for something cozy.
  • Add a scoop of cheesy spaghetti squash keto casserole if you love a big breakfast.
  • Finish with berries and a dollop of Greek yogurt when you’re in a sweet mood. For keto-friendly yogurt options, check out this Keto Yogurt Guide.
  • Pair with crispy Low-Carb Keto Hash Browns for a complete breakfast plate.

Mix and match, no one’s judging.

Common Questions

Is any bread okay for keto avocado toast?
Nope, regular bread’s a carb bomb. Grab keto bread (store-bought or homemade) for the real deal.

Can I prep this in advance?
Eh, not really. The avocado goes brown, and nobody likes sad toast. Pre-toast your brea,d though, and mash avocado when ready.

What spices work best?
I’m a fan of everything bagel seasoning or just red pepper flakes. Feeling brave? Try smoked paprika for a twist.

Is this filling enough on its own?
If you’re ravenous, toss on extra toppings or a protein side. Otherwise, it does the job for a standard morning.

Can I make it dairy-free?
Totally. Just skip the cheese if you usually add it. The basic version is already dairy-free!

Give It a Go and Let Me Know!

If you made it this far, I hope you’re as hyped on keto avocado toast as I am. Crazy easy, loaded with flavor, and it doesn’t leave you searching for snacks an hour later. Whether you pair it with soup, mix in that cheesy spaghetti squash casserole, or keep it ultra-classic, you can’t go wrong. For more brilliant ideas, check out these spins on Keto Avocado Toast {Cafe Style} – The Big Man’s World ® or this easy recipe from Keto Cooking Wins. Give it a try and seriously, let me know if your mornings don’t feel just a little bit better.

Keto Avocado Toast

Keto avocado toast is an easy, healthy, and delicious breakfast option that keeps you full and satisfied with minimal effort.

Main Ingredients

  • 2 slices keto bread (store-bought works or make your own)
  • 1 ripe avocado ripe avocado (ensure it’s ripe)
  • to taste Salt (don’t skip)
  • to taste Pepper (seriously don’t skip)
  • to taste Fresh lemon or lime juice (optional but adds zing)
  • to taste Olive oil drizzle (for those fancy days)

Optional Toppings

  • as desired red pepper flakes
  • as desired everything bagel seasoning
  • as desired sliced radishes
  • as desired leftover bacon
  • as desired fried egg

Preparation

  1. Toast the keto bread until crispy.
  2. Slice the avocado and scoop it into a bowl.
  3. Mash the avocado with a fork and add salt, pepper, and citrus juice to taste.
  4. Spread the avocado mash onto the toasted bread.
  5. Top with your choice of additional toppings or keep it classic.
  6. Enjoy your delicious avocado toast before someone tries to steal it!

Let the avocado ripen before using for the best flavor. Sourdough-style keto loaves toast best. Mash avocado right before serving to maintain freshness.

Breakfast, Snack
American, Keto
Healthy Breakfast, Keto Avocado Toast, Low Carb

Comforting Keto Chicken and Dumplings – Easy Family Favorite!

Delicious Keto Chicken and Dumplings with juicy chicken and low-carb dumplings.

Ever crave keto chicken and dumplings but get hit with that stubborn “but it’s not low carb” roadblock? Yep, been there. Nothing is worse than watching everyone else slurp up a bowl of pure comfort… and you’re poking at sad lettuce, dreaming of fluffy dumplings. Been so cold lately too! The good news? You don’t have to skip out anymore. This easy, family-favorite keto chicken and dumplings recipe proves you can have serious comfort without blowing your carb count. Honestly, it’s a go-to for my picky crew — no complaints, just empty bowls. Oh, and by the way, if you want another favorite soup-night star, try this easy keto chicken and dumplings for a cozy night in.
keto chicken and dumplings

How to Make Keto Chicken and Dumplings

Okay let’s get into the real talk: how do you actually pull off keto chicken and dumplings? I promise, it’s not food-science class. Honestly, you sauté up some chicken and veggies in a big pot first (or heck, use a rotisserie chicken if you’re feeling wild). You let everything simmer in a rich-as-can-be low-carb broth.
Here’s where it gets kind of magical. You make these easy dumplings with almond flour and a bit of baking powder so they puff up instead of turning into sad, dense hockey pucks. Drop spoonfuls of dough right onto the bubbling soup — like little clouds — and cover up for the last chunk of cooking. (It steams those dumplings right on top!)
Give the whole thing a final taste, toss in a handful of fresh herbs if you’re the fancy sort, and that’s it! Real spoonfuls of keto chicken and dumplings you actually want seconds of.

“My husband couldn’t believe these were low carb,” says Becky from Wisconsin. “This recipe is on our regular dinner rotation now. The dumplings… wow!”

Comforting Keto Chicken and Dumplings - Easy Family Favorite!

Key Ingredients

Let’s be honest, keto chicken and dumplings are mostly about the cozy flavors. But ingredients totally make the dish. You want boneless, skinless chicken breast or thighs (whatever’s in the freezer, really). Chicken broth — homemade or store-bought, but always check the label for hidden carbs if you’re strict.
Almond flour is the star here, because it replaces regular flour in the dumplings. A little baking powder helps the dumplings “rise,” and I’m not shy with garlic and onion (flavor bombs). Add in heavy cream or coconut cream to make the broth rich, plus celery and maybe carrots if you’re not crazy about every last carb.
Don’t skimp on the salt and black pepper — seasoning is what keeps it from tasting like bland diet food. And fresh parsley? Instantly looks like five-star restaurant food. Not that my kitchen’s fancy, but I can dream.
Comforting Keto Chicken and Dumplings - Easy Family Favorite!

Serving, Storing, and Re-heating

Worried about leftovers with keto chicken and dumplings? Don’t be, this dish holds up shockingly well.
After dinner, just pop the leftovers in an airtight container. Fridge will keep them happy for up to three days. When you’re ready to eat again, reheat slowly on the stove or zap it in the microwave — add a splash of broth if it looks too thick. Dumplings might soften a bit the next day, but the flavor somehow gets even better.
If you’re serving for a party, grab a big rustic bowl. Top with more parsley or, heck, a dollop of sour cream (don’t judge). Pair with a bright salad, maybe something like roasted broccoli. Want more dinner inspiration? Check out this keto chicken broccoli casserole for a change-up midweek.
Serving Suggestions:

  • Top hot bowls with fresh herbs for a pop of color.
  • Pair with a quick green salad or sautéed greens if you’re missing veggies.
  • For extra wow, offer a sprinkle of shredded cheese or a squeeze of lemon.

Dairy-Free Adaptation for Paleo or Whole30

Got someone dairy-free or following Whole30? No sweat, keto chicken and dumplings is tricky but totally do-able. Swap the cream for full-fat coconut milk (trust me, it’s not weird, just rich and subtle).
Skip the cheese if you usually add it in, and check that your baking powder is corn- and aluminum-free (if you care, some people do).
Almond flour works for most paleo eaters, but if you need nut-free, coconut flour in smaller amounts works… although honestly, texture is a lot denser. Pick your battles, I always say!
Paleo, keto chicken and dumplings can bring everyone to the table — even my dairy-avoiding sister-in-law went back for seconds last Sunday.

Chefs Tips

Here’s my not-so-secret scoop for nailing keto chicken and dumplings every time. Use chicken thighs for juicier results (I know the health nuts all swear by breasts, but thighs rule in stews). Don’t cook the dumplings too long or they’ll dry out and get crumbly.
If you need the stew a bit thicker, sprinkle in just a touch of xanthan gum, and stir like there’s no tomorrow. Don’t rush the simmer — let those flavors blend together till it smells like a hug in your kitchen.
Also, seriously, taste as you go. Keto chicken and dumplings changes as it simmers, so that little pinch of salt or fresh thyme might make all the difference.

Common Questions

Q: Can I freeze keto chicken and dumplings?
A: Oh for sure! Let it cool, then freeze in single portions. The dumplings hold up, just reheat gently.

Q: Is almond flour the only option for dumplings?
A: It works best, but if you can’t use nuts, try coconut flour with extra eggs. A bit trickier but doable.

Q: Can I make this in the slow cooker?
A: Absolutely. Cook the stew low and slow, just drop the dumpling dough in for the last hour.

Q: Are carrots okay in keto chicken and dumplings?
A: In moderation, yes, but keep it minimal if you’re strict keto. Sub with extra celery if you’re worried.

Q: What if I don’t have fresh herbs?
A: Dried herbs are fine (just use less). Still gets that cozy kick.

Try It, You’ll Love It

Comfort food is not just for “cheat days.” With keto chicken and dumplings, you get a chunky, soul-soothing dinner that actually leaves you feeling good. Remember, swap ingredients to fit your eating plan — or, heck, your pantry supply. And if you want to geek out on other people’s tricks, these blogs go deep: check out the Keto Chicken and Dumplings – easy(!) comfort food – Little Pine …, Low-Carb Chicken and Dumplings – Wholesomelicious, and Keto Chicken and Dumplings – Easy Healthy Recipes.
Trust me, once you taste homemade low-carb dumplings, you might never go back. Grab a bowl (and maybe knit socks), and spoon into pure coziness tonight.

Keto Chicken and Dumplings

A comforting, low-carb twist on traditional chicken and dumplings, made with almond flour dumplings that puff up deliciously in a rich broth.

Main Ingredients

  • 1 lb boneless, skinless chicken breasts or thighs (Use whatever is available in the freezer.)
  • 4 cups chicken broth (Check label for hidden carbs if strict keto.)
  • 1 cup almond flour (Star ingredient for dumplings.)
  • 1 tbsp baking powder (Helps dumplings rise.)
  • 2 cloves garlic, minced (Enhances flavor.)
  • 1 small onion, chopped (Enhances flavor.)
  • 1/2 cup heavy cream or coconut cream (For rich broth.)
  • 1 stalk celery, diced (Add more for flavor.)
  • 1 medium carrot, diced (Add in moderation for keto.)
  • to taste tsp salt (Key for flavor.)
  • to taste tsp black pepper (Key for flavor.)
  • to taste fresh parsley (For garnishing.)

Preparation

  1. Sauté chicken and vegetables in a large pot.
  2. Pour in the chicken broth and let it simmer.
  3. In a bowl, mix almond flour, baking powder, garlic, and onion.
  4. Add heavy cream or coconut cream into the mixture.
  5. Drop spoonfuls of the dough onto the bubbling soup.
  6. Cover the pot and cook for an additional 10 minutes to steam the dumplings.
  7. Taste the soup and adjust seasoning with salt and herbs as desired.
  8. Serve hot and garnish with fresh parsley.

For dairy-free options, replace cream with coconut milk. Store leftovers in airtight containers for up to 3 days. Reheat gently, adding broth if too thick.

Dinner, Main Course
American, Keto
Easy Recipe, Healthy Dinner, Keto Chicken and Dumplings, Low Carb Comfort Food, Paleo Adaptation

Irresistibly Delicious Keto Cookie Dough You Need to Try!

Delicious keto cookie dough made with almond flour and chocolate chips.

Ever find yourself just wanting to eat the keto cookie dough straight outta the bowl? Yeah… same. If you’re like me, you probably get this wild craving for a low-carb sweet fix that won’t kick you outta ketosis. Most regular cookie doughs are a hard nope. Too much sugar, too many carbs. But! There’s solid news for all of us dessert-loving folks trying to keep it keto. I’ve got this easy recipe that’s not just safe to eat, but it’s actually tasty, like, “hide-it-from-the-family” level good. And hey, if you’re on the hunt for more low-carb desserts, peek at my favorite keto desserts here or, if you want savory comfort food (because why not?), this beef heart stew is weirdly amazing. Swear.

Irresistibly Delicious Keto Cookie Dough You Need to Try!

What Ingredients Do I Need?

So here’s the part where I tried at least four versions before getting it right. None tasted just like regular cookie dough at first, but this mix nails it. You’ll need:

  • Almond flour (superfine is best; gritty stuff is, nope, not the vibe)
  • Butter (softened, don’t zap it into a puddle, just let it get squidgy on the counter)
  • Cream cheese (for that creamy, almost-cheesecake richness)
  • Vanilla extract
  • Granular sweetener (like monk fruit or erythritol – honestly, I toss in whatever I’m not out of)
  • Sugar-free chocolate chips (go ahead, use extra, I won’t judge)
  • Pinch of salt

I’ve tried swapping out stuff before, but coconut flour makes it weirdly gummy. Trust me, stick to almond flour.

What Makes This Recipe Keto-Friendly?

Alright, personal mini-rant: so many “keto” desserts say they’re keto, but are just low sugar, not low carb. This keto cookie dough? Genuinely low in carbs, so you can snack and not worry about ruining your numbers. Almond flour is the hero here because it’s way lower in carbs than the regular stuff. Sugar-free sweetener keeps the taste right but without all the carb crash that follows real sugar. Cream cheese, honestly, just makes it taste better but also sneaks in more fat to keep you full. The whole thing is totally grain-free and uses only keto-approved ingredients. I like that it doesn’t try too hard, ya know? Simple, no fuss, and it does the job. I’ve actually brought this to game nights and no one even asked if it was keto – that’s a win.

“I tried so many recipes and THIS is the only one that legit tastes just like cookie dough but doesn’t make me feel icky after. It’s my weekly treat now!”
— Sandy T.

keto cookie dough

Honestly, if you’ve ever made regular cookie dough, you’re halfway there. Except there’s no eggs, so it’s totally safe to eat straight from the bowl (I mean, nobody’s getting salmonella tonight).

Just do this:

  1. Mix the softened butter and cream cheese together until they look fluffy. A hand mixer works, but I’m lazy and use a fork, and it’s fine.
  2. Toss in your sweetener, vanilla, and a tiny pinch of salt. Mix again (the vanilla smells SO good here).
  3. Stir in the almond flour – add it slow, you want a dough, not dry sand – and keep mixing until blended.
  4. Lastly, chocolate chips time! Mix as many as you want.

If the dough’s kinda sticky, just pop it in the fridge for 10-15 minutes. I sometimes taste-test a lot at this stage, not sorry.

keto cookie dough

So, you made too much? Lucky you. Storing this keto cookie dough is almost too easy. I plop any leftovers in a small airtight container (sometimes it’s just a bowl with plastic wrap, but hey, I’m practical). It’ll stay fresh in the fridge for about a week – but let’s be real, it’ll never last that long in my house. If you want to make a batch for later, freeze golf ball-sized scoops, toss them in a zip bag, and stash. Pop one out whenever the sweet craving hits. Frozen dough? Delightfully chewy. Kind of addicting, actually. The flavor doesn’t get weird either, promise.

Here’s a handful of things I’ve learned, mostly from oops moments:

  • Use room temp butter and cream cheese so everything blends nice, no weird lumps.
  • If your almond flour’s kinda clumpy, sift it first. Trust me, nobody wants floury bits.
  • Wanna jazz it up? Add chopped pecans or walnuts for crunch. Sometimes I even mix in a scoop of delicious keto yogurt – changes the texture, but in a good way.
  • If the dough tastes too sweet or not sweet enough, just add or subtract sweetener next time. Adjust to your own tastebuds!

There you go, easy ways to make your keto cookie dough feel like a five-star treat.

Common Questions

Can I bake this dough into cookies?
Not really. It doesn’t have eggs or baking soda. If you want real cookies, look up a classic keto recipe.

Is almond flour safe to eat raw?
Yep! Unlike regular flour, almond flour’s perfectly fine to eat right outta the bag.

Can I use coconut flour instead?
I’d skip it. It soaks up liquids and gets gritty. The dough won’t be the same, sorry.

Will this mess with my macros?
The carbs are super low, so it fits most keto plans. Always check your sweetener, though, just in case!

Can kids eat it?
Totally! No eggs, no gluten. My niece loves sneaking bites when I’m not looking.

Honestly, You’ve Got to Try This

Anyone on keto deserves a treat that doesn’t taste like cardboard, right? This keto cookie dough delivers real flavor without those wild sugar spikes. If you’re ever looking for more breakfast keto ideas, check out my faves in the breakfast category. And don’t even get me started on the crispy keto hash browns – totally next level. If you want proof this stuff is amazing, check out reviews like “This is the BEST keto edible cookie dough I’ve ever tried” on Reddit or browse the beloved Keto Pots recipe for more inspiration. Let me know if you try it – and if you improve it, I want your secrets!

keto cookie dough

Keto Edible Cookie Dough

Indulge in creamy, safe-to-eat keto edible cookie dough made with almond flour and sugar-free sweeteners, perfect for satisfying sweet cravings without ruining your ketosis.

Base Ingredients

  • 1 cup Almond flour (Superfine is best)
  • 1/2 cup Butter (Softened)
  • 1/4 cup Cream cheese (Softened)
  • 1 teaspoon Vanilla extract (Provides flavor)
  • 1/3 cup Granular sweetener (Like monk fruit or erythritol)
  • 1/2 cup Sugar-free chocolate chips (Feel free to add more if desired)
  • 1 pinch Salt (Enhances flavor)

Preparation

  1. Mix the softened butter and cream cheese together until fluffy. A hand mixer works well, but a fork is fine too.
  2. Add the sweetener, vanilla extract, and a pinch of salt. Mix again until well combined.
  3. Slowly stir in the almond flour until a dough consistency forms, mixing continuously.
  4. Fold in the sugar-free chocolate chips as desired.
  5. If the dough is sticky, refrigerate for 10-15 minutes before enjoying.

Store any leftovers in an airtight container in the fridge for about a week. For longer storage, freeze in golf ball-sized scoops in a zip bag. Enjoy straight from the bowl without worrying about eggs!

Dessert, Snack
Keto, Low-Carb
Edible Cookie Dough, Keto Cookie Dough, Low-Carb Dessert, No Bake Dessert, Sugar-Free Treat