Simple and Delicious Salsa Verde Soup You’ll Love

Bowl of hearty Salsa Verde Soup with chicken and fresh ingredients

salsa verde soup has totally bailed me out on those I-don’t-know-what-to-make weeknights. You know, you’re craving something cozy but still want it to taste amazing (maybe a bit surprising). I used to grab the same old chicken noodle soup, but honestly, I got bored fast. Then I stumbled on this bright, zesty wonder and my soup routine was saved. If you vibe with warm, quick dinners or maybe you just want to shake up your meal prep, you gotta try this! Oh, and if you’re already in love with soups, you might wanna check out my favorites like this creamy tuscan chicken soup or browse keto soup heaven for more inspiration.
Simple and Delicious Salsa Verde Soup You’ll Love

What is Authentic Salsa Verde?

Let’s talk salsa verde for a hot second. This isn’t just any green sauce—well, yeah, it’s green, but it’s totally different from your basic red salsa. Authentic salsa verde is light, tangy, sometimes even sparkling (if taste buds could sparkle)—seriously. It’s usually made from roasted tomatillos, a handful of zesty limes, a punch of garlic, and somewhere lurking is cilantro doing its thing. A lot of the time, it’s the backbone of classic Mexican dishes, but I honestly love it best when it’s the star of a big, comforting bowl. Not too spicy, not too bland, just that perfect middle ground with a flavor kick that gently wallops you. Making it from scratch feels like a flex but you can totally use a jar and no one will judge. I promise on my favorite soup mug.

“I grew up eating red salsa but… salsa verde just woke up my taste buds. This soup is now my comfort food!” – Ana S.

Simple and Delicious Salsa Verde Soup You’ll Love

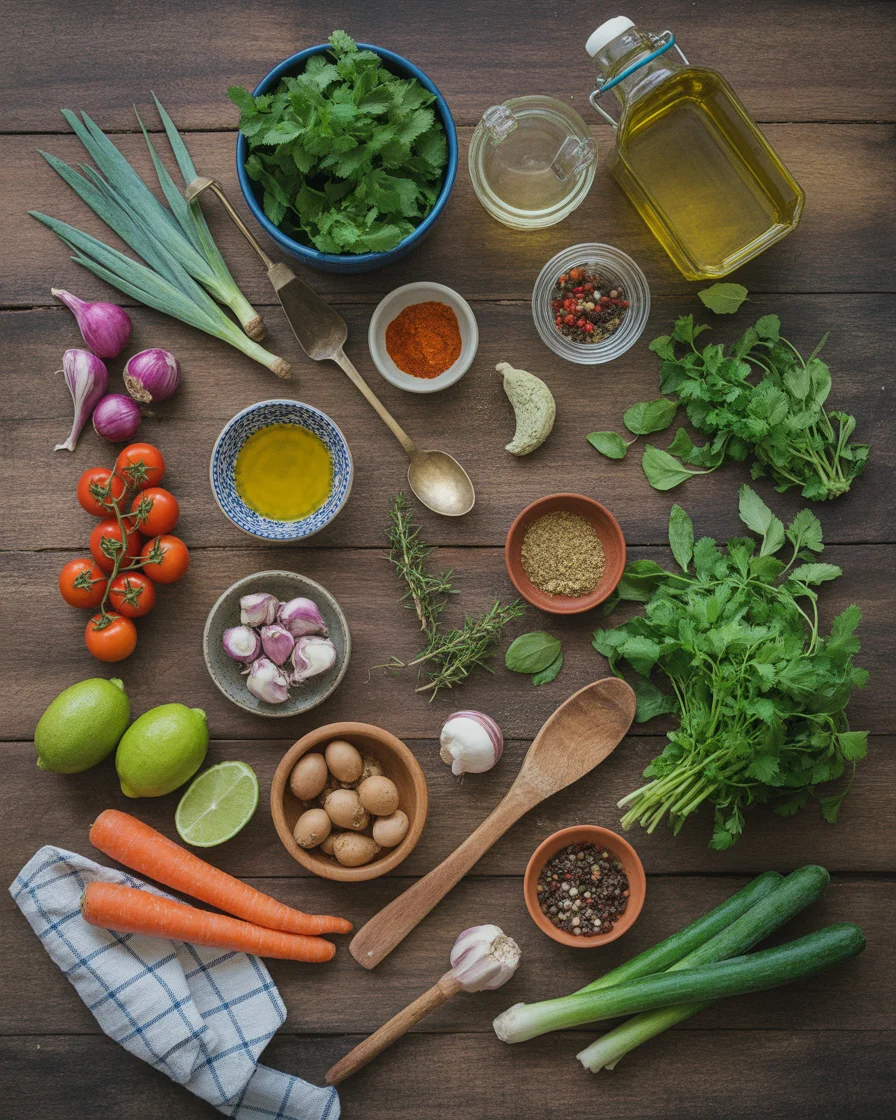
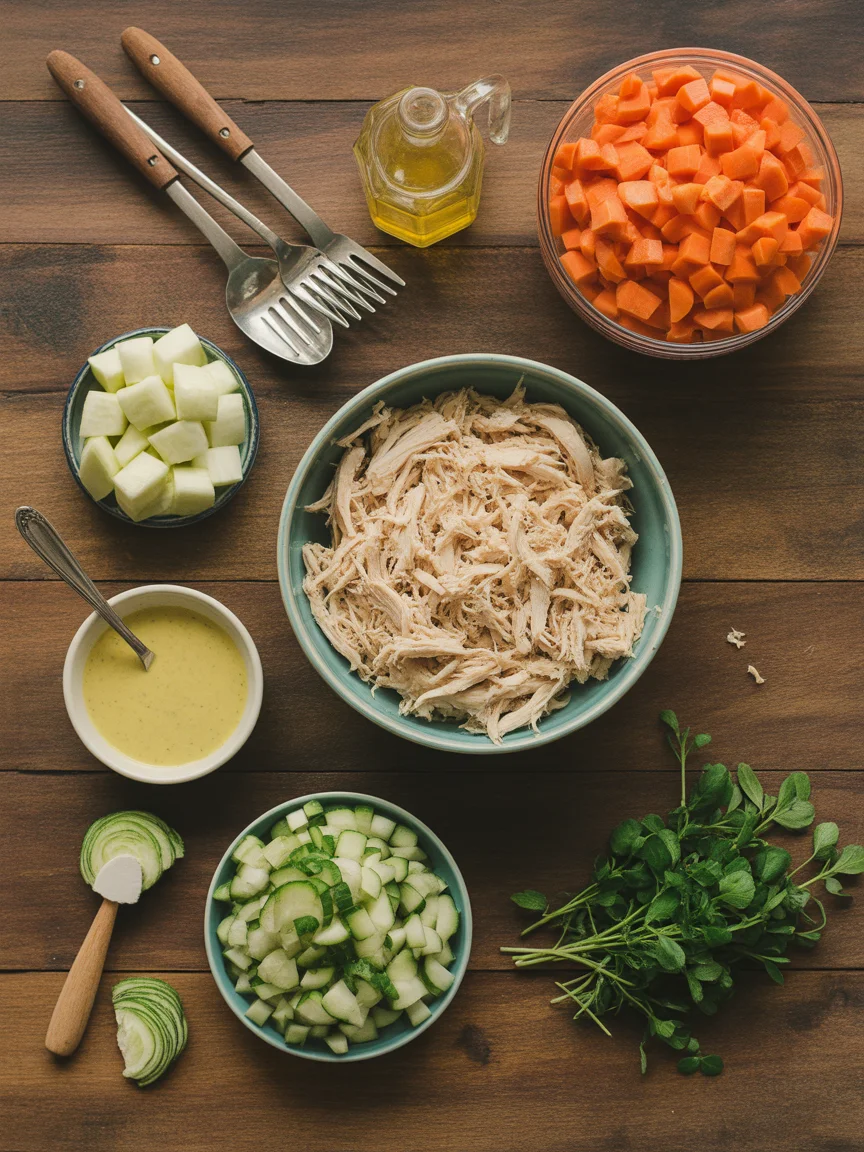
Lets Talk About the Ingredients You Need to Make This Recipe

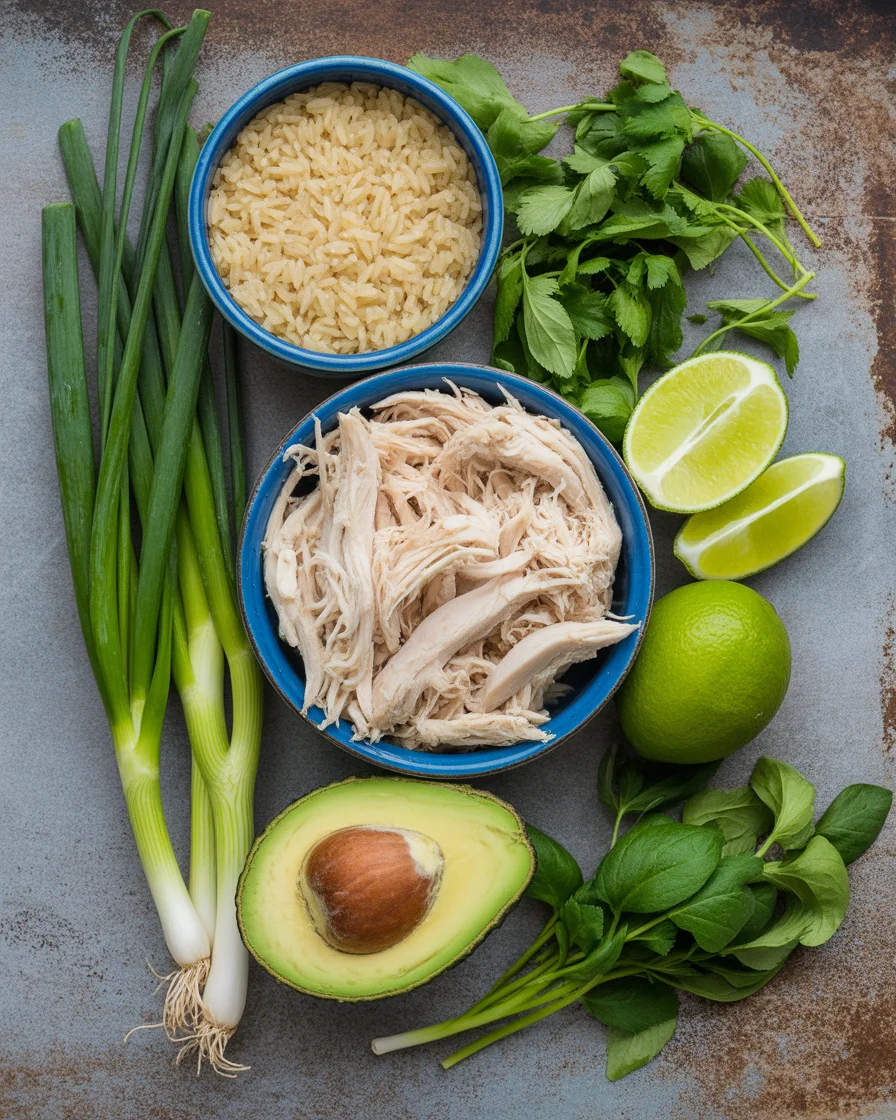
Alright, we’re getting into it. Nothing wild here but every single thing matters. You’ll need chicken breast or thigh (I usually go for the thigh because it can take a beating in the pot and stays juicy), a big jar of salsa verde (store-bought or homemade), chicken broth, onion, a couple cloves garlic, canned green chilies (they add that extra something, trust me), and a little cumin for flavor magic. Grab some lime and cilantro for a final zingy top-off. Cheese is totally optional—but in my opinion, cheese is never a bad idea. Don’t sweat it if you’re missing one thing. You can sub turkey, or even beans if you run out of chicken (I’ve done both, in emergency tortilla-less Tuesday style). Try it with low-carb tortillas for a nice twist. See what I mean? Flexible.

salsa verde soup

How to Make This Salsa Verde Chicken Soup in the Slow Cooker

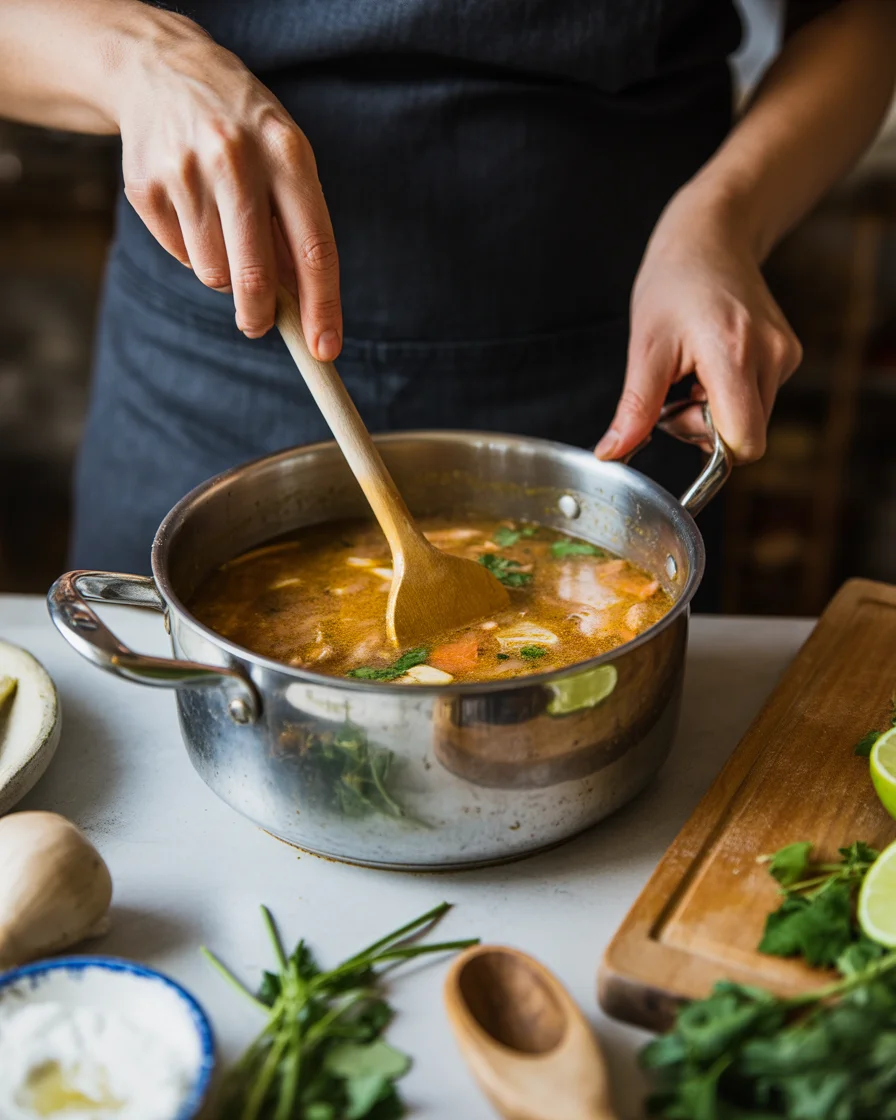
This is where things get so easy, you could almost nod off while it cooks. Just toss everything in the slow cooker (I mean everything except the garnishes—duh). Chicken, salsa verde, broth, onions, garlic, chilies, cumin—pile it in. Set it on low for about 6 hours or high for roughly 3, depending on how urgent your dinner situation is. Once the chicken’s tender, shred it right in the pot with two forks (or use your favorite gadget). Squirt in some fresh lime and scatter chopped cilantro like you’re seasoning with love. Serve it up, let those smells waft, and mentally high-five yourself for barely lifting a finger. That’s it.

Easy and Full of Flavor: Salsa Verde Chicken Soup

So…here’s why people rave about salsa verde soup (and why I make it almost weekly when winter drags on). The tang from those tomatillos, the mild heat from the chilies, all tangled up with shredded chicken—it’s practically a five-star restaurant in a bowl but in your pajamas.
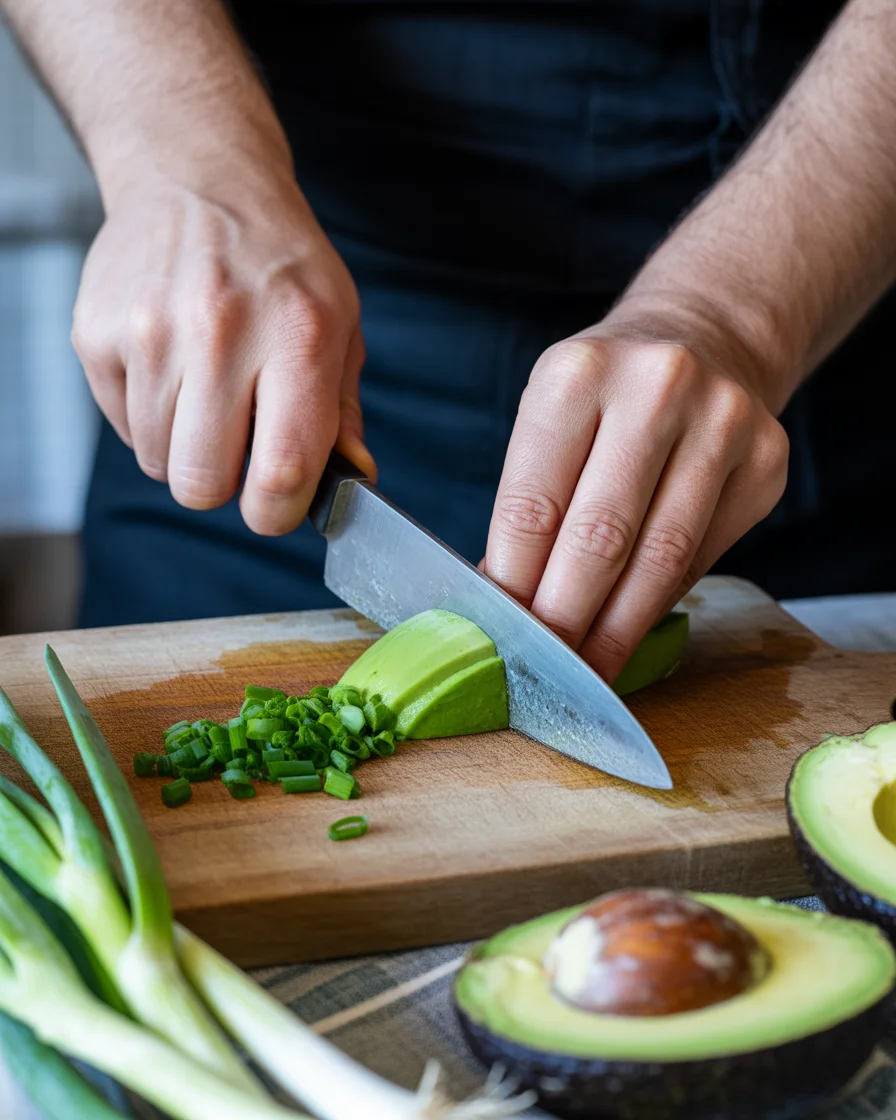
Heck, sometimes I double the recipe because it never lasts more than a day or two in my fridge. Honestly, if you pair it with some crispy keto crackers, or just top it with extra sliced avocado, it feels like the best dinner party you never planned for. Simple, but bursting with that magic Mexican zest. Give it a try and I bet you’ll become a convert (warning: may cause soup obsession).
If you’re into other flavors, you’ve got to see this keto chicken tortilla soup for a delicious low-carb fix, too.

More Delicious Soup Recipes to Love

Oh, you thought salsa verde soup was the only comfort dish in town? No chance. Give your taste buds a tour, seriously. Skip the boring instant noodles and try:

  • Keto Chicken Tortilla Soup for ultimate flavor (it’s a stunner)
  • Creamy Tuscan Chicken Soup loaded with veggies and rich creaminess
  • Try browsing my whole soup keto collection for spicy, creamy, and down-right wholesome bowls
  • Or go bold with classic beef and veggie soup—never lets me down

One spoonful, then you might never go back to canned soup again. Shake up your meal routine—life’s short!

Common Questions

Is salsa verde soup very spicy?
Not really! Most jarred salsa verde is tangy and mild. If you like heat, add a diced jalapeño.

Can I make this vegetarian?
Of course. Use white beans or chickpeas instead of chicken. Vegetable broth works, too.

What toppings do you love for this?
Avocado, shredded cheese, extra cilantro, even crushed tortilla chips if you’re not watching carbs.

Can I freeze leftovers?
Yup. Cool it first, portion in containers, freeze up to 2 months.

Does this work with leftover chicken?
A thousand times yes. Just add it in at the end to warm up—don’t let it overcook.

Cozy Green Goodness in a Bowl

If you’re looking for a soup that’s wild on flavor and low on fuss, this is the one. From my kitchen to yours, salsa verde soup is my go-to hero for tired nights (or meal-prep Sundays). And if you want an expert spin or a few different ideas, you gotta check out Salsa Verde Chicken Soup – All the Healthy Things for a step-by-step guide, or maybe try Salsa Verde Chicken and Rice Tortilla Soup for another cozy twist, and even get inspired by this Plant-Based Salsa Verde Soup if you want to keep things vegan. Give it a whirl, then let me know if it knocks your socks off the way it did mine. You seriously won’t regret it!

Salsa Verde Chicken Soup

A warm and cozy soup made with zesty salsa verde, tender chicken, and flavorful ingredients, perfect for weeknight dinners.

Main Ingredients

  • 1 lb chicken breast or thighs (Thighs are juicier and recommended.)
  • 1 jar salsa verde (Store-bought or homemade.)
  • 4 cups chicken broth
  • 1 medium onion, chopped
  • 2 cloves garlic, minced
  • 1 can canned green chilies (Adds extra flavor.)
  • 1 tsp cumin (For flavor.)

Garnishes

  • 2 tablespoons fresh lime juice (To add a fresh zing.)
  • 1/4 cup chopped cilantro (For topping.)
  • optional shredded cheese (For additional richness.)
  • optional sliced avocado (For a creamy finish.)

Preparation

  1. In a slow cooker, add the chicken, salsa verde, chicken broth, chopped onion, minced garlic, canned green chilies, and cumin.
  2. Stir the ingredients to combine, making sure the chicken is submerged in the liquid.

Cooking

  1. Set the slow cooker to low for about 6 hours or high for approximately 3 hours.
  2. Once the chicken is tender, shred it using two forks directly in the pot.
  3. Squirt in the fresh lime juice and sprinkle the chopped cilantro on top.
  4. Serve the soup hot, and enjoy!

This soup is flexible; feel free to use turkey or beans if chicken is not available. Serve with keto tortillas for a twist, and top with crispy keto crackers for added texture. Leftovers can be frozen up to 2 months.

Dinner, Soup
Mexican
Chicken Soup, Comfort Food, Healthy Soup, Salsa Verde, Slow Cooker Soup

Bright and Cozy Lemon Chicken Orzo Soup for a Quick Dinner

Bowl of Lemon Chicken Orzo Soup with fresh herbs and vegetables

Lemon chicken orzo soup always saves the day when I walk in, hungry but absolutely not in the mood for anything complicated. You know those nights: chilly, a little long, everyone’s cranky… Or maybe you’re just trying to eat something that feels a teensy bit lighter after a parade of comfort food (I’m looking at you, Creamy Tuscan Chicken Soup from my last weekend). Honestly, this recipe fixes everything, like a hot blanket for your insides with bright lemony cheer. If chicken tortilla soup is your regular go-to, or you browse soup keto recipes hoping for a pop of fresh flavor, oh man, this one is gonna hit just right.
lemon chicken orzo soup

Why You’ll Love It

Let me cut to the chase. First, this soup is seriously bright and cozy all at once. Somehow, despite how fancy it sounds, lemon chicken orzo soup is a total beginner’s dish. Brings warmth without being heavy, which, trust me, is not always easy (looking at you, cream-based things). The lemon just wakes up your whole bowl, like a zing right to your taste buds—if you don’t get what I mean, you need to try it already!

It cooks fast. Like, really fast. One pot, scavenged veggies, leftover chicken if you got it… This is the soup for “oops, I forgot to plan dinner.” If you like soups that warm you right down to your socks but don’t sit like a brick, this will be your new favorite. Plus, it’s just so… cheerful? I don’t know, there’s just something happy about it.

“This soup turned my ‘blah’ Monday around—super simple, zesty, and my picky kids ate every spoonful!” — Rachel L., home cook

Bright and Cozy Lemon Chicken Orzo Soup for a Quick Dinner

Pro Tips for the Recipe

I’ve played around with a few batches (read: got distracted and made mistakes so you don’t have to). Here’s what I’ve learned. First and most important, fresh lemon juice only. Don’t even think about the bottled stuff unless you want to miss the whole magic of the soup. It really won’t taste the same, promise.

Shredded rotisserie chicken works like a charm if you want to keep things extra-quicky. If you’re boiling your own, grab some bone-in thighs and simmer for a richer broth. Oh, and don’t be shy with the dill or parsley—a handful tossed in at the end wakes the whole thing up. If your orzo drinks up all the broth (it does that sometimes), just splash in a little extra water or stock before serving. Nobody likes a porridge meal pretending to be soup.

Don’t rush the garlic—let it sizzle in the pot for at least a minute until everything smells good. Final thing, taste the soup before adding more salt at the end. The chicken stock, especially the store-bought kind, might already be salty enough to knock your socks off.

lemon chicken orzo soup

Substitutions and Variations

Okay, real life. Sometimes you don’t have everything the recipe asks for. Been there, no shame at all. Swap out chicken for leftover turkey after holidays. If orzo’s nowhere in sight, tiny pasta shapes (like ditalini or even rice) work just fine. Need it gluten-free? Grab gluten-free orzo, or even throw in some cooked quinoa. Not feeling so herby? Just use parsley, but if you have dill, oh baby, put a little extra.

Want it creamy? You can stir in a dash of heavy cream at the end. My friend made a batch with spinach stirred in—it turned out surprisingly delightful, kind of like Italian wedding soup’s zesty cousin. For even more boldness (because sometimes you want spice), throw in a pinch of red pepper flakes right at the start. Yes, really. Also, if you love twisty classics, I found this keto chicken alfredo that uses a similar idea!

What to Serve With This Soup

Here’s how to make your simple soup dinner feel like a five-star restaurant—no kidding, it’s not hard.

  • Crisp sourdough toast. Dip, slurp, repeat.
  • Roasted veggies. I throw carrots and broccoli in the oven while the soup simmers.
  • Simple green salad. Lemon vinaigrette ties the whole plate together.
  • Keto chicken nuggets. Yep, I said it—sometimes you just need a little crunch on the side.

If you’re craving more easy soup ideas, my favorite keto soup recipes roundup is pure weeknight gold.

How to Store Lemon Chicken Orzo Soup

Here’s the best part. Lemon chicken orzo soup actually tastes better the next day. For leftovers, let it cool off, then stash it in the fridge in an airtight container (old yogurt tub does the trick). It’ll keep well for up to four days no fuss. If you’re planning to freeze it, cook the orzo separately and mix it in later, otherwise you’ll wind up with, well, very soft pasta. Still tasty, just a whole different vibe.

When reheating, just add a splash of water or stock to loosen things up again. The flavors meld overnight and get even punchier. Don’t forget a dash more lemon juice if things taste a bit mellow after chilling out in the fridge.

Common Questions

Can I make lemon chicken orzo soup ahead of time?
Definitely. Just keep the pasta out until you’re ready to reheat, then cook it fresh and add at the end.

Is it freezer-friendly?
Yup, with one tiny catch—freeze the broth and chicken, then add cooked orzo after you thaw. Otherwise, pasta turns squishy.

What veggies can I toss in?
Pretty much anything. Carrots, celery, spinach, peas…whatever’s sad in your produce drawer.

How do I make it more filling?
Easy—just up the chicken or toss in extra veg. Or eat with a grilled cheese, because, why not?

Can I use store-bought rotisserie chicken?
Absolutely. Easiest shortcut ever, and saves you about 30 minutes.

Your New Favorite Weeknight Soup Awaits

So, there you go. Lemon chicken orzo soup is that one recipe that shows up when you want it quick, cozy, and a little zesty. Next time your dinner brain freezes, you’ll know exactly what’s up your sleeve. Check out other takes like this Lemon Chicken Orzo Soup from Salt & Lavender, or even mix it up with the Pioneer Woman’s lemon chicken-orzo soup recipe. For an all-timer that’s reviewed and loved, there’s always the famous Allrecipes lemon chicken orzo soup—because nobody has a monopoly on comfort. Try it, play around, and let me know if you discover your own version (and yes, lemon always belongs). Enjoy!

Lemon Chicken Orzo Soup

A bright and cozy soup that’s quick to prepare, featuring lemon juice, orzo pasta, and chicken.

For the Soup

  • 1 tablespoon Olive oil
  • 2 cloves Garlic, minced (Sizzle until fragrant)
  • 1 medium Onion, diced
  • 2 stalks Celery, diced
  • 1 large Carrot, diced
  • 4 cups Chicken stock (Use low sodium if preferred)
  • 1 cup Orzo pasta (Can substitute with small pasta or rice)
  • 2 cups Shredded rotisserie chicken (To save time)
  • Juice of 1 lemon (Fresh lemon juice only for the best flavor)
  • 1 handful Fresh dill, chopped (adds freshness)
  • 1 handful Fresh parsley, chopped (adds freshness)

Preparation

  1. In a large pot, heat olive oil over medium heat.
  2. Sauté garlic, onion, celery, and carrot until softened.
  3. Pour in chicken stock and bring to a boil.
  4. Add orzo pasta and cook according to package instructions.
  5. Stir in shredded chicken and lemon juice.
  6. Season with salt, pepper, dill, and parsley before serving.

For added flavor, let the soup sit for a while after cooking. The flavors meld together nicely. Always taste before serving to adjust seasoning.

Main Course, Soup
American, Comfort Food
Comfort Food, Easy Soup, Lemon Chicken Orzo Soup, Quick Dinner, Weeknight Meal

Savor the Flavor: Easy Mexican Chicken Soup Recipe

Bowl of flavorful Mexican chicken soup with vegetables and cilantro

Mexican chicken soup always hits the spot, especially when you’re tired of the same old dinners. The other night, my fridge looked sad (just a lonely carrot and some leftover chicken), and I found myself craving something warm and actually tasty. That’s when I remembered this cozy bowl of magic. If you ever get stuck trying to figure out dinner, trust me, you’ll want to have this easy recipe handy. Oh and by the way, if you like trying other simple soups, check out this creamy Tuscan chicken soup or this mega-popular keto chicken tortilla soup. Both are staples in my kitchen.
Mexican chicken soup

What is Caldo De Pollo

Alright, so what’s the deal with Caldo De Pollo? Basically, it’s a Mexican chicken soup but with a little extra love thrown in. Think super tender chicken, chunky veggies, and brothy goodness. Every spoonful is like a warm hug—okay, maybe that sounds cheesy, but it really is. Some folks call it the cure-all for colds. My abuela made it every time someone sneezed, stubbed a toe, or just needed cheering up. What makes it stand out? The flavors are simple, but somehow the combo of garlic, onion, fresh lime, and cilantro makes everything taste way fancier than it actually is. Also, it’s filling yet light. You’ll probably come back for a second bowl (I won’t judge). You can make it with whatever veggies you have lying around. Got zucchini? Great. Only potatoes? Works, too. Basically, as long as you have chicken and a couple of veggies, you literally can’t mess it up.

“This Mexican chicken soup is officially my go-to comfort food. I whipped it up with random veggies from the fridge, and it still tasted like my favorite taqueria—my kids even asked for seconds, which is a miracle.” – Jess, loyal reader

Mexican chicken soup

Why You Will Love This Caldo De Pollo Recipe

I’ve tried loads of recipes, but this one just works for busy nights (or lazy weekends, let’s be honest). The main thing? It doesn’t require any weird ingredients or hours in the kitchen, and you don’t need perfect knife skills. You basically dump everything in a big pot and let it do its thing.

One of the best bits is how flexible it is. Like, you run out of carrots? No problem. Add bell peppers. And the flavors—oh, just SO good. It smells comforting and tastes rich but light at the same time. I even think it’s better the next day. Trust me, your house will smell like a five-star cantina.

If you’re into low-carb, this works, too. You can serve it as is, or pile on fresh toppings like avocado, shredded cheese, or chopped cilantro. I know some folks get fussy about authentic technique, but honestly, just make it how you like. It’ll turn out great. And if you love experimenting with chicken recipes, you can also check out this category of soup keto dishes for some fresh ideas.
Savor the Flavor: Easy Mexican Chicken Soup Recipe

Caldo Soup Variations

Let’s talk remixing! Caldo De Pollo isn’t a one-size-fits-all deal. Around here, I throw in whatever is begging to be used up. You can keep it classic or try something bold—your kitchen, your rules. Swap rice for cauliflower if you want fewer carbs, or toss in a handful of corn for sweetness. Cilantro haters (they exist, wild right?) can just skip it. Not a fan of potatoes? Add squash or even green beans. I’ve even added sliced radish on top for crunch, and the results surprised me—in a great way. Also, if you’re feeling wild, a splash of chipotle sauce amps up the flavor without making it too spicy. There’s really no wrong way to serve it. Picnics, potlucks, cozy nights, or even just meal-prep for the week… you’ll be set. Oh, and speaking of crowd-pleasers, check out my easy keto chicken enchilada casserole recipe if you want to switch up your dinner rotation.

Expert Tips

I’ve made this Mexican chicken soup so many times I could do it with my eyes closed. Okay, maybe not totally closed, but you get the idea. Here’s what I’ve learned for max flavor:

  • Brown your chicken pieces a little before adding broth if you want deeper flavor, but honestly, tossing them in raw is fine for lazy nights.
  • Don’t skip the fresh lime and cilantro at the end—seriously, it makes the soup go from “meh” to “wow.”
  • If you’re storing it for later, scoop some broth out and freeze it for an easy starter base for midweek dinners.
  • Leftovers taste even better after a day in the fridge. I call it soup magic.

How To Store

So you made a huge pot—good for you! Now what? Get that Mexican chicken soup into an airtight container as soon as it cools down. It keeps in the fridge for about 3 or 4 days. Pull it out, reheat on the stove or even zap in the microwave if you’re super hungry. The only rule is don’t add the fresh toppings until right before serving, or you’ll end up with sad, wilted cilantro and mushy avocado. Oh, and if you want to freeze it, go for it. I do it all the time—just leave out potatoes or they’ll turn weirdly grainy after thawing. Reheat slowly for the best results, and suddenly, it’s like you cooked from scratch on a Tuesday, even if you didn’t.

Common Questions

Do I need to use bone-in chicken for caldo de pollo?
Bone-in works best for flavor, but boneless is totally fine if you’re in a hurry.

Can I make this Mexican chicken soup in a slow cooker?
Yep! Just throw everything in, set it, and forget it. The chicken will get super tender.

Is this recipe spicy?
Not really. It’s pretty mild as written, but you can add chopped jalapeños or hot sauce if you want heat.

Can I add noodles to my soup?
Absolutely. Sopa de fideo (angel hair pasta) is a classic—just break up the noodles and boil for a few extra minutes at the end.

What vegetables are best?
Carrots, potatoes, celery, and zucchini are classic, but improvise with whatever you’ve got.

Soup Night Just Got a Whole Lot Better

If you’re like me, you’ll want to make Mexican chicken soup all year long, not just during chilly evenings. It’s filling, easy, and perfect for leftovers. You might find yourself adding it to your weekly menu, especially with all the easy swaps you can do. Don’t just take my word for it—there are tons of great takes out there, like this one from Culinary Hill, plus even Allrecipes’ version for a bit of diversity. If you want a little more backstory or inspiration, peek at the comforting stories on Bossy Kitchen. Give it a shot, and let me know how you make it your own—I love seeing your personal twists and kitchen wins!

Caldo De Pollo

A hearty Mexican chicken soup filled with tender chicken, chunky vegetables, and rich flavors, perfect for cozy nights or meal prep.

Main Ingredients

  • 1 lb bone-in chicken pieces (For best flavor, bone-in chicken is recommended.)
  • 4 cups chicken broth (Homemade or store-bought.)
  • 2 medium carrots (Chopped.)
  • 2 medium potatoes (Chopped.)
  • 1 stalk celery (Chopped.)
  • 1 medium zucchini (Chopped.)
  • 1 small onion (Chopped.)
  • 3 cloves garlic (Minced.)
  • 1 lime fresh lime juice (For serving.)
  • 1/4 cup fresh cilantro (Chopped, for serving.)

Preparation

  1. In a large pot, brown the chicken pieces over medium heat for about 5 minutes.
  2. Add the chopped onion and garlic, cooking until fragrant.
  3. Pour in the chicken broth and bring to a boil.
  4. Stir in the carrots, potatoes, celery, and zucchini.
  5. Reduce heat to a simmer and let cook for 20-25 minutes until vegetables and chicken are tender.

Serving

  1. Add fresh lime juice and chopped cilantro to the soup before serving.
  2. Serve with optional toppings such as avocado or shredded cheese.

For a low-carb version, substitute potatoes with cauliflower. This soup tastes even better the next day. Store in an airtight container in the fridge for 3-4 days.

Main Course, Soup
Mexican
Caldo De Pollo, Comfort Food, Easy Soup Recipe, Mexican Chicken Soup, Weeknight Dinner

Keto Pumpkin Crisp

Keto Pumpkin Crisp


Introduction

Keto Pumpkin Crisp is a delicious dessert that combines the warm flavors of pumpkin with a crisp topping. This low-carb treat is perfect for anyone following the keto diet or simply looking for a healthier dessert option. It’s easy to make and full of autumn flavors, making it a great choice for family gatherings or a cozy night in.

Why Make This Recipe

This recipe is fantastic because it captures the essence of pumpkin pie in a simpler form while keeping it keto-friendly. With minimal carbs and rich flavors, it’s a guilt-free indulgence that everyone will love. Plus, it’s a great way to enjoy pumpkin season without straying from your dietary goals.

How to Make Keto Pumpkin Crisp

Making Keto Pumpkin Crisp is straightforward. You will start with a rich pumpkin filling and then create a crunchy topping. Here’s how to do it step by step.

Ingredients

Pumpkin Filling:

  • 2 cups pumpkin purée
  • 2/3 cup heavy whipping cream
  • 4 large eggs
  • 2 tsp pumpkin pie spice
  • 1 tsp vanilla extract
  • 2/3 cup Swerve Confectioners sweetener

Crumble Topping:

  • 1 cup almond flour
  • 4 Tbsp cold butter, cubed
  • 2/3 cup Swerve Brown sweetener
  • 1 cup chopped pecans

Directions

  1. Preheat your oven to 350°F (175°C) and grease a 9×13” baking dish.
  2. In a bowl, whisk together the pumpkin purée, heavy cream, eggs, pumpkin pie spice, vanilla extract, and Swerve Confectioners sweetener until smooth.
  3. Pour the pumpkin mixture into the greased baking dish.
  4. In another bowl, mix the almond flour, Swerve Brown sweetener, and cold butter. Use a fork or your hands to mix until the mixture is crumbly. Stir in the chopped pecans.
  5. Sprinkle the crumble topping evenly over the pumpkin layer in the baking dish.
  6. Bake for 35–40 minutes or until the topping is golden and the filling is set.
  7. Cool slightly before serving.

How to Serve Keto Pumpkin Crisp

Serve your Keto Pumpkin Crisp warm or at room temperature. You can enjoy it plain, or for an extra treat, top it with some whipped cream or a dollop of sugar-free whipped topping for added richness.

How to Store Keto Pumpkin Crisp

To store your Keto Pumpkin Crisp, place it in an airtight container in the refrigerator. It will stay fresh for about 3-5 days. You can also freeze it for later enjoyment. Just make sure to wrap it well to prevent freezer burn.

Tips to Make Keto Pumpkin Crisp

  • Make sure to use pure pumpkin purée for the best flavor.
  • Keep your butter very cold for a flakier topping.
  • You can adjust the sweetness level by adding more or less Swerve sweetener to suit your taste.

Variation

For a different twist, try adding chocolate chips or shredded coconut to the crumble topping. You can also substitute walnuts for the pecans if you prefer.

FAQs

Q: Can I use fresh pumpkin instead of canned?
A: Yes, you can use fresh pumpkin if you cook and purée it first. Just make sure it’s smooth and doesn’t have excess water.

Q: Is this dessert gluten-free?
A: Yes, since it uses almond flour and no wheat, Keto Pumpkin Crisp is gluten-free.

Q: Can I make this dessert ahead of time?
A: Absolutely! You can prepare it a day in advance and store it in the fridge. Just reheat it slightly before serving for the best taste.


Now you have all the details needed to make a delightful Keto Pumpkin Crisp! Enjoy this tasty, low-carb dessert with friends and family.

Keto Pumpkin Crisp

A delicious and easy low-carb dessert featuring the warm flavors of pumpkin with a crunchy topping, perfect for the keto diet.

Pumpkin Filling

  • 2 cups pumpkin purée (Use pure pumpkin purée for best flavor.)
  • 2/3 cup heavy whipping cream
  • 4 large eggs
  • 2 tsp pumpkin pie spice
  • 1 tsp vanilla extract
  • 2/3 cup Swerve Confectioners sweetener (Adjust sweetness level to taste.)

Crumble Topping

  • 1 cup almond flour
  • 4 Tbsp cold butter, cubed (Keep butter very cold for a flakier topping.)
  • 2/3 cup Swerve Brown sweetener
  • 1 cup chopped pecans (Can substitute walnuts if preferred.)

Preparation

  1. Preheat your oven to 350°F (175°C) and grease a 9×13” baking dish.
  2. In a bowl, whisk together the pumpkin purée, heavy cream, eggs, pumpkin pie spice, vanilla extract, and Swerve Confectioners sweetener until smooth.
  3. Pour the pumpkin mixture into the greased baking dish.
  4. In another bowl, mix the almond flour, Swerve Brown sweetener, and cold butter. Use a fork or your hands to mix until the mixture is crumbly. Stir in the chopped pecans.
  5. Sprinkle the crumble topping evenly over the pumpkin layer in the baking dish.

Baking

  1. Bake for 35–40 minutes or until the topping is golden and the filling is set.
  2. Cool slightly before serving.

Serve warm or at room temperature, topped with whipped cream or sugar-free topping for extra richness. Store in an airtight container in the fridge for 3-5 days, or freeze well to prevent freezer burn.

Dessert
American
Healthy Dessert, Keto Pumpkin Crisp, Keto Recipe, Low-Carb Dessert, Pumpkin Dessert

Delicious Berry Cobbler You’ll Make Again and Again!

Fresh berry cobbler with juicy berries and a buttery biscuit topping

Berry cobbler is one of those magic desserts you dream about at weird hours, right? Maybe you’ve been staring at a basket of squishy blueberries and strawberries, thinking, “Now what?” Or maybe—like me once—you bought a ginormous bag of frozen berries on sale and totally forgot what you planned. If your sweet tooth gets loud every night but you crave something simple, this little guide is right up your alley. Here’s a straight-up, no-fuss, best-ever berry cobbler recipe. Check out these crowd-pleasing desserts too, like Southern peach cobbler and easy fruit crisp, if you’re keen for more fruity-good inspiration.
berry cobbler

What the Heck is Cobbler?

Think of cobbler as the lazy (but still stunningly tasty) cousin to pie. Basically, berry cobbler is a bunch of juicy fruit with a thick, cakey or biscuity topping. No perfect pie crusts, no special equipment. My grandma always called it “dump and go” dessert because you toss things together, bake it, and get chaos that somehow ends up worthy of five-star restaurants (well, at least to me and my little brother).

Here’s something I need to admit: cobbler doesn’t win beauty contests. It bubbles over, makes a mess, and looks rustic…but oh man, the flavor? Outrageously good. Hot fruit mingles under this golden-brown crust—sometimes chewy, sometimes fluffy, always warm and sweet. A scoop of vanilla ice cream melts on top and, honestly, you’ll want to eat it right from the dish. I do most times anyway.

The best part is, there are no strict rules. Use what fruit you love, play with the topping, and just have fun with it. That’s the secret sauce for a killer berry cobbler, if you ask me.

“My 9-year-old declared it the ‘best-ever dessert’ and scraped the whole casserole dish. No leftovers—none!”

berry cobbler

Best Berries for Berry Cobbler

Let’s clear something up—almost any berry works in berry cobbler. Fresh, frozen, even the “need to use up soon” ones hiding in your fridge drawer. I love using a mix for a sweet-tart punch. Raspberries, blackberries, blueberries, strawberries—heck, toss in cranberries if you’re feeling wild.

I usually default to what looks best at the store. Don’t stress the combo. If I can, I’ll mix two or three types, but single berry works great too. Frozen berries are a life-saver when it’s not berry season; just don’t thaw them. Tossing them in the oven frozen gives you a juicier filling and less mush.

And guess what? You can supplement with chopped stone fruit or even apple. It’s a lovely “clean out the crisper” move. The only time I had a dud? When I used nothing but tart currants—way too sour without bumping up the sugar.

Berry cobbler loves a little flexibility, so shake things up. Use what you’ve got. Taste the fruit before you bake; adjust sugar if it’s super tart or crazy sweet. Easy.

How to Make Berry Cobbler

Alright! Let’s jump into the actual making-the-magic part. Here’s my everyday, no-fuss routine for berry cobbler (seriously, I do this all the time):

  1. Preheat your oven. Crank it to 375°F (190°C) and let your oven get nice and toasty.
  2. Prep your berries. About 5-6 cups mixed berries (fresh or frozen). Dump them into a big ol’ bowl, sprinkle with 1/2 to 3/4 cup sugar, 2 tablespoons flour (helps the juice thicken), and a squeeze of lemon juice.
  3. Grease your dish. I use a large (9×13) baking dish. Butter the bottom real quick so nothing sticks.
  4. Pour in fruit. Get all those sugared berries in there—don’t forget the juice.
  5. Make the topping. In another bowl, mix 1 cup flour, 1 cup sugar, 1 1/2 teaspoons baking powder, pinch salt. Add 1 stick melted butter and 1 cup milk. Stir until it’s just combined (lumpy = good). Pour it over your berries. Don’t stress spreading it perfectly.
  6. Bake. About 35 to 45 minutes till your cobbler is bubbling and golden on top.
  7. Let cool (a little). Give it 10-15 minutes so the filling firms up just enough.

That’s really it. If you’ve survived boxed cakes, you can pull this off blindfolded. Well, maybe don’t do it blindfolded.

Tips, Tricks and Substitutions for This Fruit Cobbler

I’m not a purist—berry cobbler should fit your mood and pantry, right? Sometimes you don’t have every ingredient, and that’s perfectly fine.

First, you can swap margarine or coconut oil for the butter if you want dairy-free. You can experiment with half whole wheat flour—just expect a little denser topping. For the sweetener, brown sugar adds a caramel-y vibe if you like that sort of sticky-toffee richness.

If your berries are especially tart, toss in an extra tablespoon of sugar. Or, top with cinnamon-sugar for fun. No lemon? Try orange juice or skip it. This recipe forgives a lot of tinkering.

Quick fix if your topping is dry: add a splash of milk. Too runny? Flour works wonders. Oh, and I learned the hard way—don’t overcrowd your fruit or it’ll bubble over and get into the oven (but that messy smell? Sort of reminds me of grandma’s house).

Some folks put oats in the topping—makes it more “crisp” than cobbler, but hey, you do you! If your berries are overripe and super juicy, use an extra spoonful of flour to keep things thick. Just one last thing…LEFTOVERS! Cover and reheat in the microwave. Still as good, maybe better, second day.

More dessert recipes you’ll love

If you’re obsessed with berry cobbler (I totally get it) you might want to branch out sometimes. Try these too:

  • Southern peach cobbler—fuzzy fruit, golden topping, hits different every summer BBQ!
  • Easy apple crisp—warm cinnamon apples with crunchy topping, epic fall comfort food.
  • Berry buckle—like berry cobbler’s cakier sister, wonky name but crazy good.
  • Fancy a change? Swap in pears or plums—just as easy, every bit as homey.

I’ve got loads more ideas up my sleeve (save room for brownies!). Get started with a fruit crisp variation or try making a classic peach cobbler. No one’s ever disappointed—promise.

Common Questions

Q: Can you use frozen berries in berry cobbler?
A: Yep, frozen berries work great! Use them straight from the freezer and don’t thaw, or you’ll get mushy filling.

Q: What can you serve with berry cobbler?
A: Vanilla ice cream is a classic, for sure. I sometimes put a dollop of whipped cream or even Greek yogurt if I’m feeling healthy-fancy.

Q: Can you make berry cobbler ahead of time?
A: Totally. Make and bake, then reheat later if you want. Or, prep the fruit and topping separately, store in the fridge, then assemble right before baking.

Q: Is berry cobbler gluten free?
A: Not as written, but you can use a 1:1 gluten-free flour and it works almost the same. Test a small batch just in case.

Q: What if I don’t have lemon?
A: Try orange juice, lime, or just skip it. The cobbler will still be delicious.

Let’s Get Baking: Bring On the Berries!

Baking berry cobbler’s honestly one of my favorite ways to impress with nearly zero effort. You get that gooey, bubbling fruit and a soft, golden-cap topping every time, and it never lasts long around here. Don’t forget, there’s also a brilliant Berry Cobbler Recipe (Quick & Easy) – Sally’s Baking if you crave a little extra guidance, or check the Triple Berry Cobbler – Mel’s Kitchen Cafe for another spin. Maybe even bookmark this Mixed Berry Cobbler You’ll Crave All Week! for next weekend. Just remember to have fun and improvise as you go—you really can’t mess this up if you keep things simple and enjoy the ride. Can’t wait to hear how your first (or tenth) go turns out!

Berry Cobbler

A simple, delicious dessert made with juicy mixed berries topped with a golden, cakey crust.

For the Filling

  • 5-6 cups mixed berries (fresh or frozen) (Use a mix of raspberries, blackberries, blueberries, and strawberries. Do not thaw frozen berries.)
  • 0.5-0.75 cups sugar (Adjust based on the tartness of the berries.)
  • 2 tablespoons flour (Helps thicken the juice.)
  • 1 tablespoon lemon juice (Can substitute with orange juice or skip.)

For the Topping

  • 1 cup flour
  • 1 cup sugar (Can use brown sugar for a caramel flavor.)
  • 1.5 teaspoons baking powder
  • 1 pinch salt
  • 1 stick butter (melted) (Can substitute margarine or coconut oil for dairy-free.)
  • 1 cup milk

Preparation

  1. Preheat your oven to 375°F (190°C).
  2. In a large bowl, mix the berries with sugar, flour, and lemon juice.
  3. Grease a 9×13 baking dish with butter.
  4. Pour the berry mixture into the greased baking dish.

Making the Topping

  1. In another bowl, combine flour, sugar, baking powder, and salt.
  2. Add melted butter and milk; stir until just combined.
  3. Pour the topping over the berry mixture, spreading it out as best as you can.

Baking

  1. Bake in the preheated oven for about 35 to 45 minutes, until the topping is golden and bubbling.
  2. Let it cool for 10-15 minutes before serving.

Adjust the sugar based on the sweetness of the berries. For a denser topping, use half whole wheat flour. Cover and reheat leftovers in the microwave.

Dessert
American
Baking, berry cobbler, cobbler recipe, Easy Dessert, fruit dessert

Delicious Low Carb Coleslaw You’ll Love Making at Home

Delicious low carb coleslaw served in a bowl, perfect for keto diets.

Low Carb Coleslaw is basically a life-saver for those BBQs when everyone else is loading up their plates with potato salad. (Been there, gnawed at celery, regretted my choices.) If you’re tired of sad, limp lettuce dinners, this crisp keto coleslaw swoops in with real flavor—yeah, not just filler. Plus, it pairs up outrageously well with main dishes like these keto beef back ribs I tried last weekend. The best part? You can make it in, like, ten minutes flat.
Delicious Low Carb Coleslaw You'll Love Making at Home

Why Make This

I hardly ever rave about a “side salad,” but this low carb coleslaw cracks the code for real, actual taste satisfaction—without blowing your carb budget. Why settle for plastic-tub deli coleslaw crammed with sugar? Homemade is way fresher. You control all the flavors (and the texture, crunchy or creamy, totally up to you).

Here’s the secret sauce: this keto coleslaw can run as a proper lunch, not just some afterthought. One bowl and you’re full, happy, and not bored out of your mind. Call me dramatic, but after one too many limp drive-thru salads, I think I earned the right to be a little hyped. Actually, my mom used to fold a bit of celery salt in—wow, just trust me, it makes a difference.

“I made this for my family’s Sunday cookout, and everyone (even my picky brother-in-law who ‘hates diet food’) asked for seconds. There weren’t even leftovers.”

How to Make Keto Coleslaw

Okay, so get ready—because this process is about as easy as tying your shoes, and frankly more rewarding. Grab a big mixing bowl and toss pre-shredded coleslaw mix in it. Of course, you can shred your own cabbage and carrots if you’re feelin’ overachiever-y, but I’m not here to judge shortcuts. Pour in your dressing ingredients (mayo, vinegar, little squeeze of mustard, sweetener if you want it), then mix ‘til everything’s cozy together. I like using my hands for this step. Is that weird? Possibly. But it works.

You’ll want to let the flavors mingle for at least 10 minutes in the fridge. Longer is good, too, especially if your patience is stronger than mine. The result? Crisp, lightly tangy low carb coleslaw—never soggy or bland. That’s basically it. Told you, not rocket science, just tasty.

Ingredients & Substitutions

So, here’s your friendly, casual shopping guide for low carb coleslaw. (Don’t sweat it if you’re missing one thing.)

  • Shredded cabbage: Green or mix in purple for some pizzazz.
  • Shredded carrots: Use a tiny bit, or just skip if you’re extra strict with carbs.
  • Mayonnaise: Go for full-fat, no weird oils, or choose avocado mayo.
  • Vinegar: Apple cider or white vinegar, honestly, I’ll use what I find.
  • Dijon or yellow mustard: Because a little tang never hurt anyone.
  • Sweetener: Just a dusting of Swerve, monk fruit, or skip for ultra low carb.
  • Salt and pepper: Adjust to taste. Don’t skimp.

Sub ideas? Sure. Greek yogurt works if you want a lighter touch, and a small bit of celery salt or fresh dill totally transforms the vibes. Don’t get fussy. Use what you have.

Serving Suggestions

Low carb coleslaw isn’t just for stuffing the corner of your BBQ plate (although, go for it). If you’re on the hunt for ideas, here are a few tasty ways I like to use mine:

  • Pile it next to smoky keto beef back ribs for a classic backyard feast.
  • Dunk it on burgers (or even a low-carb bread wrap), because crunchy coleslaw is unbeatable as a topping.
  • Roll it up in lettuce wraps for a fast lunch (kids actually eat it this way, who knew).
  • Serve alongside low carb spaghetti squash and meatballs for a totally filling dinner.

Honestly, you could just eat a whole bowl for lunch with a little crumbled bacon on top. No one’s judging—not here.

Variations for Keto Coleslaw Dressing

I get bored fast. No shame. So I switch up my low carb coleslaw dressing depending on my mood. Sometimes I’ll blend in a dollop of sour cream, just for extra creaminess. Or, swap half the mayo for unsweetened Greek yogurt if you want that bit of tang and a protein boost. Occasionally, I’ll add a pinch of smoked paprika or toss in some chopped jalapeno for a faint kick (this is criminally underrated, by the way).

If you want it a little bit “fancier,” sprinkle in some green onions, chopped parsley, or even crumbled blue cheese. The basics stay the same, but a little dash of adventure keeps things fresh. If you get weird looks—let ‘em taste first, then they get it.

Common Questions

Can I use bagged coleslaw mix?
Totally, and I usually do. Saves time and cleaning up the cutting board.

Is it okay to make this ahead?
Yup, actually better that way. The flavors soak in. Just don’t leave it for days, or it’ll get watery.

Can I freeze keto coleslaw?
I’d say nope. Mayo doesn’t freeze nice, and thawed coleslaw is a sad, watery mess.

Is store-bought mayo okay?
Yes, but peek at the ingredients—avoid added sugars if you can.

Is this recipe kid-friendly?
Mine eats it (if there’s bacon sprinkled in), so yes, probably.

Give It a Whirl—You’ll Thank Yourself Later

All in all, this low carb coleslaw has rescued me from many boring meals and bland BBQs. You get crunch, creamy dressing, some serious flavor—without falling off your carb goals. It goes perfectly with all sorts of low carb favorites, and if you want inspiration for more dinners, check out recipes like these keto beef back ribs or a super cozy keto chicken tortilla soup. And don’t just trust me—plenty of others are raving about their own versions in these recipes for the Best Keto Coleslaw Recipe, a quickie Keto Coleslaw recipe, and this classic Keto Coleslaw Recipe. Seriously, what’s stopping you? Get out the bowl and go for it.
Low Carb Coleslaw

Keto Coleslaw

A delicious low-carb coleslaw that’s crunchy and tangy, perfect for BBQs or as a side dish. Quick and easy to make in just ten minutes.

Coleslaw Base

  • 4 cups shredded coleslaw mix (Can use green cabbage or a mix of green and purple cabbage.)
  • 1/4 cup shredded carrots (Optional, can skip for ultra low carb.)

Dressing

  • 1/2 cup mayonnaise (Use full-fat or avocado mayo.)
  • 2 tablespoons vinegar (Apple cider or white vinegar.)
  • 1 teaspoon Dijon or yellow mustard (For tang.)
  • 1 tablespoon sweetener (optional) (Swerve or monk fruit.)
  • to taste none salt and pepper (Adjust to taste.)

Preparation

  1. In a large mixing bowl, combine the shredded coleslaw mix and shredded carrots (if using).
  2. In a separate bowl, mix together mayo, vinegar, mustard, sweetener (if using), and season with salt and pepper.
  3. Pour the dressing over the coleslaw mix and gently toss until everything is evenly coated.
  4. Let the coleslaw sit in the fridge for at least 10 minutes to let the flavors mingle.

For variations, consider adding sour cream for extra creaminess or swapping half the mayo for Greek yogurt. Add smoked paprika or jalapeno for an extra kick. Great as a side dish with BBQ meals or as a topping for burgers.

Salad, Side Dish
Keto, Low Carb
BBQ Side, Healthy Side Dish, Keto Coleslaw, Low Carb Coleslaw

Jalapeño Cheddar Bagels – A Delicious Twist on Breakfast!

Homemade Jalapeño Cheddar Bagels, cheesy and spicy, perfect for breakfast or snacks.

Jalapeño Cheddar Bagels. Okay, get this: you wake up already running late, craving something more exciting than plain toast, but you don’t have time for a crazy kitchen experiment. Sounds familiar? That’s where these bagels swoop in and save the morning. They’re spicy, cheesy—just ridiculously satisfying. My first bite had me loving breakfast again! Oh, and by the way, if you’re into comfort food, you might wanna check out these “easy weekend brunch recipes” and “homemade breakfast treats” for some extra inspiration.
Jalapeño Cheddar Bagels

Understanding the Basics of Jalapeño Cheddar Bagels

Let’s keep it real for a sec. Jalapeño Cheddar Bagels are exactly what the name says: bagels, but kicked up about ten notches. You’re getting a chewy, golden bagel packed with fresh jalapeño slices and melty cheddar right in the dough (plus more on top if you want extra pizzazz).

At first, I totally thought these were some fancy New York bakery-only thing. Nope, you can pull these off in a regular oven. The dough is simple—no weird ingredients (I promise), just the usual bagel stuff plus the spicy, cheesy goodness. The best part? You can pick how spicy you want it. I usually go mild, my brother dumps in double jalapeños like he’s on a dare.

Folks sometimes ask if you need special skills for making bagels. Honestly? If you can stir and knead for like, five minutes, you’re golden. Boiling then baking might sound odd, but it’s kinda fun—feels like magic when they fluff up.

And yeah, you can freeze leftovers—this is real life, not a five-star brunch every day.

Jalapeño Cheddar Bagels

Benefits of Jalapeño Cheddar Bagels in Daily Life

Here’s what I love: Jalapeño Cheddar Bagels do way more than just fill you up in the morning. For me, they’re a quick fix when my brain’s running dry and I need a snack (or well, lunch). That little jolt from the pepper and cheese is better than a second cup of coffee.

People who don’t even like spicy foods admit—these beastly creations might convert you. Seriously, it’s enough heat to wake up your mouth. Not, like, “I just ate a whole hot pepper and I’m dying” heat. It’s balanced.

They’re also a fun way to make breakfast exciting, which if I’m honest, is not easy before noon. Every now and then, I’ll bring a batch to a family brunch or offer to neighbors…and every single time, I come home with an empty tray (which, hey, that’s a good sign). Bagels get devoured because they fit anywhere—a quick meal, cool sandwich base, or just a snack with butter. My cousin uses them for mini pizzas. That’s genius, right?

Don’t forget: baking your own means you control the ingredients, so if you want less salt, more cheese, or gluten-free…you’re the boss.
Jalapeño Cheddar Bagels

Common Misconceptions about Jalapeño Cheddar Bagels

Alright—let’s clear the air about a few things. Some people (my neighbor included) thought Jalapeño Cheddar Bagels would be way too spicy for regular folks. Not even close. Like, unless you’re tossing in ghost peppers, the flavor’s punchy, not painful. Adjust your jalapeño amounts and you’re good.

Another thing: people assume homemade bagels take hours and hours. Honestly? Maybe an hour and change, most of it is the dough rising, so you’re not doing much. Plenty of time to scroll your phone or toss in laundry between steps.

Also, bagels are for breakfast… or? No way! Not with these. Try ’em for lunch, as a base for breakfast melts, or even dinner sandwiches. I once made a grilled cheese with these as the “bread”—mind blown.

“I used to think making bagels was intimidating, until I tried your recipe. Now we make a batch almost every week—my kids even help!” – Jamie H., loyal reader

Practical Applications of Jalapeño Cheddar Bagels

So, besides wolfing them down straight outta the oven (yep, I’ve done it every time), Jalapeño Cheddar Bagels are super versatile. I make a big batch on Sunday and eat them all week. Sliced with a fried egg for breakfast: amazing. Toasted with just a little butter? Next level.

They also make wild good sandwich rolls. My personal favorite: bacon, avocado, and tomato. That combo with the spicy cheese? If heaven has a lunch menu, it’s on there.

Picnic? Toss a few bagels in a basket with some deli stuff—bam, instant picnic hero.

Surprisingly, they freeze like a dream. Just let them cool, pop them in a bag, and you’ve got a stash for any “ugh, no food in the house” crisis.

Just in case you’re on the hunt for delicious “easy bread recipes” to add some variety, you can explore a ton more.

Tips for Implementing Jalapeño Cheddar Bagels Effectively

Now for what you came for—the real-life, “here’s what I learned the hard way” stuff.

  • Don’t skimp on cheese. Seriously, piles of cheddar make these unforgettable.
  • Fresh jalapeños are worth it over jarred. Trust me, better bite and less sog.
  • If the dough feels sticky, a bit more flour fixes everything.
  • They’re best fresh, but toasting them later brings ’em back to life.

If the dough’s rising slower than you like, find a warmer spot. Sun on the kitchen table? Works wonders.

Share ‘em with people—big smiles are guaranteed.

Common Questions

Can I make Jalapeño Cheddar Bagels less spicy?
Absolutely! Just use fewer (or milder) jalapeños, or scrape out the seeds for a gentler heat.

Do I need any fancy kitchen tools?
Not really. A bowl, a baking tray, and your hands are enough. A stand mixer helps, but it’s not required.

How should I store leftovers?
Let them cool, then pop into a zip-top freezer bag. Boom, they’re good for weeks in the freezer.

Can you use a different cheese?
Totally. Pepper Jack is solid, Monterey Jack too. Just don’t use something too soft or it’ll ooze everywhere.

Are homemade bagels really worth the effort?
Listen, if you want to impress yourself (or, um, anyone you’re feeding), they’re absolutely worth it. And you’ll crave them again after the first bite.

Give Your Breakfast a Spicy Upgrade

So, here’s the scoop. Jalapeño Cheddar Bagels are the easiest way to turn boring mornings into something special. The mix of spicy and cheesy is just fun, and honestly, anyone can make these at home with a little patience. If you’re still feeling hesitant, check out Jalapeno Cheddar Bagels – I Wash You Dry for another awesome take, or swing by Jalapeño Cheddar Bagels – Cooking With Karli – Cooking With Karli to see how others are doing it. Promise, once you try these, plain bagels will feel a little “meh” forevermore. Give yourself permission to experiment, and hey—don’t forget to brag a little when they come out amazing.

Jalapeño Cheddar Bagels

Spicy and cheesy bagels that are a perfect upgrade for your breakfast, easy to make and customize.

Dough Ingredients

  • 4 cups all-purpose flour (Use more if the dough is sticky.)
  • 1 tablespoon active dry yeast (To help the dough rise.)
  • 1 cup warm water (Not too hot, for activating yeast.)
  • 1 tablespoon salt (To enhance flavor.)

Add-ins

  • 1 cup cheddar cheese, shredded (Extra cheese on top for serving.)
  • 1 cup fresh jalapeño, diced (Adjust amount according to spice preference.)

Preparation

  1. In a large bowl, combine warm water and yeast. Let it sit for about 5 minutes until foamy.
  2. Add flour, salt, and diced jalapeños to the yeast mixture. Stir until combined and knead for about 5 minutes.
  3. Cover the dough and let it rise in a warm place for approximately 30 minutes.

Boiling & Baking

  1. Preheat your oven to 425°F (220°C).
  2. Bring a large pot of water to a boil.
  3. Divide the dough into 8 equal pieces, shape them into bagels, and let them rest for 5 minutes.
  4. Boil each bagel for about 1 minute on each side, then place on a baking tray.
  5. Sprinkle shredded cheddar cheese on top of each bagel.
  6. Bake in the preheated oven for 20 minutes or until golden brown.

Best enjoyed fresh or toasted later. Store leftovers in a zip-top freezer bag.

Breakfast, Snack
American
Bagels, Breakfast Recipes, Comfort Food, Homemade Bagels, Jalapeño Cheddar Bagels

Deliciously Moist Almond Flour Banana Bread – No Guilt Treat!

A slice of moist Almond Flour Banana Bread on a wooden table, garnished with banana slices.

Almond Flour Banana Bread is my tried-and-true fix for those bananas gone freckly on the counter (why does that always happen in the blink of an eye?). If you’re like me, maybe you want something sweet but not overloaded with guilt or weird ingredients you can’t pronounce. Not to mention, classic banana bread can get heavy and super sugary. This one’s so simple, good for a snack or breakfast, and honestly? I love that it’s gluten-free! For more easy bakes with almond flour, check out the fluffy pancakes here and see how almond flour works magic in these low-carb muffins.
Deliciously Moist Almond Flour Banana Bread - No Guilt Treat!

Ingredients In Almond Flour Banana Bread

The stars of this show are things you probably already have around, or they’re easy grabs at any grocery. Let’s break it down. For almond flour banana bread, you’ll need:

  • 3 medium overripe bananas (the uglier the better, really)
  • 2 cups almond flour (the fine kind—trust me, don’t use almond meal)
  • 2 large eggs
  • 1/4 cup maple syrup or honey (either, your call)
  • 1 teaspoon vanilla extract
  • 1 teaspoon baking powder
  • 1/2 teaspoon baking soda
  • Pinch of salt
  • Optional: 1/2 cup chopped nuts or chocolate chips (choose your own adventure)

No complicated stuff here. No butter. No regular flour. I can’t tell you how many times I’ve swapped the sweetener based on what I remembered to buy that week. This recipe forgives you.

I never thought banana bread could taste this good without regular flour. My kids and husband devoured it within an hour—no exaggeration!

Almond Flour Banana Bread

How To Make Almond Flour Banana Bread

First things first, grab a medium mixing bowl—no need to dig out the giant one. Mash those ripe bananas till they’re mostly smooth, little lumps are fine. Toss in the eggs, maple syrup or honey, and vanilla. Give that a quick whisk.
Now, stir in the almond flour, baking powder, baking soda, and salt. If the batter looks a tad thick, don’t panic, that’s right. Add your nuts or chocolate chips if you’re feeling wild (why wouldn’t you?). Pour into a lined loaf pan, and bake at 350°F (that’s like 175°C if you’re across the pond) for about 45-55 minutes. Your kitchen will smell basically like a bakery halfway through. Toothpick comes out clean? You’re done.
I’m always amazed how easy this comes together—honestly, one bowl is my spirit animal for baking.
Almond Flour Banana Bread

Tips For Making The Best Almond Flour Banana Bread

Okay, real talk. This isn’t just about slapping ingredients together. If you want that amazing texture and taste, I have a few little secrets. First, don’t use cold eggs. Room temp is better. Makes everything combine smoother, no weird clumps.
Use bananas that are ugly—lots of spots, super ripe. They bring the most flavor and sweetness. If your almond flour is clumpy? Sift it. Or, just break up the lumps with your fingers. Nothing fancy—just don’t chuck in big clumps, please.
Also, don’t overbake it. Almond flour browns faster than regular flour. I check around 40 minutes with a toothpick to be safe. Last small bit: let it cool a little before slicing, or it’ll crumble like sandcastles.
My friend once made this recipe in a rush (famous last words) and pulled it out way too early. Banana pudding disguised as bread, yikes.

Variations

So you want to jazz it up, huh? Do it! This recipe plays well with others:

  • Sprinkle cinnamon to the batter for a warmer flavor
  • Top with sliced almonds before baking for a crunch
  • Mix in dried blueberries or chopped dates for fruity sweetness
  • Swap maple syrup for agave or coconut sugar if you like experimenting

You could even turn these into mini muffins (just bake for way less time). I sometimes swirl peanut butter on top before baking. Not exactly scientific, but oh wow, it’s tasty.

How To Store Almond Flour Banana Bread

Got leftovers? This part is easy. Once cooled completely, wrap slices in foil or tuck them into an airtight container. They’ll sit happy at room temperature for 2 days, or better yet, keep them in the fridge for up to 5 days. Pop a slice in the toaster or microwave for a quick warm breakfast.
If you’ve got a lot, freeze it. Just wrap individual slices in parchment and freeze them. Grab one in the morning, toast it, and your future self will thank you. Almond Flour Banana Bread stays moist, not crumbly, so you won’t be left with sad, dry edges.

Common Questions

Can I make almond flour banana bread without eggs?
You can try flax eggs, but it might get a little denser. Works in a pinch!

Can I use coconut flour instead of almond flour?
Nope. Coconut flour soaks up a lot more liquid. Totally different animals.

Will this recipe work with frozen bananas?
Yes, just thaw and drain off any extra liquid before mashing them in.

Is almond flour banana bread healthy?
It’s less sugary and more wholesome than regular versions, thanks to the almond flour and minimal added sweetener.

Can I add protein powder to this?
If you want, just swap out a little almond flour for protein powder (maybe 1/4 cup). It’ll be a bit more dense.

You’ve Got To Try This Almond Flour Banana Bread

If you’re hunting for a banana bread that’s easy, forgiving, and (let’s be honest) secretly healthy, this almond flour banana bread is a must. You don’t need fancy tools or a five-star kitchen, and it tastes great warm or cold. Mighty good for sharing, or you know, hiding the last slice for yourself.
I’ve picked up ideas from pros like Almond Flour Banana Bread – NO Sugar Required! and Almond Flour Banana Bread – Mama Knows Gluten Free on my adventure to the perfect loaf. Try it and see if it doesn’t become your go-to, too!

Almond Flour Banana Bread

A simple and guilt-free banana bread recipe made with almond flour. Perfect for breakfast or a snack, it’s gluten-free and delicious.

Main Ingredients

  • 3 medium overripe bananas (The uglier the better for sweetness.)
  • 2 cups almond flour (Use the fine kind, not almond meal.)
  • 2 large eggs (Room temperature for best results.)
  • 1/4 cup maple syrup or honey (Your choice.)
  • 1 teaspoon vanilla extract
  • 1 teaspoon baking powder
  • 1/2 teaspoon baking soda
  • 1 pinch salt
  • 1/2 cup chopped nuts or chocolate chips (Optional.)

Preparation

  1. Preheat your oven to 350°F (175°C) and prepare a lined loaf pan.
  2. In a medium mixing bowl, mash the ripe bananas until mostly smooth.
  3. Add in the eggs, maple syrup or honey, and vanilla. Whisk until combined.
  4. Stir in the almond flour, baking powder, baking soda, and salt until just combined.
  5. If desired, fold in the chopped nuts or chocolate chips.
  6. Pour the batter into the prepared loaf pan and bake for 45-55 minutes.
  7. Check for doneness by inserting a toothpick; it should come out clean.

Store cooled bread in an airtight container. It lasts up to 2 days at room temperature and up to 5 days in the fridge. Can be frozen for longer storage. For best texture, avoid overbaking and let it cool before slicing.

Breakfast, Snack
Gluten-Free, Healthy
Almond Flour, Banana Bread, Gluten-Free Baking, Healthy Snacks, Low-Carb Bread

Irresistibly Smooth Cottage Cheese Chocolate Mousse in Minutes

Delicious Cottage Cheese Chocolate Mousse dessert topped with chocolate shavings.

Cottage Cheese Chocolate Mousse pretty much saved my dessert routine last week. I mean, who has time to fuss for hours with complicated, fussy sweet recipes when you want chocolate—like, now? The story goes, I was scrolling for easy high-protein treats when I stumbled across my new little obsession. Not only is it quick, it’s packed with good stuff, and don’t even get me started on how creamy it tastes. Reminds me of the first time I made this Keto Philly Cheesesteak Casserole that surprised even me with its simplicity and flavor. Oh, and if you enjoy speedy, clever dishes, check out my hands-down favorite Keto Philly Cheesesteak Casserole—it’s a lifesaver on busy weeknights.
Irresistibly Smooth Cottage Cheese Chocolate Mousse in Minutes

Why You’ll Love This Cottage Cheese Mousse

Here’s the thing about Cottage Cheese Chocolate Mousse: you get dessert that’s so smooth and rich, you might forget it’s actually loaded with protein. I mean, talk about hitting the jackpot! For someone who’s always on the go (aren’t we all?), this recipe is a game changer. It’s done in minutes, honestly, maybe even less if you skip the extra tasting and licking the spoon part. The magic is that it’s truly creamy—no gritty bits, just velvety mousse you’d swear came from a five-star restaurant. But it’s made with what? Cottage cheese? Sounds a little wild, I know, but I was absolutely shocked (in a good way) by how the cottage cheese disappears into chocolate bliss. I served it to my brother last weekend and he asked if I was holding out on some secret ingredient. There’s no guilt, either. It feels a bit like cheating on your diet, except you’re not. Basically, it’s the kind of recipe that fixes those late-night chocolate cravings without wrecking your day.
Irresistibly Smooth Cottage Cheese Chocolate Mousse in Minutes

“I never thought cottage cheese could taste this good. Seriously, I’m hooked! My husband couldn’t get enough and asked if I’d made a batch for every day this week.”

Key Ingredients

Believe it or not, you only need a few things for this Cottage Cheese Chocolate Mousse. Here’s what I always grab from my fridge and pantry:

  • Cottage cheese: Go for the full-fat stuff for extra creaminess. Low-fat works too, but the flavor is bolder with the original.
  • Cocoa powder: Unsweetened, since you want that deep, chocolatey punch. Don’t scrimp on this part. It matters!
  • Sweetener of choice: Use honey, maple syrup, agave, or, if you’re keeping it lower-carb, a dash of your favorite keto sweetener.
  • Vanilla extract (optional, but oh boy, it’s worth it): Just a splash for that little extra something.
  • Pinch of salt: Not everyone tosses it in, but trust me—it lifts the chocolate flavor in a way that’s… well, just try it once.

That’s really it. All stuff you’ll find in your average kitchen, so no last-minute grocery runs.
Irresistibly Smooth Cottage Cheese Chocolate Mousse in Minutes

Step-by-Step Instructions

Making Cottage Cheese Chocolate Mousse is about as easy as opening your fridge. I actually timed myself once, just out of curiosity, and I think I broke some kind of record.

First, dump your cottage cheese in a blender or food processor. Add the cocoa, sweetener, vanilla (if you’re cool like that), and just a pinch of salt. Now, blend it up. Don’t stop until you can’t see any curds left. It should look totally smooth and whipped, like a custard or thick pudding. If you want it fluffier, blend for another 30 seconds. That’s it. Spoon it into little cups or glasses, toss them in the fridge for a few minutes, and you’re good to go. Sometimes I eat it straight from the blender, but that’s between me and my sweet tooth.

That’s honestly the core of it. I’m not kidding when I say it’s a no-mess, no-fuss snack or dessert. If you can push a blender button, you’re golden.

Variations

Don’t feel stuck with just chocolate. Once you’ve tried the basic Cottage Cheese Chocolate Mousse, you’ll want to mix things up. Swap vanilla for almond extract, or switch out the cocoa powder for peanut butter powder if you’re feeling wild. Sprinkle in some instant espresso for a mocha vibe (oh man, it’s good). Fresh berries on top or mixed in? Yes, please. I’ve even snuck in a spoonful of Greek yogurt for extra tang. Want it fancy? A little shaved dark chocolate or a dollop of whipped cream totally elevates this dish.

My friend actually makes her Cottage Cheese Chocolate Mousse as a quick breakfast—no kidding. She swirls in chia seeds and chopped nuts, then calls it a power mousse. Sticky, yum, and definitely filling.

Serving Suggestions

Here’s how I like to dress up my Cottage Cheese Chocolate Mousse. Just a few ideas to help you make it your own:

  • Top with sliced strawberries for a boost of freshness. Classic, you can’t go wrong.
  • Layer with crushed nuts if you like a bit of crunch in every bite.
  • Dust with extra cocoa powder for those true chocolate fiends (like, me, obviously).
  • Serve in cute mini glasses if you’re feeling a tad bit fancy for guests or, you know, just yourself.

Storage Instructions

Usually—let’s be real—Cottage Cheese Chocolate Mousse doesn’t last long enough to worry about storage. But if you manage to save some, it’ll keep in the fridge for about three days. Just cover the bowl or use a container with a tight lid, because you don’t want it picking up fridge smells. If it gets a little thick (rare, but possible), just stir in a splash of milk or cream to loosen it up. Freeze it? Sure, but the texture does change, and not everyone loves that. Maybe treat yourself fresh instead. Now, back to making it disappear…

Common Questions

Does it taste like cottage cheese?
Nope, not at all! The cocoa and vanilla make it totally dessert-like. Even my picky cousin was convinced.

Can I use low-fat cottage cheese?
Of course, but it’s creamier if you use full-fat. Both work, so use what you’ve got.

What’s the best way to blend it?
Food processor gives a super smooth finish, but a high-power blender does great too.

Can I make it ahead for parties?
Absolutely! Make it the day before, stash in the fridge, and give it a quick mix before serving.

How much sweetener should I use?
Totally up to you. Start with a spoonful, taste, and add more if you need that extra kick.

Just Make It—You’ll Thank Yourself

There you go, folks. All the secrets for Cottage Cheese Chocolate Mousse delivered straight from my kitchen to yours. It’s affordable, ridiculously fast, and totally customizable—a dessert you can feel good about eating. Don’t forget to hop over and try my Keto Philly Cheesesteak Casserole if you love easy wins like this. Seriously, give this a shot. I used to think making mousse was a professional-chef-only thing—turns out, it’s as simple as pushing a button. For even more ideas, you might want to check out some cool versions like this High Protein Cottage Cheese Chocolate Mousse or the 5-Minute Silky Cottage Cheese Chocolate Mousse. Happy blending, happy eating, and let me know how yours turns out!

Cottage Cheese Chocolate Mousse

This Cottage Cheese Chocolate Mousse is a deliciously creamy dessert that’s high in protein and incredibly quick to make—perfect for satisfying those late-night chocolate cravings without any guilt.

For the mousse

  • 1 cup Cottage cheese (Use full-fat for extra creaminess.)
  • 1/4 cup Cocoa powder (Unsweetened, for deep chocolate flavor.)
  • 2 tablespoons Sweetener of choice (Honey, maple syrup, agave, or keto sweetener.)
  • 1 teaspoon Vanilla extract (Optional but recommended for flavor enhancement.)
  • 1 pinch Salt (Enhances chocolate flavor.)

Preparation

  1. Add the cottage cheese to a blender or food processor.
  2. Include cocoa powder, sweetener, vanilla extract, and a pinch of salt.
  3. Blend until completely smooth and whipped, with no visible curds.
  4. For a fluffier mousse, blend for an additional 30 seconds.
  5. Spoon the mousse into cups or glasses and refrigerate for a few minutes.

Store in the fridge for up to 3 days. If it thickens, stir in a splash of milk or cream. Can be frozen but the texture may change.

Dessert, Snack
American
Chocolate Mousse, Cottage Cheese Chocolate Mousse, Easy Dessert, Healthy Snack, High Protein Dessert

Deliciously Simple Keto Chicken Salad You’ll Crave!

Delicious keto chicken salad made with shredded chicken, mayo, and crunchy pecans.

So, keto chicken salad. It sounds pretty basic, right? But let me tell you, some days I just stare at my fridge and think, “What’s easy, won’t trash my carb count, and still actually tastes good?” This is where keto chicken salad walks in like a superhero. You get something filling, tasty, and shockingly simple. I’ve made it for picnics, quick lunches, even late-night munchies (guilty, oops). Oh and if you want more low-carb dinner inspiration, definitely check out this easy keto chicken enchilada casserole that’s just as craveable as it sounds.

keto chicken salad

Why This Recipe Works

Listen, nobody’s got time for complicated recipes every day. That’s why keto chicken salad has become my secret weapon on those “I’m starving but don’t want to cook” nights—happens more than I care to admit. You can use leftover rotisserie chicken, or just poach a couple chicken breasts. Seriously, even canned will do in a pinch.

Here’s the kicker: the fatty dressing keeps you full without feeling heavy. No sad desk salad here. Mayo, a spike of mustard, maybe some crunchy celery or fresh dill for zing. It all just… works. Even my friend Kim, who claims she “hates diets,” asked for seconds.

“I tried this on a whim, and now it’s taken over my weekly meal prep. So easy and you can’t screw it up!” — Carla M.

Deliciously Simple Keto Chicken Salad You'll Crave!

Recipe Variations

Let me get real with you—no two keto chicken salads I make taste exactly the same. That’s the fun part. Got pickles? Toss ‘em in. Scallions laying around? Yup, slice those up. If you like it with a hit of crunch, chopped pecans or sliced almonds totally work.

Another cool trick: squeeze in some lemon or a dash of ranch powder. Avocado? Yes, please. One time I even mixed in bacon and blue cheese—it might’ve been my five-star version. Oh and if you’re a fan of spicy, a few drops of hot sauce never hurt anyone.

Play around, make it yours. As long as the base is solid, everything else is just bonus flavor.

Deliciously Simple Keto Chicken Salad You'll Crave!

Serving Suggestions

Alright, so you’ve made this delicious bowl of keto chicken salad… now what? Here’s some of my go-to ways to eat it:

  • Pile it onto crunchy lettuce leaves for DIY wraps
  • Top it on cucumber slices for a super-easy snack
  • Fill mini bell peppers (so cute for parties, btw)
  • Honestly, I just grab a fork and dive in straight—no judgment

Try it once with cold keto chicken salad on a bed of greens for lunch, then toss leftovers into a quick wrap or low-carb sandwich the next day. Super versatile (and yes, lunchbox-friendly).

More Keto Salad Recipes

Obsessed with keeping meals fresh and green? I’ve totally been there. After getting the hang of keto chicken salad, I started dabbling in other salad adventures. Seriously, you’d be surprised how different chopped chicken, bacon, and ranch can taste when you swap dill pickles for olives or add a sprinkle of smokey paprika. Maybe even try mixing in a few nuts, or roasted cauliflower bits if you’re not entirely a salad purist like my sister.

And hey, you can always perk up your meal with a side of warm soup from my keto chicken tortilla soup collection for a little comfort action. Trust me, salads don’t need to be boring.

More Keto Dinner Ideas

If there’s one thing I love more than a killer salad, it’s having options for dinner that don’t mean hours in the kitchen. Keto chicken salad is perfect for batch-prepping but you probably want some variety. I often cycle through classics like keto casseroles, cheesy spaghetti squash bakes, or easy skillet recipes.

When I’m feeling more creative, I’ll whip up these keto chicken nuggets for a change. The best part is you can switch between salads, hot dinners, and even sneaky-snack options without ever missing the bread or carbs. Freedom!

Common Questions

Q: Can I use canned chicken?
Yep, totally. Drain well, then shred with a fork for best texture.

Q: How long does keto chicken salad last in the fridge?
Usually 3 to 4 days, if you can keep from eating it all before then.

Q: Is it okay to freeze leftovers?
I don’t recommend it. The mayo turns weird. Just make enough for the week.

Q: Can I swap mayo for Greek yogurt?
You can—makes it a touch tangier and lighter. Still tasty.

Q: Any tricks for extra flavor?
Try smoked paprika, a little lemon, or chopped herbs. Honestly, experiment!

Give This a Whirl—You’ll Thank Yourself

So there it is: keto chicken salad is simple, endlessly adaptable, and a staple in my kitchen. If you’ve never tried it, well, you’re overdue for an easy win. Don’t believe just me, check what folks at Keto Chicken Salad – That Low Carb Life and Keto Chicken Salad – Sugar Free Londoner have to say. For extra tips or twists, Keto Chicken Salad Recipe: How to Make Delicious Chicken Salad … has even more ideas. Whether it’s prepping for weekday lunches or making something quick before you dash out the door, give it a shot—promise you’ll crave it again. Good luck, hungry friends!

Keto Chicken Salad

A quick, easy, and tasty keto chicken salad that is perfect for lunch, picnics, or a low-carb dinner option. It’s versatile and can be customized to your liking.

Main Ingredients

  • 2 cups cooked chicken, shredded (Use leftover rotisserie chicken or poached chicken breasts.)
  • 1 cup mayonnaise (This is the base dressing.)
  • 1 tablespoon mustard (For added flavor.)
  • 1 cup celery, chopped (Adds crunch.)
  • 2 tablespoons fresh dill, chopped (Optional, for freshness.)

Optional Add-Ins

  • 1/2 cup pickles, chopped (For extra flavor.)
  • 1/4 cup scallions, sliced (For a bit of onion flavor.)
  • 1/2 cup chopped nuts (like pecans or almonds) (For added crunch.)
  • 1 medium avocado, diced (For creaminess.)
  • to taste hot sauce (Optional for spice.)

Preparation

  1. In a large bowl, combine shredded chicken, mayonnaise, and mustard.
  2. Add chopped celery and dill. Mix until well combined.
  3. If using, add any optional ingredients like pickles, scallions, nuts, or avocado and mix gently.

Serving

  1. Serve on crunchy lettuce leaves, cucumber slices, or in mini bell peppers.
  2. Enjoy straight from the bowl or store for lunches throughout the week.

Keto chicken salad is highly customizable. Feel free to experiment with different add-ins and serve it in various ways. It keeps well in the fridge for about 3-4 days.

Lunch, Snack
American, Keto
chicken salad, Healthy, Keto Recipes, Low Carb