Deliciously Easy Low-Carb Keto Hash Browns You’ll Love!

Crispy low-carb keto hash browns made with cauliflower served with a sunny side up egg.

Low-carb keto hash browns. OK, so tell me if this sounds familiar—you wake up, want something crispy and golden at breakfast, but potatoes are off the menu because, well, those carbs add up fast. Boy, have I been there. It’s that moment when you miss hash browns like crazy, but you really want to keep things keto. For me, this is where my favorite swap comes in and trust me, these homemade keto hash browns are a total game-changer. Plus, if you need more healthy side dish ideas, check out this genius air fryer spaghetti squash low-carb keto side dish—so handy! Some mornings I’m all about comforting things like this beef heart stew keto recipe too, but let’s get crispy this time.
low-carb keto hash browns

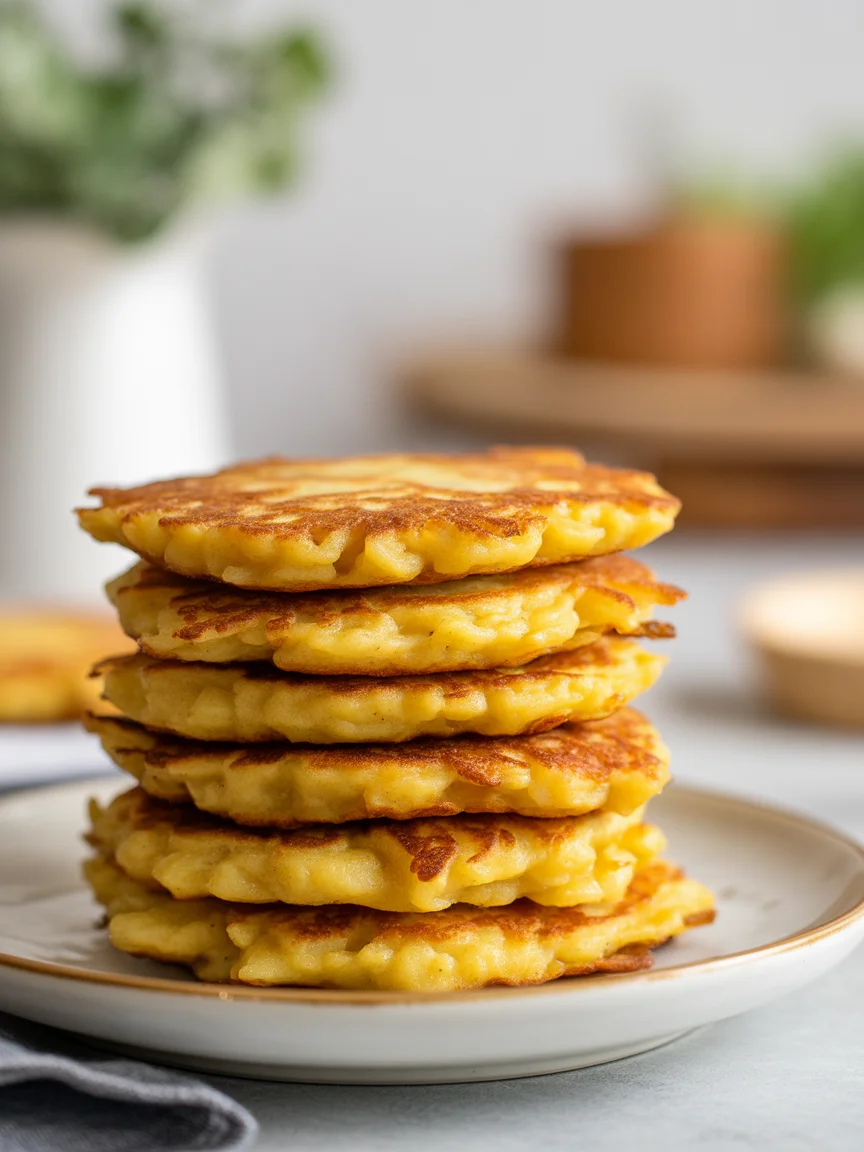
Cauliflower Rice as Potato Alternative

Let me just spill the beans—I was totally skeptical about cauliflower rice at first. Maybe you’ve looked at that bag in the freezer section and thought, hmm, really? But when it comes to making low-carb keto hash browns, cauliflower rice is like magic. It gives you that golden outside and soft inside, a lot like real potatoes, but without the carb overload.

Here’s the secret: you’ve got to squeeze out all the extra water from the cauliflower after you cook it. Makes a world of difference—otherwise, they’ll never crisp up. And if you want extra flavor, honestly, a sprinkle of cheese or a pinch of smoked paprika absolutely turns things next-level. Cauliflower isn’t just for pretending to be rice. When it’s done right, it’s cozy, satisfying, and honestly, my taste buds barely miss the potato. No joke. So if you’re like me—always on a mission to keep it low-carb without missing out—try it.
low-carb keto hash browns

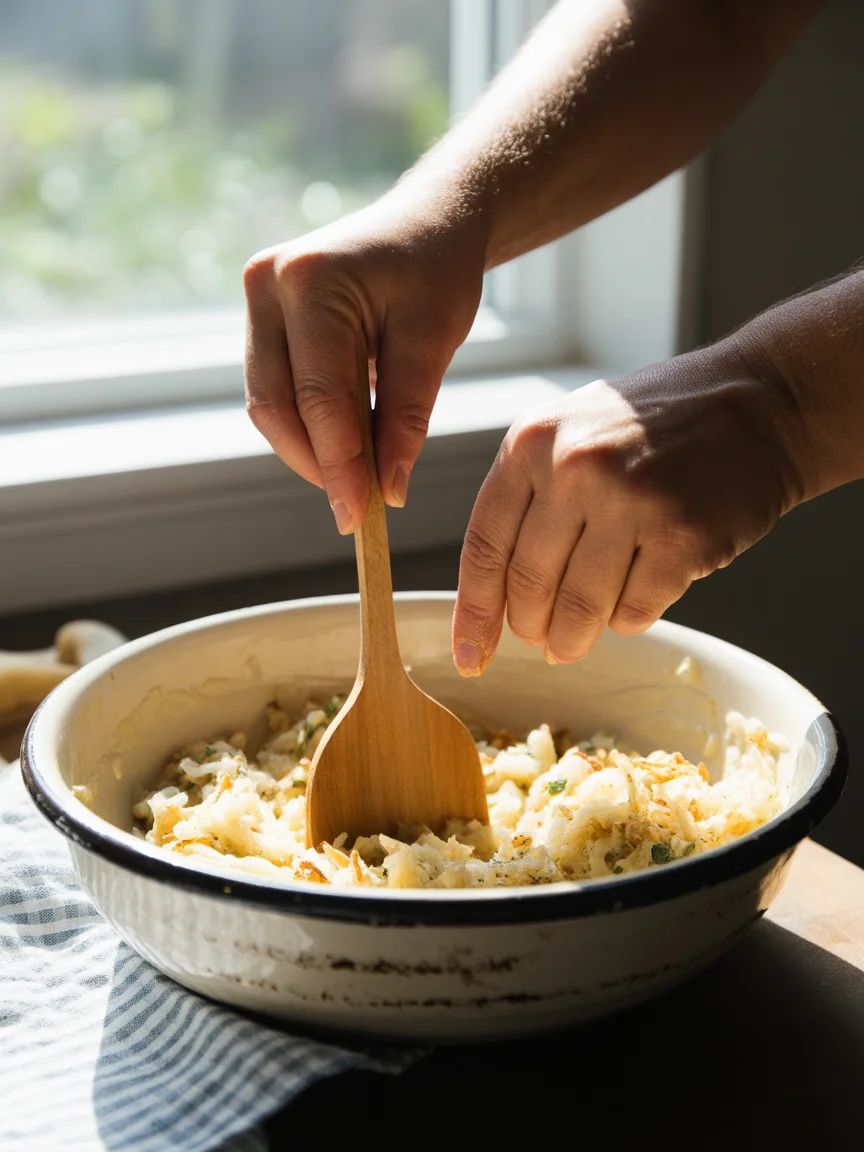
How to make Keto Hash Browns

This is where it gets fun (well, I think so, anyway). I’m going to lay out my go-to method for making these beauties. Spoiler: it’s weirdly easy compared to making actual hash browns.

Start with a bag of frozen cauliflower rice, or just blitz some florets in your food processor. Quickly steam or microwave to soften it up. Here’s the crucial step—grab a clean kitchen towel and wring out the moisture like you mean it.

Now, dump your cauliflower into a bowl. Add an egg to help it hold together. Sprinkle in a little almond flour and cheese (cheddar, mozzarella, whatever, go wild). I like to add some salt, pepper, and if I’m feeling dangerous, a little garlic powder.

Mix it all up. Heat a nonstick skillet with avocado oil or butter. Spoon the mixture in, mash it down gently, and fry until the edges get crisp—about 3 minutes each side. Don’t mess with them too much, let them get that color before flipping. Boom. There it is. Your low-carb keto hash browns are ready to devour. My advice? Eat them hot, right off the skillet. Nothing beats the smell, I swear.

I used to think eating keto meant giving up all my favorite comfort foods, but these hash browns are unreal. My husband kept saying, “Are you sure there’s no potato in here?” Seriously, major breakfast win.

Deliciously Easy Low-Carb Keto Hash Browns You’ll Love!

What to serve with keto hash browns

Okay, so you made low-carb keto hash browns. Now what? Well, that’s where breakfast gets fun (and filling). Here are some of my top pairings:

  • Stack them up alongside crispy bacon or sausage links. I mean, is there a better combo?
  • Pair with sunny side eggs, and let that yolk run all over. You’ll thank me.
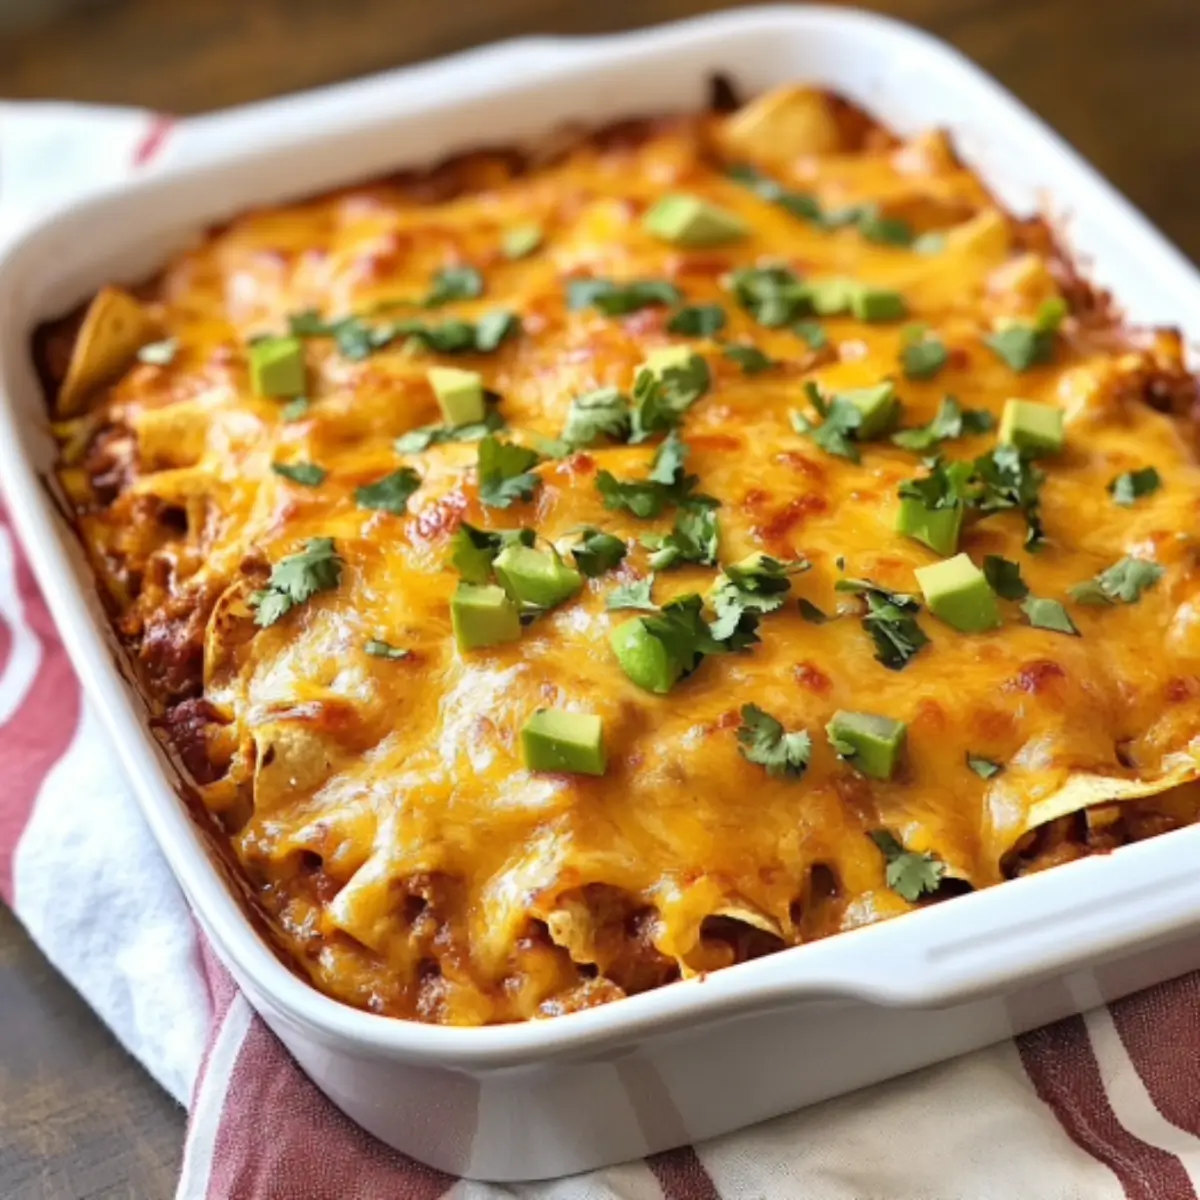
  • Make a breakfast sandwich! Slip a hash brown patty between two eggs or even more creative, with this keto beef enchilada casserole on the side for a savory twist.
  • Want to keep things veggie? Add some sliced avocado, salsa, or a dollop of sour cream.

Really, these hash browns go with almost any keto-friendly meal. They’re just as good for lunch or even dinner. (Not too weird, right?)

Recipe Tips for Perfect Hash Browns

Let’s be real, sometimes cauliflower recipes can go sideways. But I’ve messed up more hash browns than I care to admit, so here’s what I’ve learned.

First off, really drain the cauliflower after cooking it. Soggy cauliflower is the enemy of crunch. Using a cheesecloth or just a regular towel, just squeeze like you’ve had a stressful week. Next, don’t skimp on the cheese if you want extra flavor—the cheese helps hold everything together and gives those wonderful crispy edges.

If your mix feels too wet (eggs can vary a lot), sprinkle in a little extra almond flour. Or heck, even coconut flour works in a pinch. Give it a minute to sit so it’s not runny. When frying, don’t rush the process. Leave them alone in the pan so they get beautifully brown on one side before you even think about flipping. Oh, and if you like a smoky touch, a tiny pinch of smoked paprika is wild.

Trust your instincts—if the batter feels off, adjust it. These are homemade hash browns, not a five-star restaurant’s secret signature.

Storage Instructions

Assuming you somehow have leftovers (it happens! well, sometimes), you’ll want to save them so nothing goes to waste. Slide any extra low-carb keto hash browns into an airtight container. They’ll keep in your fridge for up to four days no problem.

When you’re ready for round two, heat them in a nonstick skillet over medium. You can zap them in the microwave, sure, but honestly, they crisp back up so much better in a pan. If you want to freeze them, layer them with parchment to prevent sticking. Thaw overnight in the fridge, then fry till warm. They’re nearly as good as fresh—maybe even better, because you get crispy squares in half the time.

Common Questions

Can I use fresh cauliflower instead of frozen?
Of course! Fresh works just fine, just grate or use the food processor. Squeeze out all that moisture for best results.

Can I make these dairy-free?
Yes! Swap the cheese for your favorite dairy-free alternative. It won’t be quite as melty, but still yummy.

Are low-carb keto hash browns good for meal prep?
For sure. Make them ahead and stash in the fridge. Reheat in a pan to get that crisp back.

Can I bake them instead of frying?
Totally—use a parchment-lined baking sheet, press them into patties, spray with oil, and bake at 400°F until golden. Not quite as crispy, but super convenient.

Do you need almond flour or can you skip it?
I recommend it for the best texture, but you can use coconut flour or just extra cheese in a pinch.

Hash Brown Heaven Awaits

So, that’s the scoop. You don’t have to give up crispy breakfast favorites just because you’re watching carbs. These low-carb keto hash browns are easy, fast, and honestly so close to classic it feels a little like magic. Other folks have come up with pretty clever cauliflower hash browns recipes too, so you know it works. If you ever wondered about all the alternatives, someone even tested 4 keto hashbrown alternatives and found cauliflower wins—ha, told ya. Try them out, maybe whip up some dinner keto recipes while you’re at it. Don’t wait for a special Sunday. Breakfast-for-dinner, anyone? Let me know how yours turn out.

Keto Hash Browns

Delicious low-carb keto hash browns made with cauliflower rice, perfect for a crispy breakfast without the carbs.
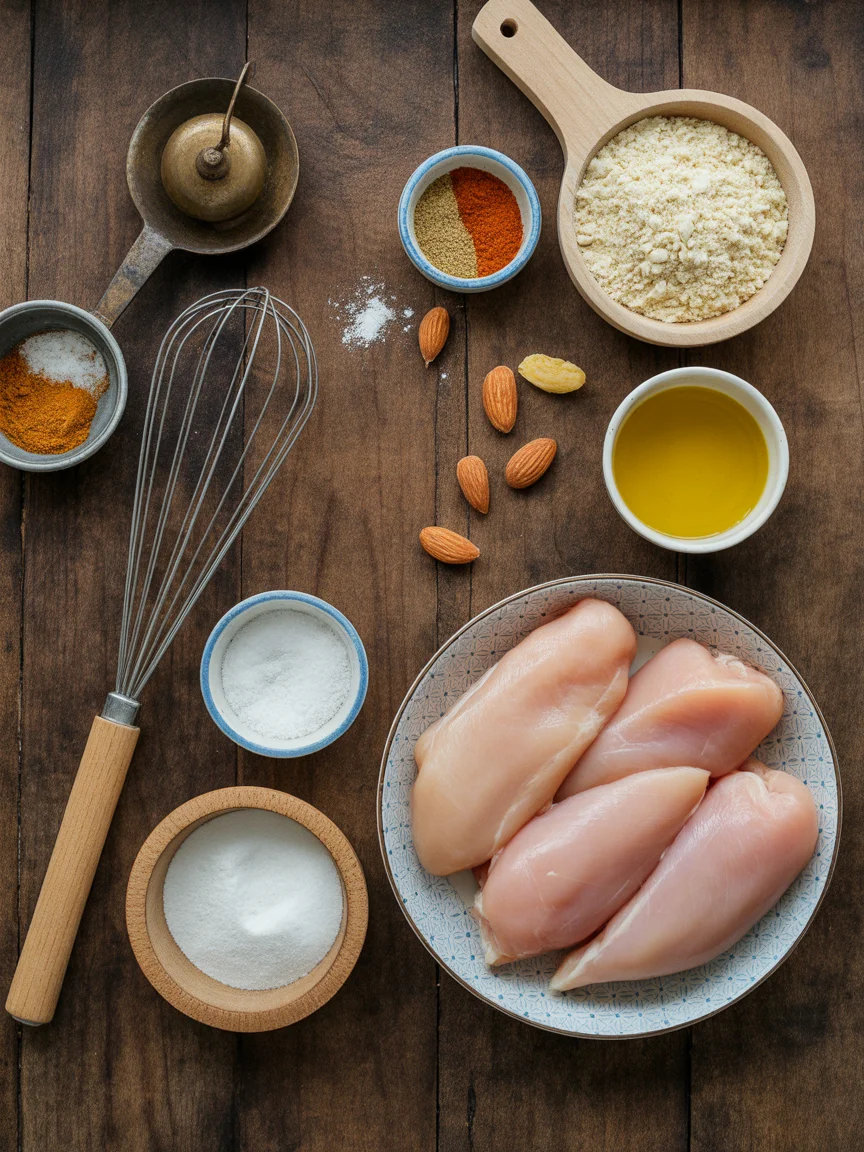
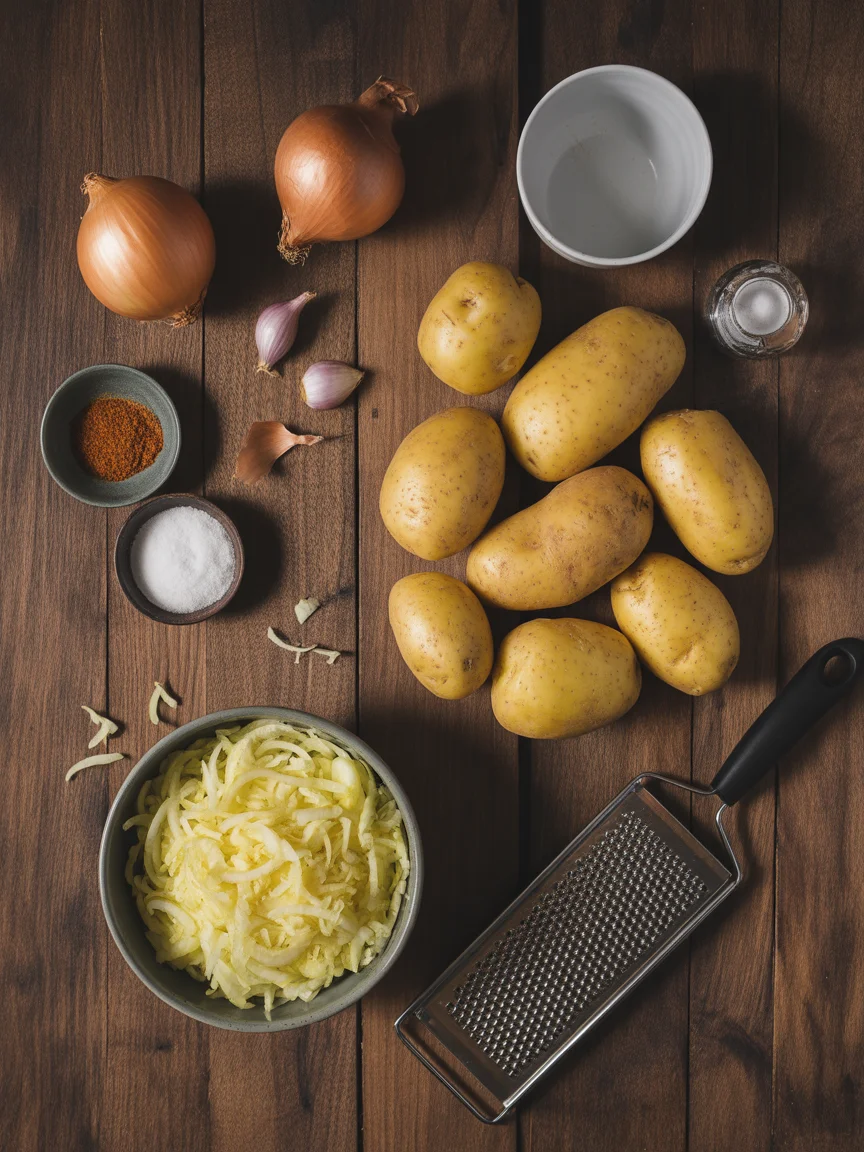
Main ingredients

  • 1 bag frozen cauliflower rice (Alternatively, use fresh cauliflower and process it.)
  • 1 large egg (Helps to bind the mixture.)
  • 1/4 cup almond flour (Can substitute with coconut flour or extra cheese.)
  • 1/2 cup cheddar or mozzarella cheese (Add more for extra flavor.)
  • to taste salt (Adjust as necessary.)
  • to taste pepper (Adjust as necessary.)
  • to taste garlic powder (Optional for flavor.)
  • 2 tablespoons avocado oil or butter (For frying the hash browns.)

Preparation

  1. Steam or microwave the cauliflower rice to soften it.
  2. Using a clean kitchen towel, wring out as much moisture from the cauliflower as possible.
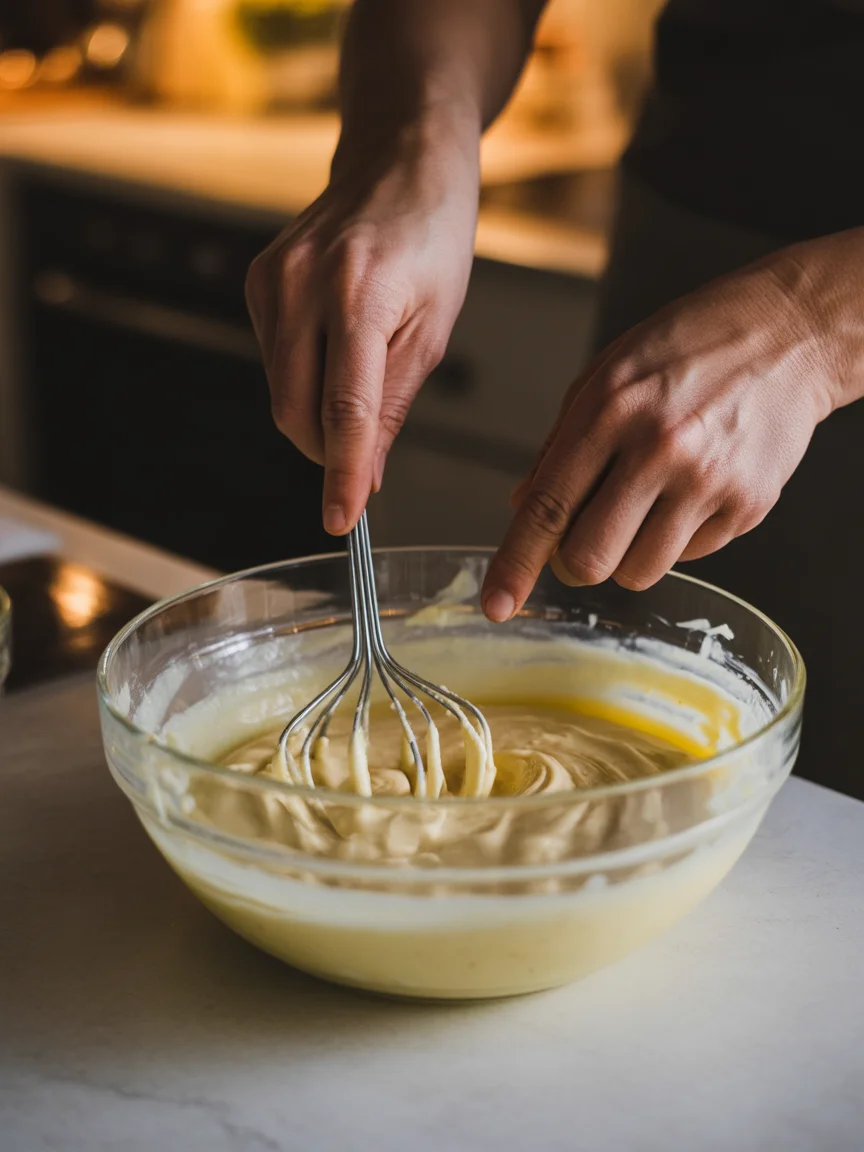
  3. In a bowl, combine the drained cauliflower, egg, almond flour, cheese, salt, pepper, and garlic powder.

Cooking

  1. Heat avocado oil or butter in a nonstick skillet over medium heat.
  2. Spoon the mixture into the skillet and mash it down gently.
  3. Cook for about 3 minutes on each side, until crispy and golden brown.
  4. Do not disturb them too much while frying; let them crisp properly before flipping.

Store leftovers in an airtight container in the fridge for up to four days. Reheat in a skillet for best crispiness. Can freeze and reheat later for a quick meal.

Breakfast, Side Dish
Keto, Low-Carb
Breakfast Recipe, Cauliflower Rice, Healthy Hash Browns, Keto Hash Browns, Low-Carb Breakfast

Crispy Keto Chicken Nuggets You’ll Love in Minutes!

Crispy keto chicken nuggets made with chicken, cheese, and almond flour, low-carb and gluten-free.

Keto chicken nuggets are a total game changer, right? I can’t count how many times I’ve craved drive-thru nuggets and just sat there staring at the menu, knowing I shouldn’t. If you’ve ever eyed those crispy little bites but worried about low-carb goals, you’re not alone. Trust me, you CAN have your favorite comfort food the keto way. I found a recipe at Simply Keto Recipes that honestly fixed all my nugget cravings in one go, and now, well, I make them way too often. Check out this keto chicken nuggets recipe if you’re impatient like me and want the shortcut.

keto chicken nuggets

Why You’ll Love This Recipe

So why am I actually obsessed with these keto chicken nuggets? Let me count the ways, or at least try. First, they taste absolutely incredible. Not even joking, these are crunchy on the outside and juicy inside, just like the fast food spots. I never miss the drive-thru now, that’s for sure.

Second, these are FAST. I’m talking minimal ingredients you likely already have stashed in your kitchen. That’s something I love — no weird flours or eleven kinds of cheese. It’s all straightforward.

And here’s my opinion, probably controversial: homemade nuggets are way more fun. You can play around, snack while you cook, even let the kids help with the coating part (mine always want to, though it gets messy, fair warning). Plus, you’ll feel a little like a five-star chef with zero stress.

Honestly, after you do these once, you’ll get why I’m saying they fix your nugget cravings and keep it keto. Seriously.

“Thought I’d never find a decent keto nugget that made the whole family happy. These did. Haven’t looked back since.” – Jamie L.

keto chicken nuggets

Top Tips

Alright, don’t make the rookie mistakes I did at the start. Here’s how to get your keto chicken nuggets crispy and tasty every single time. The biggest tip? Use bite-size chunks of chicken breast or thigh. Basically, stay away from giant pieces. They cook unevenly, which, trust me, isn’t what you want.

For the coating, almond flour is usually my go-to, but sometimes a bit of crushed pork rind (yep, pork rinds) gives you this extra-level crunch. Season it up! Garlic powder, a little paprika, salt, and pepper. Don’t skimp or the nuggets can taste kind of bland and… blah.

When frying, get the oil hot enough before dropping in your nuggets. Too cool, and they soak up oil like a sponge — too hot, and you’ll burn the outside. I usually test it with a little piece of the coating first. Don’t crowd the pan because then you’ll get soggy results, and no one wants that disappointment.

Final tip? Serve immediately! These keto chicken nuggets have the most satisfying crunch straight off the stove or out of the oven. Get some good dipping sauce ready (more on that soon).

Crispy Keto Chicken Nuggets You’ll Love in Minutes!

Variations

Bored with plain? Me too, sometimes. The awesome thing about keto chicken nuggets is you can switch things up so easily. Swapping out spices changes the whole vibe. If you love heat, a bit of cayenne or buffalo sauce in the egg wash does wild things (in a good way). Sometimes I’ll mix in grated parmesan with the almond flour — makes each bite cheesy and next-level. Want another twist? Dip in sugar-free BBQ before the coating for a tangy crust.

If you’re dairy-free, just skip the cheese. Not kidding, these still hold together and taste great. I’ve even tried a coconut flour variation which was (to be honest) a bit sweeter, but not bad at all. Oh, and kids really love the mini versions. Tiny nuggets, big fun. For other keto chicken ideas with different flavors, check out amazing recipes like easy keto chicken enchilada casserole.

Serving Suggestions and Dipping Sauces for Keto Chicken Nuggets

Okay, let’s get into the good stuff. Here’s how I usually serve my keto chicken nuggets so the whole bunch (even picky eaters) get excited:

  • Classic ranch or blue cheese – you can’t beat creamy dips with that crispy nugget crunch.
  • Sugar-free ketchup (or spicy mayo) – not gonna lie, tastes practically like the “real thing.”
  • With a fresh green salad – make your meal look five-star and get some veggies in, too.
  • Paired with keto chicken tortilla soup if you’re extra hungry, try keto chicken tortilla soup.

Sometimes I pile the nuggets on a platter with a bunch of different sauces, let everyone go to town. Makes weeknight dinners feel special.

Storage

Honestly, these keto chicken nuggets are best fresh, but leftover? Still tasty. After you finish the meal, just pop any extras in an airtight container and stick them in the fridge. They usually keep three days or so (if they last that long!). If you want to re-crisp, throw them into an air fryer or hot oven for a few minutes. The microwave is super convenient but, heads up, will make them a little softer.

If you’re the planning type, you can freeze uncooked coated nuggets on a tray, then transfer them to a bag. Pull out what you need for easy last-minute meals. Not that I ever plan that far, but hey, maybe you’re more organized than me.

Common Questions

Can I bake these instead of frying?
Definitely. Bake at around 400°F until crispy, turning halfway so every side gets a bit of crunch.

What’s the best oil to use for frying?
I love avocado oil. It holds up to high heat and doesn’t leave a weird aftertaste.

Can I use chicken thigh instead of breast?
Sure thing! Thighs come out juicier and are sometimes cheaper, too.

Do these taste like traditional nuggets?
Honestly, yes. They scratch that fried chicken itch with none of the guilt.

Are these nuggets gluten free?
Yep, absolutely. As long as your ingredients are keto-safe and gluten free, you’re good to go.

Ready to Snack Like a Pro

So! That’s the rundown on my favorite crispy keto chicken nuggets, the ones that keep me from raiding the kid’s fast food leftovers. If you get creative with your seasonings and try tricks like pork rinds, you’ll never get bored. Don’t forget there are even more ideas over at Low Carb Chicken Nuggets – Hungry Happens and another take from Keto Chicken Nuggets – Grumpy’s Honeybunch. You can also peep Easy Keto Chicken Nuggets – Beauty and the Foodie for more inspiration. Seriously, just try these nuggets tonight and see if you’re not completely hooked by tomorrow. Happy crunching!

Keto Chicken Nuggets

Delicious and crispy keto chicken nuggets that satisfy your cravings without the carbs.

For the chicken nuggets

  • 1 lb chicken breast or thigh (Cut into bite-size chunks.)
  • 1 cup almond flour (For coating.)
  • 1 large egg (For the egg wash.)
  • 1 tsp garlic powder (For seasoning.)
  • 1 tsp paprika (For seasoning.)
  • to taste salt and pepper (To season the nuggets.)
  • oil for frying avocado oil or preferred oil (For frying.)

Preparation

  1. Cut the chicken into bite-size chunks and set aside.
  2. In a bowl, mix almond flour, garlic powder, paprika, salt, and pepper.
  3. In another bowl, whisk the egg.

Cooking

  1. Dip chicken pieces into the egg and then coat with the almond flour mixture.
  2. Heat oil in a frying pan until hot.
  3. Fry the chicken nuggets in batches, being careful not to overcrowd the pan.
  4. Cook until golden brown and cooked through, about 5 minutes each side.
  5. Serve immediately with your favorite dipping sauce.

For best results, serve hot and consider dipping sauces like ranch dressing or sugar-free ketchup. You can also freeze uncooked nuggets for later use.

Appetizer, Snack
American, Keto
Comfort Food, Crispy Chicken, Healthy Snacks, Keto Chicken Nuggets, Low Carb Nuggets

Deliciously Easy No Bake Keto Cheesecake to Satisfy Cravings

Delicious no bake keto cheesecake topped with berries, low carb and sugar free.

no bake keto cheesecake might be just the treat you’re looking for when that sweet craving sneaks up but turning on the oven sounds…painful. I’ve been there. There’s a reason I almost never bake in the summer. You get a creamy, rich bite and don’t even have to sweat in the kitchen. If you’re already poking around for other easy desserts or quick breakfast ideas, I keep seeing great stuff over at this breakfast keto roundup too. Trust me, quick wins taste sweeter.
no bake keto cheesecake

Why We Love This Recipe

Okay, so here’s the real deal. What makes no bake keto cheesecake such a game-changer? First, zero oven time. You mix, chill, slice, repeat. That’s it. Low carb, so you’re not totally blowing your macros (I’m always watching those). The texture? Smoother than your grandma’s best quilt. I stumbled over this recipe during a week when everything went sideways (ran out of eggs, oven decided to die for no reason—classic), but ended up loving it even more. It’s one of those accidental discoveries that makes you wonder, why did I ever bake cheesecake in the first place?

If you’ve ever tried a “healthy” dessert that tasted like air and sadness, relax. This one is honestly delicious. I served it to my skeptical cousin—she went back for seconds, then asked for the recipe. Nobody knew it was low carb unless I tattle (which I always do because, come on, it’s a flex).

“I had my doubts ‘cause I’m weird about keto desserts, but yours was creamy and lush—couldn’t tell it was any different from the regular kind!” — Mags

no bake keto cheesecake

The Ingredients

Let’s get straight to it—short list, nothing too fancy:

  • 8 ounces cream cheese, at room temp (don’t skip the softening, trust me)
  • 1 cup heavy whipping cream
  • 1/3 cup powdered erythritol (or your fave keto sweetener)
  • 1 teaspoon vanilla extract
  • Pinch lemon zest (optional, but it gives a nice zing)
  • Almond flour or crushed pecans for the quick crust (about 3/4 cup)
  • 2 tablespoons melted butter

You could totally change out the nuts or skip the crust, but this is how I like mine. I’ve even used hazelnuts that one weird time I ran out of almonds.

Step by Step Instructions

You don’t need to be some five-star restaurant chef for this. Seriously, just follow along:

First, get a small bowl and mix your almond flour (or pecans, if you’re wild) with the melted butter. Should kinda clump up. Press it right into your pan or fancy glass dish. Stick this in the fridge while you get the good stuff ready.

Now, grab a bigger bowl. Toss in the cream cheese and erythritol, mash it until no lumps peek back at you. Add vanilla and that shy pinch of lemon zest. Pour in heavy cream slowly and whip (electric mixer is my lazy trick). It’ll look fluffy and pure joy when it’s done.

Pile all your creamy filling on top of the crust, smooth it out with the back of a spoon, and chill. Let it stay in the fridge for at least 3 hours—or, if you can stand to wait, overnight is epic.

Cut yourself a slab and just…enjoy. No judgment if you sneak nibbles straight from the dish.

no bake keto cheesecake

Do You Need To Bake The Cheesecake Crust First?

Short answer? Nope. The cool part about no bake keto cheesecake is that the crust sets up just fine in the fridge. Butter acts like magic glue and keeps it together. I know a lot of traditional cheesecakes have you baking the crust until it’s golden (and your kitchen is a sauna). No thanks—I’ll save my energy.

Now, if you want a truly crunchy base, I get it. You could toast the crust ingredients in a skillet for a couple minutes first (just until it smells nutty), then press and chill. This is totally optional, and genuinely—most folks say they couldn’t tell the difference. For more low carb side dish inspiration, you might want to check out the air fryer spaghetti squash—the perfect low-carb keto side dish recipe. It’s shocking how many things you can just not bake.

Other Toppings For Low-Carb Cheesecake

Bored with plain cheesecake? I get it. Sometimes you want to jazz things up. Here are my favorite low-carb cheesecake topping ideas:

  • Fresh berries: Just a handful goes a long way. I like raspberries or blackberries.
  • Shaved sugar-free dark chocolate: For when you’re feeling extra.
  • Keto-friendly lemon curd or jam: Adds real zing.
  • Whipped topping: Fluffy, easy, looks like something from a diner.

Extra tip—mix a dash of cinnamon into your crust if you want more warmth, or swirl a little nut butter on top for richness.

Common Questions

Q: Can I make this no bake keto cheesecake ahead of time?
A: Absolutely, and you probably should—gives it time to set and flavors mingle.

Q: Can I freeze leftovers?
A: Yes, just slice and wrap individual pieces. Grab a slab straight from the freezer for emergency dessert protocol.

Q: Is it okay to use another sweetener?
A: Definitely. Stevia, monk fruit, whatever works for your taste.

Q: Can I use coconut flour for the crust instead?
A: You could, but keep in mind, you’ll need less. Coconut flour is crazy absorbent.

Q: How long will it stay good in the fridge?
A: I’d say about four days, but it rarely lasts that long in my house.

Give This No Bake Wonder a Try

To wrap it all up, this no bake keto cheesecake is about as simple and satisfying as it gets. You don’t need to fuss with ovens or fancy gadgets, and the texture—trust me—is everything you want in a dessert. If you need inspiration for even more low-carb imagination, check out this creamy spaghetti squash alfredo recipe perfect for your keto diet. There’s a whole wide world of easy keto treats out there.

Hungry for more? Compare this recipe with the pros at No Bake Keto Cheesecake – Quick, No Crust – Broke foodies, peek at Trina Krug’s take, or dive into the wild creativity over at The BEST No Bake Keto Cheesecake – Mad Creations Hub. You really can make your no bake keto cheesecake your own. I say—go wild, get messy, and let your taste buds do the happy dance.

No Bake Keto Cheesecake

This no bake keto cheesecake is a creamy, rich dessert that satisfies sweet cravings without the oven, perfect for low-carb diets.

For the Crust

  • 3/4 cup Almond flour or crushed pecans (About 3/4 cup for the crust)
  • 2 tablespoons Melted butter (Melted butter to bind crust)

For the Filling

  • 8 ounces Cream cheese, at room temperature (Don’t skip softening)
  • 1 cup Heavy whipping cream (Use heavy cream for fluffiness)
  • 1/3 cup Powdered erythritol (Or your favorite keto sweetener)
  • 1 teaspoon Vanilla extract
  • 1 pinch Lemon zest (optional) (Adds a nice zing)

Preparation

  1. In a small bowl, mix almond flour (or pecans) with melted butter until clumpy.
  2. Press the mixture into the bottom of a pan or fancy glass dish and refrigerate.
  3. In a larger bowl, mash cream cheese with erythritol until smooth. Add vanilla and lemon zest.
  4. Slowly pour in the heavy cream while whipping until fluffy.
  5. Spread the creamy filling over the crust and smooth it out.
  6. Chill in the refrigerator for at least 3 hours or overnight for best results.
  7. Slice and enjoy, with no judgment if you sneak nibbles directly from the dish.

Feel free to use different nuts for the crust or skip it entirely. This cheesecake is versatile with various toppings such as fresh berries, sugar-free dark chocolate, or whipped topping.

Dessert, Snack
American, Keto
Creamy Dessert, Easy Cheesecake, Keto Dessert, Low Carb Cheesecake, No Bake Cheesecake

Creamy Keto Tomato Soup That’s Ready in Just 20 Minutes!

Creamy keto tomato soup with fresh ingredients in a bowl, perfect for low-carb diets.

You know what’s kind of a bummer? When you’re craving warm, homey comfort food and all you can find is carb-loaded stuff that messes with your keto vibe. So keto tomato soup comes in clutch. It’s classic, but give it a little upgrade and you’ll have a cozy, creamy dream in just twenty minutes. Not even lying. You don’t even need fancy skills for this one. I actually found it’s a total lifesaver when those soup cravings hit hard. Plus, it goes great as a starter or even the main thing if you’re feeling lazy. If you’re all about easy, check out these other amazing keto soup recipes or, for a more adventurous night, a batch of keto chicken tortilla soup never disappoints either.

Creamy Keto Tomato Soup That's Ready in Just 20 Minutes!

Why Make This Soup?

Can I tell you what I genuinely love about making creamy keto tomato soup? It’s super fast (like zero patience needed) and you almost always have the ingredients kicking around. Honestly, my family thinks I spent hours when it’s ready in less time than it takes to find good parking. Sometimes, the weather just demands soup, you know? You want something warm, but not heavy enough to put you in a food coma. This recipe nails it. Keto tomato soup also feels like a little hug in a bowl, and let’s not forget, you get lovely flavor without blowing up your carbs. Even my picky teenager will slurp this stuff up, which is, frankly, nothing short of a miracle. If you end up loving this, then you’ll probably be obsessed with creamy Tuscan chicken soup on chilly days.
keto tomato soup

Ingredients in Keto Tomato Soup

You want the best flavor with the simplest stuff, right? Here’s my go-to lineup for creamy keto tomato soup:

  • Canned diced tomatoes (fire-roasted is really, really nice, trust me)
  • Onion (yellow or white, you pick)
  • Garlic (fresh is bold, but jarred does the trick in a pinch)
  • Olive oil or butter (let’s be real, I always pick butter)
  • Chicken or veggie broth (low-sodium if you’re picky about salt)
  • Heavy cream (don’t skimp—the richness is key)
  • Salt and pepper (just taste as you go so you don’t overdo it)
  • Dried basil or Italian seasoning (honestly, whatever’s on hand)
  • Pinch of sweetener (optional, but it balances the acidity and that’s magic for your taste buds)

That’s it. Nothing fancy or weird to track down.
Creamy Keto Tomato Soup That's Ready in Just 20 Minutes!

How to Make Keto Tomato Soup

Okay, I promise you, making this is almost foolproof. You’ll sauté your onions in butter or oil until soft— don’t rush this part, let ’em get a little golden if you’re feeling fancy. Then the garlic goes in (don’t burn it, it’ll get bitter, trust me I’ve done it). Dump in your tomatoes, broth, seasoning, and let the whole situation simmer about ten minutes. At this point, it won’t look pretty, but hang in there.

Next, bust out your immersion blender. If you don’t have one, pour it (carefully!) into a blender. Blend it smooth— some people leave it chunky, but I’m picky. Last part, stir in the cream and simmer a few more minutes. Taste and tweak salt or pepper. Done! By the way, don’t forget to top with fresh basil if you’ve got it. Looks all five-star restaurant and stuff.

Expert Tips for the Best Results

Alright, let me hit you with a few of my favorite tricks for knockout creamy keto tomato soup.

First, good tomatoes are everything. If you splurge on one thing, let it be those fire-roasted cans. Also, when I say heavy cream, I really mean heavy cream— milk just makes it watery and sad. Got leftovers? This soup actually gets tastier after a night in the fridge. Freeze single servings for emergency comfort food moments (trust me, you’ll pat yourself on the back).

One more: always taste as you go. Sometimes canned tomatoes can be a diva with acidity; a sprinkle of sweetener calms them down. I tried skipping it once, regretted it. The last batch I made went in a little tart but a half teaspoon of allulose—absolutely saved the day.

“I didn’t think soup could be this creamy and filling without a heap of carbs. I now make it every week! Even my carb-loving husband asks for seconds.” – Robin from Ohio

Serving Suggestions

Here’s my shortlist for turning creamy keto tomato soup into something epic:

  • Pair with a crisp air fryer spaghetti squash for crunch.
  • Sprinkle parmesan cheese on top for that perfect salty kick.
  • Serve in a mug for cozy couch dinners on rainy days.
  • Crumbled bacon— don’t even get me started, it’s wild.

Other Keto Soup Recipes

If you’re in the soup mood, don’t even stop at just keto tomato soup. There’s an entire world of low-carb bowls just waiting for you. I went on a wild soup streak this winter (the weather basically forced my hand). Some days, I did a beef heart stew (I know, sounds wild but it’s rich and savory, honest), and other times I craved something creamy, so I’d whip up a chicken and dumplings vibe— you can find my latest easy keto chicken and dumplings recipe and wow, it delivers comfort. Play around with broths and toppings, get creative, and you’ll never get bored, promise.

Common Questions

What tomatoes are best for keto tomato soup?
Honestly, canned fire-roasted tomatoes always hit the mark for flavor. Regular diced tomatoes work, too. Fresh tomatoes need longer to cook down but can taste amazing in summer.

Can I skip the cream?
Not if you want that creamy vibe! You could swap with coconut cream for dairy-free, but it changes the flavor a bit.

Is this soup okay for meal prep?
Absolutely. It stores in the fridge up to four days or freezes for about a month. I batch cook and freeze in small containers for sanity-saving lunches.

Can I make this soup chunky instead of blended?
Yep, just mash the tomatoes right in the pot and leave it rustic. The texture is different but still tasty.

What can I add for more protein?
My go-to is rotisserie chicken or even little turkey meatballs. Dump them right in and it becomes a whole meal.

Go Make Some Cozy Soup Tonight!

Look, when life gets busy, creamy keto tomato soup is basically a superhero. It’s easy, crazy fast, and actually tastes special. Warm, rich, and low on carbs— what more do you want? If you liked my version, I bet you’ll get a kick out of this Easy Keto Tomato Soup – Explorer Momma or Dr. Davinah’s Easy Creamy Keto Tomato Soup Recipe for more inspiration. Go on, give it a whirl and let your kitchen smell like a five-star spot for once. And hey, take a peek at my soup category if you ever get stuck in a dinner rut— there is always another bowl of cozy waiting!

Keto Tomato Soup

A quick and creamy keto tomato soup that is rich in flavor without the carbs. Perfect for cozy dinners or as a comforting starter.

For the Soup

  • 1 can canned diced tomatoes (preferably fire-roasted) (Canned tomatoes are great for flavor.)
  • 1 medium onion (Yellow or white onion.)
  • 2 cloves garlic (Fresh is best; jarred can be used if needed.)
  • 2 tablespoons olive oil or butter (Butter gives a richer flavor.)
  • 2 cups chicken or vegetable broth (Low-sodium is preferable.)
  • 1 cup heavy cream (Do not substitute with milk.)
  • to taste salt (Taste as you go.)
  • to taste pepper (Taste as you go.)
  • 1 teaspoon dried basil or Italian seasoning (Use any herbs you have on hand.)
  • 1 pinch sweetener (optional) (Balances acidity.)

Preparation

  1. Sauté the onions in butter or oil until soft and golden.
  2. Add minced garlic and cook until fragrant, being careful not to let it burn.
  3. Add the canned tomatoes and broth along with the seasonings.
  4. Let the mixture simmer for about 10 minutes.
  5. Blend the soup until smooth using an immersion blender or regular blender.
  6. Stir in the heavy cream and simmer for a few more minutes.
  7. Taste and adjust salt and pepper if necessary.

Good quality fire-roasted tomatoes enhance the flavor. This soup gets tastier after sitting in the fridge. Freeze single servings for later enjoyment.

Appetizer, Soup
American, Keto
Creamy Soup, Keto Tomato Soup, Low Carb Soup

Keto Meat Pie

Keto meat pie with a golden low-carb crust, filled with seasoned ground beef and melted cheese.

Craving a hearty, guilt-free meal that satisfies your comfort food cravings?

Check out this Keto Meat Pie. A tasty mix of seasoned minced meat, savory spices, and a golden, cheesy topping awaits. Best of all, it doesn’t use a traditional pie crust!

Keto meat pie with a golden low-carb crust, filled with seasoned ground beef and melted cheese.

This recipe is great for keto dieters and those watching carbs. It skips starchy fillers and focuses on bold ground beef flavor.

For simple pie recipes, unique ground beef meals, or a dinner that the whole family will enjoy, this recipe is for you. Pre-cooking the beef locks in juiciness, while a layer of melted cheese adds irresistible richness. Plus, leftovers stay delicious, making it ideal for meal prep or quick keto lunches. Dive into this gluten-free, high-protein pie and redefine what’s possible with low-carb cooking!

INGREDIENTS

Savory Beef Base

2 pounds lean ground beef (85/15) – High-quality, grass-fed beef for maximum flavor and optimal fat balance.

1 teaspoon avocado oil – Lightly coats the pan for easy cooking (substitute with olive oil or ghee).

Egg Binding & Texture

6 large farm-fresh eggs, lightly beaten – Creates a custardy, pie-like base without starchy fillers.

Flavor-Boosting Seasonings2 teaspoons garlic powder – Adds aromatic depth.

2 teaspoons onion powder – Enhances savory umami notes.

1 teaspoon dried oregano – Mediterranean herbiness for warmth.

¼ teaspoon cayenne pepper – A subtle, smoky heat (adjust to taste).

1 teaspoon Diamond Crystal kosher salt – Balances flavors (use ½ tsp if substituting with fine-grain salt).

Rich, Tangy Sauces

6 ounces sugar-free tomato paste – Concentrated richness without added carbs.

2 tablespoons bold Dijon mustard – Adds zesty complexity and emulsifies the mixture.

Cheesy Finish

1 ½ cups sharp cheddar cheese, shredded (divided) – Reserve ½ cup for a golden, bubbly topping.

Step-by-Step

Create a juicy, cheesy masterpiece with these foolproof instructions—no crust required!
  1. Prepare and Preheat

Preheat the oven to 350°F. (175°C).

Lightly grease a 9-inch pie plate with oil. Avocado or olive oil works well. Place the pie plate on a foil-lined baking sheet. This will catch drips and make cleanup easier.

  1. Build the Flavor Base

In a large mixing bowl, whisk together:

6 lightly beaten eggs (creates a custard-like texture)

1 tsp Diamond Crystal kosher salt (or ½ tsp fine-grain salt)

2 tsp garlic powder + 2 tsp onion powder (for savory depth)

1 tsp dried oregano + ¼ tsp cayenne pepper (herbaceous warmth + subtle kick)

Whisk in 2 tbsp Dijon mustard (for tangy richness) and 6 oz sugar-free tomato paste (for concentrated umami). Set aside.

  1. Cook the Beef to Perfection

Heat a 12-inch skillet over medium heat.

Add 2 lbs lean ground beef (85/15) directly to the dry skillet.

Pro tip: If using extra-lean beef, add 1 tsp oil to prevent sticking.

Break apart the beef with a spatula as it cooks. Sauté until mostly browned but slightly pink (about 5 minutes). This keeps it tender.

Drain excess fat (if needed) and let cool slightly—this prevents the eggs from scrambling when mixed.

  1. Combine & Layer

Fold the warm beef into the egg-spice mixture until fully coated.

Stir in 1 cup shredded sharp cheddar (reserve ½ cup for topping).

Press the mixture firmly into the greased pie plate, smoothing the top and edges to form an even layer.

  1. Cheesy Finish & Bake

Sprinkle reserved ½ cup cheddar evenly over the top.

Bake for 30 minutes on the middle rack until the edges turn golden, the center sets, and the cheese bubbles.

  1. Rest & Serve

Let the pie cool 15-20 minutes in the pan—this ensures clean slices.

Cut into wedges and serve warm.

  1. Storage & Reheating

Refrigerate leftovers for up to 4 days or freeze for 3 months.

Reheat slices in the microwave (90 seconds) or air fryer (5 minutes at 375°F) for crispy edges.

Storage Instructions

To keep your keto meat pie tasting fresh, store cooled leftovers in an airtight container in the fridge for up to 4 days.

For best results, portion slices before refrigerating—this makes reheating a breeze! Heat individual servings in the microwave for 60-90 seconds with a cover. You can also use an air fryer. Set it to 375°F and cook for 4-5 minutes to get the cheesy crispness back.

If the pie feels dry after being in the fridge, add a teaspoon of broth or water. This will keep it moist when you reheat it. Avoid leaving the dish at room temperature for over 2 hours to maintain food safety and flavor integrity. Perfect for grab-and-go lunches or quick keto dinners!

Tips for Achieving Maximum Flavor

Unlock bold, restaurant-quality taste in every bite with these chef-approved tricks! First, brown the ground beef in small batches. This helps avoid overcrowding the skillet. It also creates a nice, caramelized crust.

Next, bloom the spices.

After draining the beef, quickly sauté garlic powder, onion powder, and oregano in the leftover fat.

This will enhance their aroma. For a tangy flavor, add a splash of beef broth or red wine vinegar to the skillet after cooking the meat. Then, stir those golden-brown bits into the egg mixture. Don’t skip the Dijon-tomato paste combo—it adds umami richness and balances the beef’s savoriness.

Let the mixture rest for 10 minutes before baking. This helps the flavors blend.

Use extra-sharp cheddar for a stronger cheesy taste. A sprinkle of smoked paprika on top before baking adds a nice smokiness. This makes the pie unforgettable!

FAQ

Q: Can I substitute the cheddar cheese with another type?

A: Absolutely! While sharp cheddar adds a rich, tangy profile, pepper jack lends a spicy kick, or smoked gouda introduces a savory depth. For a dairy-free option, try nutritional yeast mixed with coconut oil for a cheesy flavor.

Q: Why pre-cook the beef instead of baking it raw with the eggs?

A: Searing the beef first caramelizes its fats and proteins, creating a deeper flavor base. Skipping this step can result in a bland, watery texture, as raw beef releases excess moisture during baking.

Q: Can I use an egg substitute for this recipe?

A: Yes! For a lighter texture, flax eggs (1 tbsp ground flax + 3 tbsp water per egg) work, though the pie may be slightly less firm. For a vegan twist, blend silken tofu with turmeric for color.

Q: How do I prevent the pie from drying out?

A: Avoid overbaking—30 minutes is ideal for a custardy center. If your oven runs hot, check at 25 minutes. Adding 1-2 tbsp heavy cream to the egg mixture also boosts moisture.

Q: Is the cayenne pepper optional for milder palates?

A: Yes! Omit it entirely or replace it with smoked paprika for warmth without heat. Alternatively, add zested lemon peel to brighten the dish without spiciness.

Q: Can I freeze leftovers even though you advised against it?

A: Freezing isn’t the best option because the eggs can become rubbery. To reduce texture changes, wrap portion slices tightly in containers lined with parchment. Thaw overnight in the fridge before reheating.

Keto Meat Pie

Savory Beef Base

  • 2 pounds lean ground beef (85/15 – High-quality, grass-fed beef for maximum flavor and optimal fat balance.)
  • 1 teaspoon avocado oil – Lightly coats the pan for easy cooking (substitute with olive oil or ghee.)

Egg Binding & Texture

  • 6 large farm-fresh eggs (lightly beaten – Creates a custardy, pie-like base without starchy fillers.)
  • Flavor-Boosting Seasonings2 teaspoons garlic powder – Adds aromatic depth.
  • 2 teaspoons onion powder – Enhances savory umami notes.
  • 1 teaspoon dried oregano – Mediterranean herbiness for warmth.
  • ¼ teaspoon cayenne pepper – A subtle (smoky heat (adjust to taste).)
  • 1 teaspoon Diamond Crystal kosher salt – Balances flavors (use ½ tsp if substituting with fine-grain salt.)

Rich Tangy Sauces

  • 6 ounces sugar-free tomato paste – Concentrated richness without added carbs.
  • 2 tablespoons bold Dijon mustard – Adds zesty complexity and emulsifies the mixture.

Cheesy Finish

  • 1 ½ cups sharp cheddar cheese (shredded (divided) – Reserve ½ cup for a golden, bubbly topping.)

Prepare and Preheat

  1. Preheat the oven to 350°F. (175°C).
  2. Lightly grease a 9-inch pie plate with oil. Avocado or olive oil works well. Place the pie plate on a foil-lined baking sheet. This will catch drips and make cleanup easier.

Build the Flavor Base

  1. In a large mixing bowl, whisk together:
  2. 6 lightly beaten eggs (creates a custard-like texture)
  3. 1 tsp Diamond Crystal kosher salt (or ½ tsp fine-grain salt)
  4. 2 tsp garlic powder + 2 tsp onion powder (for savory depth)
  5. 1 tsp dried oregano + ¼ tsp cayenne pepper (herbaceous warmth + subtle kick)
  6. Whisk in 2 tbsp Dijon mustard (for tangy richness) and 6 oz sugar-free tomato paste (for concentrated umami). Set aside.

Cook the Beef to Perfection

  1. Heat a 12-inch skillet over medium heat.
  2. Add 2 lbs lean ground beef (85/15) directly to the dry skillet.
  3. Pro tip: If using extra-lean beef, add 1 tsp oil to prevent sticking.
  4. Break apart the beef with a spatula as it cooks. Sauté until mostly browned but slightly pink (about 5 minutes). This keeps it tender.
  5. Drain excess fat (if needed) and let cool slightly—this prevents the eggs from scrambling when mixed.

Combine & Layer

  1. Fold the warm beef into the egg-spice mixture until fully coated.
  2. Stir in 1 cup shredded sharp cheddar (reserve ½ cup for topping).
  3. Press the mixture firmly into the greased pie plate, smoothing the top and edges to form an even layer.

Cheesy Finish & Bake

  1. Sprinkle reserved ½ cup cheddar evenly over the top.
  2. Bake for 30 minutes on the middle rack until the edges turn golden, the center sets, and the cheese bubbles.

Rest & Serve

  1. Let the pie cool 15-20 minutes in the pan—this ensures clean slices.
  2. Cut into wedges and serve warm.

Storage & Reheating

  1. Refrigerate leftovers for up to 4 days or freeze for 3 months.
  2. Reheat slices in the microwave (90 seconds) or air fryer (5 minutes at 375°F) for crispy edges.
Main Course
American

keto tuna casserole

If you’re searching for a hearty, satisfying, and low-carb dinner option, this Keto Tuna Casserole is a must-try!

This recipe is great for anyone on a ketogenic diet or wanting a healthier version of comfort food. It mixes the rich taste of tender tuna with a creamy sauce and a golden, cheesy topping.

Whether you like tuna cakes, tuna salad, or keto casseroles, this dish adds a tasty twist to your table. Packed with protein and healthy fats, it’s a family-friendly meal that’s easy to prepare and guaranteed to impress. Say goodbye to boring dinners and hello to a delicious, keto-approved favorite!

Unique Ingredients for a Flavor-Packed Keto Tuna Casserole

Canned Tuna: Opt for high-quality skipjack tuna or albacore tuna packed in water for a lean, protein-rich base.

Avocado Oil Mayonnaise: A creamy, keto-friendly mayo made with avocado oil adds richness and healthy fats.

Dijon Mustard: This smooth, tangy mustard enhances the flavor profile without overpowering the dish.

Shredded Gruyere Cheese: Known for its nutty, melt-in-your-mouth texture, Gruyere takes this casserole to the next level. (Feel free to swap in cheddar, mozzarella, or provolone if preferred.)

Finely Chopped Red Onion: Adds a subtle crunch and a touch of sweetness to balance the savory flavors.

Seasonings: A blend of sea salt, freshly ground black pepper, and a pinch of cayenne pepper for a hint of warmth without overwhelming spice.

Fresh Parsley: A sprinkle of chopped parsley adds a pop of color and a fresh, herbaceous finish. (Optional, but highly recommended!)

These carefully chosen ingredients mix to make a keto casserole. Great for a quick dinner, meal prep, or a potluck. If you like tuna cakes, tuna salad, or other keto-friendly dishes, this casserole will be a new favorite!

Step-by-Step Directions for Keto Tuna Casserole

Follow these easy steps to make a tasty and comforting Keto Tuna Casserole. Great for a quick dinner or meal prep. Let’s start!

Step 1: Preheat the Oven

Preheat your oven to 400°F (200°C). This ensures the casserole bakes evenly and develops a golden, bubbly top.

Step 2: Prepare the Ingredients

  1. Drain the canned tuna thoroughly and flake it into a large mixing bowl.
  2. Finely chop the red onion and set aside.
  3. Grate the Gruyere cheese (or your preferred melty cheese) and reserve a small portion for topping.
  4. Chop the fresh parsley for garnish, if using.

Step 3: Mix the Casserole Base

  1. In the mixing bowl with the tuna, add the avocado oil mayonnaise, Dijon mustard, and finely chopped red onion.
  2. Season with salt, black pepper, and a pinch of cayenne pepper for a subtle kick.
  3. Add most of the shredded Gruyere cheese, saving some for the topping. Mix everything until well combined.

Step 4: Assemble the Casserole

  1. Transfer the tuna mixture to a small, greased baking dish. Spread it evenly with a spatula.
  2. Sprinkle the reserved Gruyere cheese over the top for a gooey, golden crust.

Step 5: Bake to Perfection

  1. Put the baking dish in the preheated oven. Bake for 15 minutes. The casserole should feel hot, and the cheese should melt and bubble.
  2. For an extra golden top, broil for 1-2 minutes at the end (keep an eye on it to avoid burning).

Step 6: Garnish and Serve

  1. Remove the casserole from the oven and let it cool slightly.
  2. Garnish with freshly chopped parsley for a pop of color and freshness.
  3. Serve warm and enjoy your flavorful, low-carb Keto Tuna Casserole!

Tips for Achieving Maximum Flavor

To elevate your Keto Tuna Casserole to the next level, focus on quality ingredients and thoughtful preparation. Start by using high-quality canned tuna packed in water or olive oil for a fresher taste. Opt for avocado oil mayonnaise and Dijon mustard to add richness and depth without overpowering the dish.

Don’t hold back on seasoning. Add a pinch of cayenne pepper for a little kick. Use a good amount of sea salt and black pepper to balance the flavors. Choose a flavorful variety of cheese, like Gruyere or sharp cheddar, and ensure you grate it fresh for better melting.

Finally, bake until the top is golden and bubbly, and garnish with fresh parsley for a bright, herbaceous finish. These small touches will ensure your casserole is bursting with flavor in every bite!

Frequently Asked Questions

Can I make this recipe ahead of time?

Absolutely! You can prepare the tuna mixture in advance and store it in the fridge for up to 24 hours. When ready to bake, simply add the cheese topping and pop it in the oven.

Is this recipe freezer-friendly?

Yes, this casserole freezes well. Assemble the dish (without baking), cover it tightly, and freeze for up to 2 months. Thaw in the fridge overnight before baking as directed.

Can I use a different type of cheese?

Definitely! Gruyere gives a rich, nutty flavor. You can replace it with cheddar, mozzarella, or dairy-free cheese. These options will provide a similar melty texture.

How can I make this dish spicier?

For a spicier kick, increase the amount of cayenne pepper or add a dash of hot sauce to the tuna mixture before baking.

What sides pair well with this casserole?

This casserole pairs beautifully with a crisp green salad, steamed vegetables, or cauliflower rice for a complete low-carb meal.

keto tuna casserole

This recipe is great for anyone on a ketogenic diet or wanting a healthier version of comfort food. It mixes the rich taste of tender tuna with a creamy sauce and a golden, cheesy topping.

  • 2 5- ounce cans tuna in water – drained and flaked
  • ⅓ cup mayonnaise
  • 1 tablespoon Dijon mustard
  • ½ cup Gruyere cheese – shredded (divided)
  • ¼ cup red onion – minced
  • ¼ teaspoon sea salt
  • ¼ teaspoon black pepper
  • ¼ teaspoon cayenne pepper
  • ¼ cup parsley – chopped (for garnish)

Step 1: Preheat the Oven

  1. Preheat your oven to 400°F (200°C). This ensures the casserole bakes evenly and develops a golden, bubbly top.

Step 2: Prepare the Ingredients

  1. Drain the canned tuna thoroughly and flake it into a large mixing bowl.
  2. Finely chop the red onion and set aside.
  3. Grate the Gruyere cheese (or your preferred melty cheese) and reserve a small portion for topping.
  4. Chop the fresh parsley for garnish, if using.

Step 3: Mix the Casserole Base

  1. In the mixing bowl with the tuna, add the avocado oil mayonnaise, Dijon mustard, and finely chopped red onion.
  2. Season with salt, black pepper, and a pinch of cayenne pepper for a subtle kick.
  3. Add most of the shredded Gruyere cheese, saving some for the topping. Mix everything until well combined.

Step 4: Assemble the Casserole

  1. Transfer the tuna mixture to a small, greased baking dish. Spread it evenly with a spatula.
  2. Sprinkle the reserved Gruyere cheese over the top for a gooey, golden crust.

Step 5: Bake to Perfection

  1. Put the baking dish in the preheated oven. Bake for 15 minutes. The casserole should feel hot, and the cheese should melt and bubble.
  2. For an extra golden top, broil for 1-2 minutes at the end (keep an eye on it to avoid burning).

Step 6: Garnish and Serve

  1. Remove the casserole from the oven and let it cool slightly.
  2. Garnish with freshly chopped parsley for a pop of color and freshness.
  3. Serve warm and enjoy your flavorful, low-carb Keto Tuna Casserole!
Main Course
American

Easy Keto Salmon Recipe – Healthy & Delicious Dinner

Looking for a delicious and nutritious keto dinner option? This Keto Salmon Recipe is the perfect choice! Featuring tender salmon fillets rich in healthy fats, this dish is keto-friendly and incredibly satisfying.

Keto salmon fillets pan-seared with lemon, garlic butter, and fresh herbs served with a side of vegetables.

With low net carbs, it’s a great meal to help you stick to your keto diet. You can enjoy a tasty and healthy dinner.

Try this Keto Salmon recipe. It offers a simple and elegant way to nourish your body with healthy food!

The Ingredients.

  • Salmon Fillets: Opt for boneless, skinless cuts for a seamless cooking experience.
  • Sea Salt and Black Pepper: A classic duo to enhance the natural flavors of the salmon.
  • Fresh Lemon Juice: Brighten up the dish with a zesty kick—freshly squeezed is best for that vibrant taste.
  • Extra Virgin Olive Oil: Perfect for pan-searing, adding a touch of richness and healthy fats.
  • Grass-Fed Butter: Unsalted and softened, it creates a luxurious, velvety finish to the dish.
  • Garlic Cloves: Freshly minced for a fragrant, savory depth that complements the salmon beautifully.
  • Fresh Parsley: A sprinkle of this herb adds a pop of color and a subtle, refreshing note to the final presentation.

The Instructions. 

  • Prepare the Salmon: Gently pat the salmon fillets dry using a paper towel to ensure a perfect sear. Season both sides generously with sea salt and black pepper, then drizzle with fresh lemon juice to infuse a bright, tangy flavor.
  • Heat the Pan: Place a non-stick skillet over medium heat and add extra virgin olive oil. Allow the oil to warm up until it shimmers slightly, indicating it’s ready for cooking.
  • Cook the Salmon: Carefully place the seasoned fillets into the pan, skin-side down (if applicable). Let them cook undisturbed for 3-4 minutes to achieve a golden, crispy exterior. Flip the fillets gently and cook for an additional 2 minutes on the other side.
  • Add the Finishing Touches: Reduce the heat to low and add a knob of grass-fed butter to the pan. Toss in the minced garlic and let it sizzle for a moment, releasing its aromatic flavor. Sprinkle in the fresh parsley and swirl the pan to combine the ingredients into a rich, flavorful sauce.
  •       Simmer and Serve: Let the salmon cook in the buttery garlic sauce for 1-2 minutes. Baste the fillets now and then to soak up all the tasty flavors. Remove the pan from the heat.
  • Plate and Enjoy: Transfer the salmon fillets to serving plates and spoon the pan juices over the top for an extra burst of flavor. Garnish with additional parsley if desired, and serve immediately for a mouthwatering keto-friendly meal.

Storage Instructions

To keep your cooked Keto Salmon fresh and tasty, let it cool completely. Then, put it in an airtight container.

Store it in the refrigerator for up to 2 days to ensure optimal taste and texture. When reheating, warm the salmon gently. Use a skillet on low heat or the oven at a low temperature. This helps keep its moisture and stops it from overcooking.

For best results, avoid prolonged storage and enjoy your dish while it’s at its peak!

Tips for Achieving Maximum Flavor

To elevate your Keto Salmon to the next level, start with high-quality, fresh ingredients. Season the salmon generously with sea salt and black pepper before cooking to enhance its natural taste.

For a deeper flavor profile, let the fillets marinate in fresh lemon juice and a touch of olive oil for 10-15 minutes before cooking.

When you pan-sear, ensure you properly heat your skillet to create a beautiful golden crust. Finally, don’t rush the process. Let the butter, garlic, and parsley mix together slowly. This will create a rich, aromatic sauce that coats the salmon perfectly.

These small steps will make a big difference in delivering a restaurant-worthy dish!

Frequently Asked Questions

1.    Can I use frozen salmon for this recipe?

While chefs recommend fresh salmon for the best texture and flavor, you can use thawed frozen salmon in a pinch. Just ensure you fully defrost it and pat it dry before cooking to avoid excess moisture.

2.   What sides pair well with this keto salmon?

This dish pairs beautifully with low-carb options like roasted asparagus, cauliflower rice, or a fresh spinach salad. These sides complement the salmon’s richness while keeping the meal keto-friendly.

How can I tell when the salmon is fully cooked?

You can tell the salmon is done when it flakes easily when you use a fork. It should also reach an internal temperature of 145°F (63°C). Be careful not to overcook it, as this can dry out the fillets.

4.   Can I substitute the butter for a dairy-free option?

Absolutely! You can use ghee or a plant-based butter alternative to keep the recipe dairy-free while still achieving a rich, flavorful sauce.

5.   How long can I store leftovers?

You can store leftover salmon in an airtight container in the refrigerator for up to 2 days. Reheat gently to preserve its moisture and flavor.

6.   Is this recipe suitable for meal prep?

Yes! This keto salmon is great for meal prep. Cook the fillets as directed, let them cool, and store them in portioned containers. Reheat gently when ready to enjoy.

7.   Can I use other herbs besides parsley?

Sure! Fresh dill, cilantro, or chives can replace parsley. Each adds a unique flavor to the dish.

Easy Keto Salmon Recipe – Healthy & Delicious Dinner

Looking for a delicious and nutritious keto dinner option? This Keto Salmon Recipe is the perfect choice! Featuring tender salmon fillets rich in healthy fats, this dish is not only keto-friendly but also incredibly satisfying.

  • 4 4 oz salmon fillets skinless and boneless
  • 1/2 teaspoon salt
  • 1/2 teaspoon pepper
  • 2 tablespoons lemon juice
  • 1 tablespoon olive oil
  • 3 tablespoons butter
  • 5 cloves garlic minced
  • 1/4 cup parsley loosely packed
  1. Prepare the Salmon: Gently pat the salmon fillets dry using a paper towel to ensure a perfect sear. Season both sides generously with sea salt and black pepper, then drizzle with fresh lemon juice to infuse a bright, tangy flavor.

  2. Heat the Pan: Place a non-stick skillet over medium heat and add extra virgin olive oil. Allow the oil to warm up until it shimmers slightly, indicating it’s ready for cooking.

  3. Cook the Salmon: Carefully place the seasoned fillets into the pan, skin-side down (if applicable). Let them cook undisturbed for 3-4 minutes to achieve a golden, crispy exterior. Flip the fillets gently and cook for an additional 2 minutes on the other side.

  4. Add the Finishing Touches: Reduce the heat to low and add a knob of grass-fed butter to the pan. Toss in the minced garlic and let it sizzle for a moment, releasing its aromatic flavor. Sprinkle in the fresh parsley and swirl the pan to combine the ingredients into a rich, flavorful sauce.

  5. Simmer and Serve: Let the salmon cook in the buttery garlic sauce for 1-2 minutes. Baste the fillets now and then to soak up all the tasty flavors. Remove the pan from the heat.

  6. Plate and Enjoy: Transfer the salmon fillets to serving plates and spoon the pan juices over the top for an extra burst of flavor. Garnish with additional parsley if desired, and serve immediately for a mouthwatering keto-friendly meal.

Main Course
American

Keto Enchilada Casserole Recipe for Busy Nights

Looking for a flavorful and satisfying low-carb dinner that fits your keto lifestyle?

This delicious keto enchilada casserole is the perfect solution! This dish has tender chicken breasts.

Keto enchilada casserole layered with shredded chicken, cheese, and low-carb enchilada sauce, baked to perfection.
A cheesy, flavorful keto enchilada casserole — all the Tex-Mex taste without the carbs.

The rich enchilada sauce covers them. The dish features layers of cheesy, savory goodness. This is a must-try for anyone who loves keto casseroles.

Whether you are new to keto or an expert, this keto enchilada casserole will be a family favorite. It gives you all the comfort of traditional enchiladas but without the carbs.

It’s easy to make and great for meal prep. Just add your favorite keto enchilada sauce and enjoy a tasty, guilt-free meal!

Ingredients

To craft this delectable casserole, you’ll require only a handful of fundamental ingredients. The recipe card below meticulously details precise quantities. Here’s a concise summary of what you’ll need:

  • Olive oil: A versatile and flavorful choice for cooking. If you prefer an oil with a higher smoke point, avocado oil works just as well.
  • Aromatics: Fresh garlic and onion to build a flavorful base.
  • Seasonings: A blend of kosher salt, black pepper, chili powder, and ground cumin for that perfect savory kick.
  • Canned staples: Tomato sauce and diced green chile peppers to create a rich and tangy sauce.
  • Shredded chicken: Pre-cooked chicken breast or rotisserie chicken (skin removed) for convenience and tender texture.
  • Fresh cilantro: Adds a bright, herbaceous note. If cilantro isn’t your thing, parsley makes a great substitute.
  • Cheesy goodness: Shredded sharp or extra-sharp cheddar for a gooey, melty finish.

Step-by-Step Directions:

  1. Preheat the Oven: Start by preheating your oven to 400°F (200°C). Lightly grease a baking dish with olive oil or non-stick spray and set it aside.
  2. Prepare the Enchilada Sauce:
  • Heat 1-2 tablespoons of olive oil in a skillet over medium heat.
  •  Sauté finely chopped onion and minced garlic until softened and fragrant, about 2-3 minutes.
  • Stir in chili powder, ground cumin, kosher salt, and black pepper, toasting the spices for 1 minute to enhance their flavor.
  • Add tomato sauce and diced green chiles, stirring to combine. Let the sauce simmer for 5-7 minutes until slightly thickened.
  1. Combine the Filling:
  • In a large mixing bowl, combine the shredded chicken (pre-cooked or rotisserie) with the prepared enchilada sauce.
  • Add chopped cilantro (or parsley, if preferred) and half of the shredded cheddar cheese. Mix everything well to ensure the chicken is evenly coated.
  1. Assemble the Casserole:
  • Transfer the chicken mixture to the greased baking dish, spreading it out into an even layer.
  •  Sprinkle the remaining shredded cheddar cheese on top for a gooey, golden finish.
  1. Bake:
  • Place the baking dish in the preheated oven and bake for 10-12 minutes, or until the cheese is fully melted and bubbly.
  1. Serve:
  • Remove the casserole from the oven and let it cool for a few minutes.
  •  Garnish with additional cilantro or parsley if desired, and serve immediately while warm and cheesy!

Storage Instructions

To keep your keto enchilada casserole fresh and delicious, store any leftovers in an airtight container in the refrigerator.

It will stay good for up to 3-4 days. When you want to enjoy it again, just reheat a single portion in the microwave. You can also warm the whole dish in the oven at 350°F (175°C) until it is hot.

For best results, cover the casserole with foil while reheating to prevent the cheese from drying out. This makes it a perfect make-ahead meal for busy weeknights!

Tips for Achieving Maximum Flavor:

To elevate your keto enchilada casserole to the next level, start by using high-quality, fresh ingredients.

Choose sharp or extra-sharp cheddar cheese for a richer flavor. Toast the spices well. This step brings out their full aroma and depth.

Consider adding a pinch of smoked paprika or a dash of lime juice to the sauce for an extra kick.

If you use rotisserie chicken, shred it finely to ensure every bite packs in flavor. Let the casserole rest for 5 minutes after baking. This helps the flavors blend nicely before serving. These small touches will make your dish truly unforgettable!

Frequently Asked Questions

Can I use a different type of meat in this recipe?

Absolutely! Shredded chicken is great, but you can also use ground beef, turkey, or shredded pork for a change. Just ensure you fully cook the meat before assembling the casserole.

Is this recipe spicy?

You can adjust the level of spice to your preference. The diced green chiles and chili powder add mild heat, but you can reduce or omit them if you prefer a milder flavor. Alternatively, add a pinch of cayenne pepper for extra spice.

Can I make this casserole ahead of time?

Yes! You can prepare the casserole up to a day in advance. Simply assemble it, cover tightly, and refrigerate until ready to bake. You may need to add a few extra minutes to the baking time if the dish is cold from the fridge.

What can I use instead of cilantro?

Fresh parsley makes a great substitute if you’re not a fan of cilantro. You can also try using chopped green onions or even a sprinkle of dried oregano for a different herbal note.

How can I tell when the casserole has finished baking?

The casserole becomes ready when the cheese fully melts, bubbles, and turns lightly golden around the edges. If the top starts browning too quickly, cover it loosely with foil to prevent burning.

Can I use store-bought enchilada sauce?

Yes, you can use a store-bought keto-friendly enchilada sauce to save time. Just check the label to ensure it’s low in carbs and free from added sugars to keep it keto-compliant. What sides pair well with this casserole?

This dish pairs nicely with a few options. You can serve it with cauliflower rice. A fresh avocado salad is also a great choice. For added creaminess, consider using sour cream or guacamole.

Keto Enchilada Casserole Recipe for Busy Nights

The rich enchilada sauce covers them. The dish features layers of cheesy, savory goodness. This is a must-try for anyone who loves keto casseroles.

  • Olive Oil Cooking Spray

Enchilada Sauce Ingredients:

  • 1 tbsp olive oil (or avocado oil for a lighter option)
  • 1 medium onion (6 oz, finely diced)
  • 1 tsp Diamond Crystal kosher salt* (or ½ tsp Morton kosher salt/table salt)
  • ¼ tsp freshly cracked black pepper
  • 1 tbsp minced garlic (about 3–4 fresh cloves)
  • 3 tbsp chili powder (adjust for spice preference)
  • 2 tsp ground cumin
  • 15 oz unsalted tomato sauce (check labels for no added sugars)
  • ½ cup water

Casserole:

  • ▢2 pounds cooked chicken breast – boneless (skinless, shredded, from 4 medium or 3 large chicken breasts)
  • ▢4 ounces canned diced green chile peppers
  • ▢½ cup cilantro – minced (packed; 1 ounce)
  • ▢2 cups sharp cheddar – shredded

Preheat the Oven:

  1. Start by preheating your oven to 400°F (200°C). Lightly grease a baking dish with olive oil or non-stick spray and set it aside.

Prepare the Enchilada Sauce:

  1. Heat 1-2 tablespoons of olive oil in a skillet over medium heat.
  2. Sauté finely chopped onion and minced garlic until softened and fragrant, about 2-3 minutes.
  3. Stir in chili powder, ground cumin, kosher salt, and black pepper, toasting the spices for 1 minute to enhance their flavor.
  4. Add tomato sauce and diced green chiles, stirring to combine. Let the sauce simmer for 5-7 minutes until slightly thickened.

Combine the Filling:

  1. In a large mixing bowl, combine the shredded chicken (pre-cooked or rotisserie) with the prepared enchilada sauce.
  2. Add chopped cilantro (or parsley, if preferred) and half of the shredded cheddar cheese. Mix everything well to ensure the chicken is evenly coated.

Assemble the Casserole:

  1. Transfer the chicken mixture to the greased baking dish, spreading it out into an even layer.
  2. Sprinkle the remaining shredded cheddar cheese on top for a gooey, golden finish.

Bake:

  1. Place the baking dish in the preheated oven and bake for 10-12 minutes, or until the cheese is fully melted and bubbly.

Serve:

  1. Remove the casserole from the oven and let it cool for a few minutes.
  2. Garnish with additional cilantro or parsley if desired, and serve immediately while warm and cheesy!
Main Course
Mexican

Keto Chicken Nuggets

Looking for a delicious and satisfying keto dinner option? These Keto Chicken Nuggets are the perfect choice! Crispy on the outside, tender on the inside, and completely low-carb, they’re a guilt-free way to enjoy a classic favorite.

Crispy golden keto chicken nuggets served on a plate with a side of dipping sauce.
Crispy on the outside, tender on the inside — these keto chicken nuggets are a low-carb favorite.

You can enjoy these nuggets with a tasty Keto Buffalo Chicken Dip or on their own. They show that you can have great flavor while following a low-carb diet.

Say goodbye to regular high-carb chicken nuggets. Say hello to a keto-friendly version that is just as tasty, or even better!

Ingredients for Keto Chicken Nuggets:

Nuggets:

  • 2 pounds of ground chicken
  • 2 large eggs
  • 1/3 cup finely grated parmesan cheese
  • 1/2 cup shredded mozzarella cheese
  • 3/4 teaspoon garlic powder
  • 3/4 teaspoon onion powder
  • 3/4 teaspoon paprika
  • 2 teaspoons salt

Coating:

  • 1/2 cup grated parmesan cheese
  • 3 tablespoons potato starch (or substitute with tapioca or corn starch)
  • 1/2 teaspoon paprika
  • 1/2 teaspoon dried parsley

Spicy Ketchup:

  • 1/4 cup sugar-free ketchup
  • 1/2 tablespoon Worcestershire sauce
  • 1 teaspoon Sriracha sauce (adjust to taste for desired spice level)

Step-by-Step Instructions:

  1. Preheat and Prepare:

Preheat your oven to 425°F (220°C). Line a large baking sheet with parchment paper for easy cleanup and to prevent sticking.

  1. Prepare the Coating:

In a shallow bowl, mix the coating ingredients. Use grated parmesan cheese, potato starch (or a substitute), paprika, and dried parsley. Whisk them together until they are well combined. Set aside.

  1. Mix the Nugget Mixture:

In a large bowl, combine the ground chicken and eggs. Add the grated parmesan cheese and shredded mozzarella.

Then, mix in the garlic powder, onion powder, paprika, and salt. Use your hands to mix everything until just combined. Be careful not to overmix.

  1. Shape the Nuggets:

Take small portions of the chicken mixture and shape them into flat ovals. For easier handling, you can drop a clump of the mixture into the coating bowl, then shape it into an oval while coating it. Place each nugget onto the prepared baking sheet, gently flattening them as you go. Keep in mind that the nuggets will shrink slightly during baking, so adjust the size accordingly.

  1. Add the Coating:

Lightly spray the tops of the nuggets with olive oil to help them crisp up in the oven.

  1. Bake the Nuggets:

Bake in the preheated oven for 15 minutes. After 15 minutes, carefully flip each nugget using a spatula. Return them to the oven and bake for an additional 10 minutes, or until golden brown and cooked through.

The total baking time depends on the size of your nuggets. Medium-sized nuggets usually take about 25 minutes to bake.

  1. Serve and Enjoy:

Once baked, remove the nuggets from the oven and let them cool slightly. Serve with your favorite dipping sauce. You can use the spicy ketchup from this recipe. You can also pair them with a creamy Keto Buffalo Chicken Dip for more flavor.

Storage Instructions:

To keep your Keto Chicken Nuggets fresh and tasty, store leftovers in an airtight container. You can keep them in the refrigerator for 3 to 4 days.

To store the nuggets for a long time, freeze them. Place them in a single layer on a baking sheet until they are firm. Then, move them to a freezer-safe bag or container.

They’ll stay good in the freezer for up to 2–3 months. To enjoy, reheat the refrigerated nuggets in the oven or air fryer. Set the temperature to 350°F (175°C) until they are warm and crispy.

You can reheat frozen nuggets straight from the freezer. Just add a few extra minutes to heat them evenly. This way, you can enjoy your keto-friendly nuggets anytime!

Tips for Achieving Maximum Flavor:

To make your Keto Chicken Nuggets truly irresistible, consider these simple tips. First, make sure your seasoning blend is balanced. Adjust the garlic powder, onion powder, and paprika to fit your taste.

Add a pinch of cayenne pepper to the coating mixture. Using freshly grated parmesan cheese instead of pre-packaged can enhance the nutty, savory flavor. Don’t skip the olive oil spray before baking; it helps achieve a golden, crispy exterior.

Finally, let the nuggets rest for a few minutes after baking to lock in moisture and flavor. Try them with a bold dipping sauce. Spicy ketchup or creamy buffalo dip can make the taste even better!

Frequently Asked Questions:

Can I use chicken breast instead of ground chicken?

Yes, you can! Simply finely chop or grind chicken breast to achieve a similar texture. Just ensure the meat is well-chopped so the nuggets hold their shape.

Are these nuggets freezer-friendly?

Absolutely! These keto chicken nuggets freeze well.

Put them in a single layer on a baking sheet to freeze. Then, move them to a freezer-safe bag or container. They can stay there for 2 to 3 months.

Can I use an air fryer instead of an oven?

Yes, an air fryer works great! Cook the nuggets at 400°F (200°C) for about 10–12 minutes, flipping halfway through, until golden and crispy.

What can I use instead of potato starch?

To avoid potato starch, try using tapioca starch, almond flour, or crushed pork rinds. They are great low-carb options for coating.

How can I tell when the nuggets are fully cooked?

You know the nuggets are done when they reach an internal temperature of 165°F (74°C) and have a crispy, golden-brown outside.

Can I make these nuggets spicier?

Sure! Add a little cayenne pepper or chili powder to the chicken mix. You can also add more Sriracha to the spicy ketchup for extra heat.

What dipping sauces pair well with these nuggets?

These nuggets taste great with spicy ketchup. They also pair well with keto-friendly options like ranch dressing, blue cheese dip, or creamy buffalo sauce.

Can I make these nuggets ahead of time?

Yes, you can prepare the nuggets up to the baking step, cover them, and refrigerate for up to 24 hours before baking. This makes them a convenient option for meal prep!

Keto Chicken Nuggets

Looking for a delicious and satisfying keto dinner option? These Keto Chicken Nuggets are the perfect choice! Crispy on the outside, tender on the inside, and completely low-carb, they’re a guilt-free way to enjoy a classic favorite.

  • 2 pounds ground chicken
  • 2 large eggs
  • 1/3 cup finely grated parmesan cheese
  • 1/2 cup shredded mozzarella cheese
  • 3/4 teaspoon garlic powder
  • 3/4 teaspoon onion powder
  • 3/4 teaspoon paprika
  • 2 teaspoons salt
  1. Preheat and Prepare:
  2. Preheat your oven to 425°F (220°C). Line a large baking sheet with parchment paper for easy cleanup and to prevent sticking.
  3. Prepare the Coating:
  4. In a shallow bowl, mix the coating ingredients. Use grated parmesan cheese, potato starch (or a substitute), paprika, and dried parsley. Whisk them together until they are well combined. Set aside.
  5. Mix the Nugget Mixture:
  6. In a large bowl, combine the ground chicken and eggs. Add the grated parmesan cheese and shredded mozzarella.
  7. Then, mix in the garlic powder, onion powder, paprika, and salt. Use your hands to mix everything together until just combined. Be careful not to overmix.
  8. Shape the Nuggets:
  9. Take small portions of the chicken mixture and shape them into flat ovals. For easier handling, you can drop a clump of the mixture into the coating bowl, then shape it into an oval while coating it. Place each nugget onto the prepared baking sheet, gently flattening them as you go. Keep in mind that the nuggets will shrink slightly during baking, so adjust the size accordingly.
  10. Add the Coating:
  11. Lightly spray the tops of the nuggets with olive oil to help them crisp up in the oven.
  12. Bake the Nuggets:
  13. Bake in the preheated oven for 15 minutes. After 15 minutes, carefully flip each nugget using a spatula. Return them to the oven and bake for an additional 10 minutes, or until golden brown and cooked through.
  14. The total baking time depends on the size of your nuggets. Medium-sized nuggets usually take about 25 minutes to bake.
  15. Serve and Enjoy:
  16. Once baked, remove the nuggets from the oven and let them cool slightly. Serve with your favorite dipping sauce. You can use the spicy ketchup from this recipe. You can also pair them with a creamy Keto Buffalo Chicken Dip for more flavor.
Main Course
American

Keto Broccoli Casserole Recipe – Easy and Cheesy Delight

If you are on a keto diet and looking for a tasty dinner, try this Keto Broccoli Casserole! Full of flavor and nutrients, this is the perfect keto meal. It combines the richness of broccoli cheese casserole with the ease of a simple broccoli casserole.

Keto broccoli casserole baked with cheddar cheese, cream, and crispy golden topping in a casserole dish.
Cheesy, creamy, and low-carb — this keto broccoli casserole is the ultimate comfort food side dish.

If you love low-carb broccoli casserole or want something like keto zucchini lasagna, this dish is for you. It gives you a comforting, cheesy taste while keeping your low-carb diet intact.

Great for meal prep or a family dinner, this recipe is versatile. It will quickly become a favorite in your keto kitchen.

Ingredients

  • Cooked Broccoli: Fresh broccoli is ideal for this dish—steam it until tender but still crisp. If you’re short on time, frozen broccoli works too; just cook and drain it thoroughly to remove excess moisture.
  • Creamy Base Trio: This mix of cream cheese, sour cream, and mayonnaise makes a rich, smooth texture. It can replace regular canned soups. This combination adds depth and creaminess to the casserole.
  • Cheese: Opt for shredded cheddar cheese for its sharp, tangy flavor. For a twist, mix in Monterey jack cheese to add a mild, melty texture that complements the dish perfectly.
  • Seasonings: A mix of dried minced onion or onion powder, garlic powder, dried parsley, kosher salt, and black pepper adds flavor. This gives the casserole a tasty and balanced taste.

How To Make Keto Broccoli Casserole

Step 1: Prepare the Creamy Mixture

In a large mixing bowl, combine the cream cheese, sour cream, and mayonnaise until smooth. Add the dried minced onion (or onion powder), garlic powder, dried parsley, kosher salt, and black pepper. Mix well to ensure you distribute the seasonings evenly. Stir in half of the shredded cheddar cheese, creating a rich and flavorful base for your casserole.

Step 2: Add the Broccoli

Gently fold the steamed broccoli into the creamy mixture. Be careful not to overmix; this action keeps the broccoli intact and packs every bite with texture and flavor. Once combined, transfer the mixture to a greased casserole dish, spreading it out evenly.

Step 3: Top with Cheese

Sprinkle the remaining shredded cheddar cheese over the top of the broccoli mixture. This creates a golden, cheesy crust as it bakes, adding a delicious finishing touch to your casserole.

Step 4: Bake to Perfection

Preheat your oven to 375°F (190°C). Put the casserole dish in the oven.

Bake it for about 20 minutes. Melt the cheese until it becomes bubbly and lightly golden on top. Remove from the oven and let it cool slightly before serving.

Storage Instructions

To store your Keto Broccoli Casserole, let it cool completely before placing it in an airtight container. You can keep it in the refrigerator for up to 3-4 days, making it a convenient option for meal prep or leftovers.

When you are ready to enjoy it again, reheat the casserole in the oven. Set the temperature to 350°F (175°C). Heat it until it is warm and the cheese is bubbly.

Alternatively, you can microwave individual portions for a quick and easy meal.

Keeping your casserole in the fridge helps it stay fresh and tasty. Ready whenever you want a delicious low-carb meal!

Tips for Achieving Maximum Flavor

To elevate the taste of your Keto Broccoli Casserole, start by using fresh, high-quality ingredients. Steam the broccoli just until tender to retain its vibrant color and slight crunch, avoiding overcooking.

For the creamy base, soften the cream cheese to blend it smoothly with the sour cream and mayonnaise. Opt for sharp cheddar cheese or a mix of cheeses like Monterey Jack for a richer, more complex flavor.

Don’t skimp on the seasonings—adjust the garlic powder, onion powder, salt, and pepper to suit your taste preferences.

Finally, let the casserole sit for a few minutes after baking. This helps the flavors mix. You will end up with a dish that is full of delicious, savory goodness!

Frequently Asked Questions

Can I use frozen broccoli instead of fresh?

Yes, frozen broccoli works well in this recipe. Just be sure to cook and drain it thoroughly to remove excess moisture before adding it to the casserole.

Can I substitute the mayonnaise?

If you’re not a fan of mayonnaise, you can replace it with an equal amount of Greek yogurt or additional sour cream for a similar creamy texture.

How can I make this casserole dairy-free?

To make it dairy-free, use dairy-free cream cheese, sour cream, and shredded cheese alternatives. Ensure all substitutes are low-carb to keep the recipe keto-friendly.

Can I add protein to this dish?

Absolutely! Diced cooked chicken, ground turkey, or crumbled bacon can be mixed in for a heartier, protein-packed meal.

How do I prevent the casserole from becoming watery?

Make sure to drain the broccoli well after cooking. Avoid overmixing the ingredients. This will help prevent extra moisture from coming out while baking.

Is it possible to make this casserole in advance?

Certainly, you can put together the casserole a day before, securely cover it, and store it in the refrigerator. Bake it just before serving for the best results.

What can I serve with this casserole?

This dish pairs well with a fresh green salad, roasted vegetables, or a side of cauliflower rice for a complete keto-friendly meal.

Keto Broccoli Casserole Recipe

  • Cooked Broccoli: Fresh broccoli is ideal for this dish—steam it until tender but still crisp. If you’re short on time (frozen broccoli works too; just cook and drain it thoroughly to remove excess moisture.)
  • Creamy Base Trio: This mix of cream cheese (sour cream, and mayonnaise makes a rich, smooth texture. It can replace regular canned soups. This combination adds depth and creaminess to the casserole.)
  • Cheese: Opt for shredded cheddar cheese for its sharp (tangy flavor. For a twist, mix in Monterey jack cheese to add a mild, melty texture that complements the dish perfectly.)
  • Seasonings: A mix of dried minced onion or onion powder (garlic powder, dried parsley, kosher salt, and black pepper adds flavor. This gives the casserole a tasty and balanced taste.)
  1. Step 1: Prepare the Creamy Mixture
  2. In a large mixing bowl, combine the cream cheese, sour cream, and mayonnaise until smooth. Add the dried minced onion (or onion powder), garlic powder, dried parsley, kosher salt, and black pepper. Mix well to ensure you distribute the seasonings evenly. Stir in half of the shredded cheddar cheese, creating a rich and flavorful base for your casserole.
  3. Step 2: Add the Broccoli
  4. Gently fold the steamed broccoli into the creamy mixture. Be careful not to overmix; this action keeps the broccoli intact and packs every bite with texture and flavor. Once combined, transfer the mixture to a greased casserole dish, spreading it out evenly.
  5. Step 3: Top with Cheese
  6. Sprinkle the remaining shredded cheddar cheese over the top of the broccoli mixture. This creates a golden, cheesy crust as it bakes, adding a delicious finishing touch to your casserole.
  7. Step 4: Bake to Perfection
  8. Preheat your oven to 375°F (190°C). Put the casserole dish in the oven.
  9. Bake it for about 20 minutes. Melt the cheese until it becomes bubbly and lightly golden on top. Remove from the oven and let it cool slightly before serving.
Main Course
American