7 Simple and Delicious Easy Dessert Ideas to Try Today

A selection of easy dessert recipes featuring brownies, churros, and panna cotta.

So look, we’ve all had those days where the craving hits hard, the clock ticks faster than it should, and suddenly you need an easy dessert like nobody’s business. Maybe your friends dropped by without notice, or you just really want something sweet after a long Tuesday (it’s always Tuesday). Good news is, quick treats still hit the spot without a lot of fuss. I’m always on the prowl for simple sweet fixes, kinda like I’m always drooling over the new things on this easy keto dessert recipes page. Oh, and if you need a dinner before dessert (who says you have to?), I recently tried this easy keto chicken enchilada casserole recipe and, hand to heart, it’s honestly flavor-packed. But hey, you’re here to make dessert easy, fast, and foolproof. Let’s get started.
easy dessert

Best Quick Dessert Recipes

Alright, let’s not overcomplicate things. I swear by a few reliable classics that always work when you want something sweet but don’t want to turn the house upside down. My go-to is a mug cake. All you need? A mug, a few pantry staples, and a microwave. It’s almost ridiculous how fast it comes together. Mix flour (I sometimes use almond flour), cocoa powder, sugar (or your sweetener of choice), a splash of milk, and maybe a bit of oil. Zap it. Boom, instant cake. It’s stupidly easy dessert anyone can handle.

Another winner: chocolate-dipped fruit. You’ve got an apple? Maybe some strawberries? Melt your favorite chocolate (I use the microwave, because lazy is sometimes best), dip, then chill. It feels fancy and takes five minutes, maybe six if you drop some pieces along the way (me, every single time).

When company swings by, I fake “fancy party vibes” with a whipped cream and berries bowl. Buy whipped cream (or make it if you’re feeling adventurous), dump some berries in a bowl, top it, done.

One time, a friend told me these tasted like something from a five-star restaurant. Not true, but hey, I’m not correcting that story.

“These are pure lifesavers when you’re running low on energy and time but still want dessert. My kids now request mug cakes at least twice a week!” –Jenna, long-time dessert enthusiast

easy dessert

Dessert Recipes with Fewer Ingredients

Y’know what’s better than a fast recipe? One that doesn’t clutter the kitchen counter. Easy dessert options like these are practically made for lazy nights (or lazy minds—guilty as charged). My top pick here is peanut butter cookies. Three ingredients, real talk: peanut butter, egg, and sugar. Mix, roll, bake. So good with a glass of milk (does anyone else eat cookies with water? No judgment either way).

Rice Krispie treats will always be legendary for me. Butter, marshmallows, cereal. That’s the whole process. No advanced degrees in pastry science. Sometimes I throw in chocolate chips, sometimes rainbow sprinkles if my daughter’s “helping.” These disappear in hours—sometimes minutes if my nephew stops by.

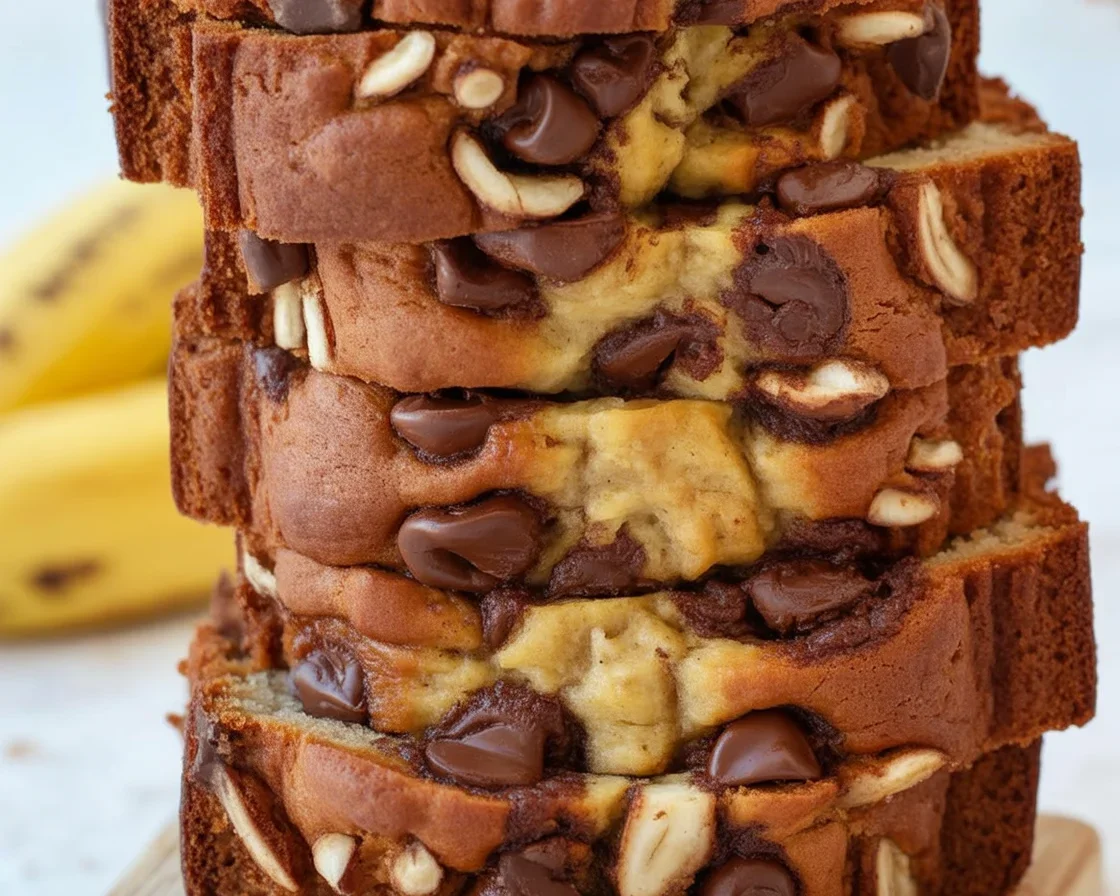
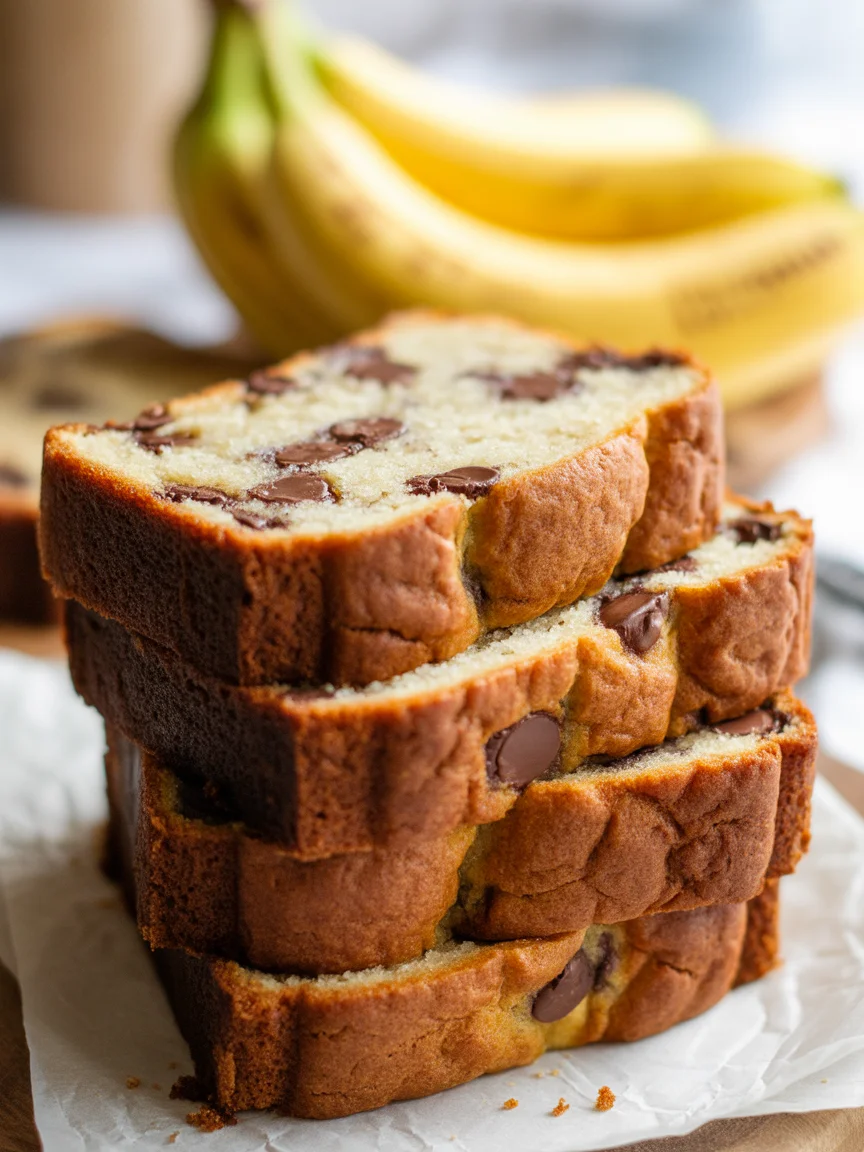
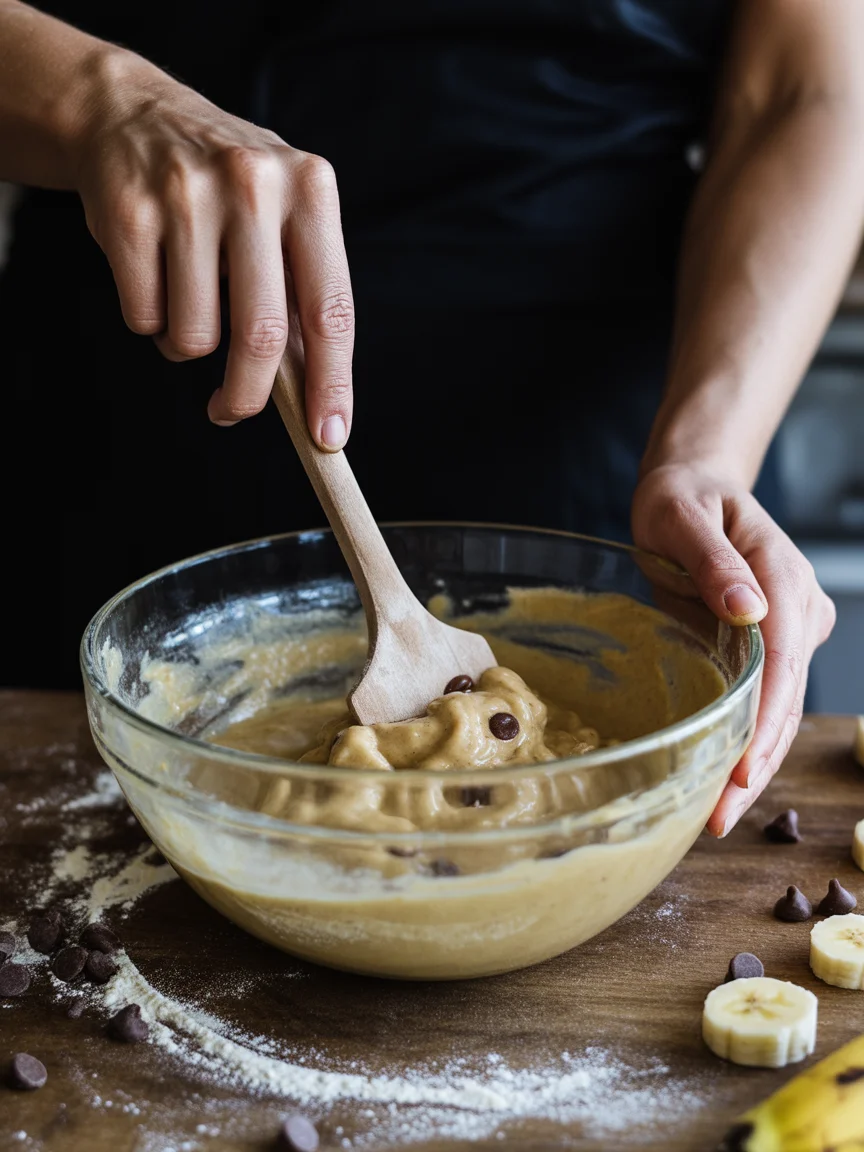
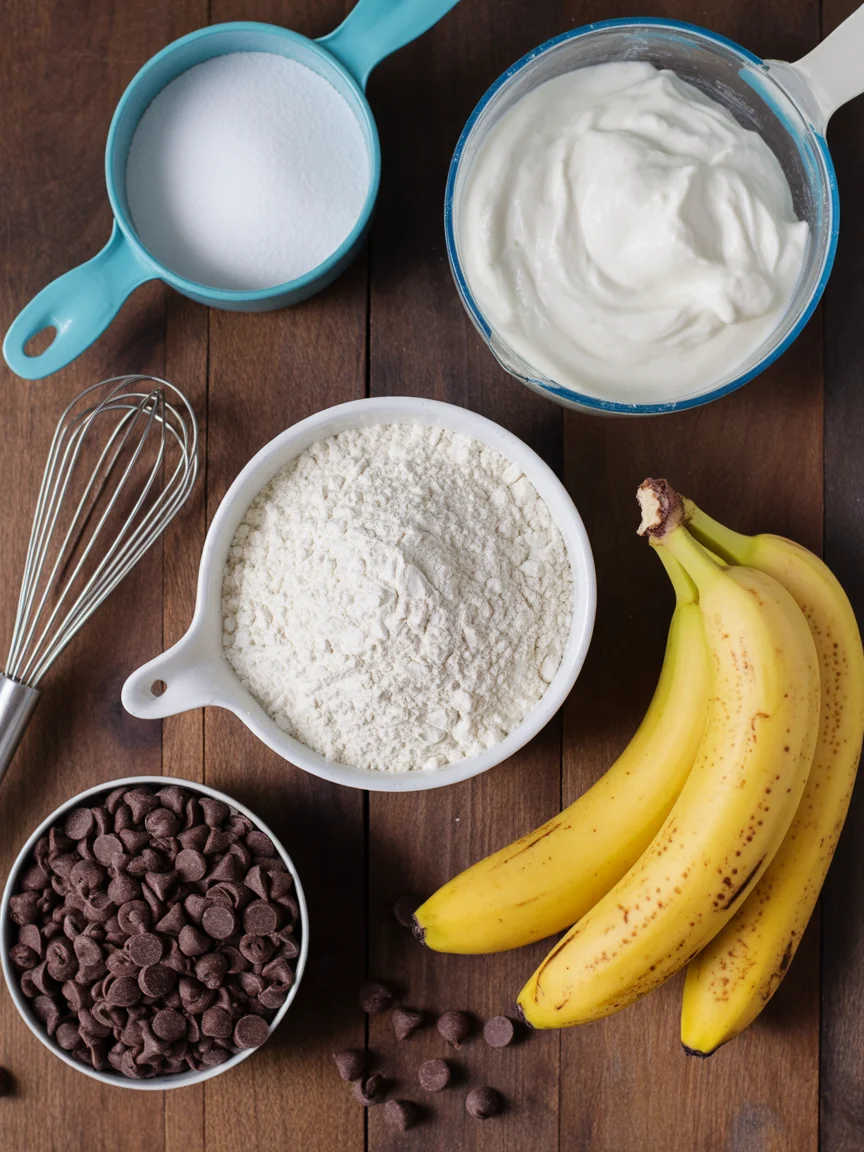
Oatmeal banana bites are in my back pocket for healthy vibes. Just mash one ripe banana, mix in quick oats and a handful of chocolate chips. Scoop and bake. You can’t really mess them up, which is my favorite thing about them.

Trust me, when your grocery run skipped the baking aisle, these easy dessert tricks are clutch.

Easy No-Bake Desserts

I’ve gotta confess, summer is my enemy when it comes to cranking up the oven. No-bake desserts are my BFF from May to September—and to be real, also in December.

First up, the classic no-bake cheesecake. Grab a ready-made graham crust, blend some cream cheese with sugar and vanilla, then fold in whipped topping. Pour it into the crust, let it chill, forget about it (until you suddenly remember that, oh yes, dessert is waiting).

Another favorite: chocolate bark. Melt chocolate, spread it on parchment, toss whatever you have—nuts, pretzels, coconut, dried fruit—right on top, chill. You end up with a slab of chocolate happiness.

If you like pudding (don’t look at me like that, it’s underrated), instant pudding with crushed cookies and whipped cream stacked in layers—yup, that’s your “fancy” parfait.

No-bake equals no worries (and no overheated kitchens).

Quick and Simple Dessert Tips

Alright, time for the real secrets. If you want to master easy dessert making, here are a few tricks I’ve probably ranted about to friends:

  • Bulk-buy chocolate chips. They fix basically everything.
  • Frozen fruit is your savior—not just for smoothies, but for thaw-and-eat “nice cream.”
  • Keep instant pudding powder on hand for emergencies (or late-night cravings).
  • Invest in a microwave-safe mug. Trust me, you’ll use it more than you think.

These tiny tweaks make dessert easier than finding socks that match. And if you’re looking for more easy dinner ideas (which let’s be honest, just so you can get to dessert faster), check out this easy keto salmon recipe or try this easy spaghetti squash lasagna casserole recipe for keto dieters next.

Creative Dessert Ideas for Any Occasion

Sometimes you want your easy dessert to feel, I dunno, like you actually tried. If you have ten extra minutes, switch things up. Try a cinnamon-sugar tortilla—spread butter on a tortilla, sprinkle a mess of cinnamon and sugar, bake or fry until crispy. Cut up for “chips” and dunk in fruit salsa or honey.

Or, make dessert skewers. I like alternating marshmallows, brownie bites, and fruit on sticks. Sure, it’s the kind of thing you’d see at a kid’s birthday—but adults dive in faster than kids, let’s be real.

Feeling fancy? Layer store-bought pound cake with pudding, whipped cream, and fruit in a jar. That’s technically a trifle, but no one cares what it’s called once they’re two bites in.

So, don’t be afraid to improvise. If it’s sweet, it counts.

Common Questions

Do I really need special equipment for these easy dessert recipes?
Nope! A mug, a bowl, and your microwave or oven are enough. Regular forks and spoons do all the mixing. No gadgets required.

Can I swap sweeteners to make the recipes healthier?
Honestly, yes! Most recipes work fine with stevia, monk fruit, or your favorite sugar alternative. Just keep an eye on texture, but taste stays solid.

How do you make gluten-free versions?
Many easy dessert recipes like flourless cookies or no-bake options are naturally gluten-free. And you can swap almond or oat flour for most regular flours without drama.

What’s the best way to store leftovers?
Grab a tight-lid container and pop leftovers in the fridge. But fair warning: most of this stuff doesn’t last long enough to worry about leftovers.

Help! My mug cake turned out rubbery. What went wrong?
Probably microwaved it a smidge too long. Start with less time, check it, and add fifteen seconds at a time as needed.

Sweet Treats, Zero Fuss

Dessert doesn’t have to be hard or take an hour—honestly, most people just want something satisfying without the struggle. If you’re ever stuck or need extra inspiration, check out What are some good and easy dessert recipes : r/cookingforbeginners, or test-drive a couple recipes from Sally’s Baking quick dessert ideas. And for out-of-the-box ideas, you might like this thread where folks share easy desserts nobody realizes they can make. Don’t overthink it—the best easy dessert is the one you actually make and enjoy, even if it’s just whipped cream and store-bought cookies. Now go on, treat yourself tonight (you deserve it).

Quick and Easy Desserts

Discover how to whip up delicious quick desserts with minimal ingredients and effort, perfect for satisfying sweet cravings without the fuss.

Mug Cake Ingredients

  • 1 cup all-purpose flour (can substitute with almond flour)
  • 3 tbsp cocoa powder
  • 4 tbsp sugar or sweetener (use your preferred sweetener)
  • 3 tbsp milk (can use any milk of choice)
  • 1 tbsp oil

Chocolate-Dipped Fruit Ingredients

  • 1 apple sliced
  • 1 cup strawberries (fresh)
  • 1 cup chocolate (for melting)

Peanut Butter Cookies Ingredients

  • 1 cup peanut butter
  • 1 large egg
  • 1/2 cup sugar

Rice Krispie Treats Ingredients

  • 3 tbsp butter
  • 1 bag marshmallows
  • 6 cups Rice Krispies cereal

No-Bake Cheesecake Ingredients

  • 1 package cream cheese (softened)
  • 1/2 cup sugar
  • 1 tsp vanilla extract
  • 8 oz whipped topping (for folding into the mixture)
  • 1 pre-made graham cracker crust

Mug Cake Preparation

  1. In a microwave-safe mug, mix flour, cocoa powder, sugar, milk, and oil until smooth.
  2. Microwave on high for 1-2 minutes until cooked through.

Chocolate Dipped Fruit Preparation

  1. Melt chocolate in a microwave-safe bowl.
  2. Dip apple slices and strawberries in melted chocolate and place them on parchment paper.
  3. Chill in the fridge until set.

Peanut Butter Cookies Preparation

  1. Preheat oven to 350°F (175°C).
  2. In a bowl, mix peanut butter, egg, and sugar until combined.
  3. Roll into balls and flatten on a baking sheet.
  4. Bake for 10-12 minutes.

Rice Krispie Treats Preparation

  1. In a saucepan, melt butter and marshmallows together until smooth.
  2. Stir in Rice Krispies until fully coated.
  3. Press into a greased pan and let cool before cutting.

No-Bake Cheesecake Preparation

  1. In a bowl, blend cream cheese, sugar, and vanilla until smooth.
  2. Fold in whipped topping gently.
  3. Pour into the crust and refrigerate for a few hours until set.

Feel free to customize the desserts using different fruits, nuts, or toppings based on your preference. These quick dessert recipes are perfect for spontaneous cravings or unexpected guests!

Dessert
American
Chocolate Dipped Fruit, Easy Recipes, Mug Cake, No-Bake Desserts, Quick Desserts

Deliciously Easy Creamy Dijon Chicken for Any Night

Creamy Dijon Chicken served with flavorful mustard sauce on a plate.

Creamy Dijon Chicken is what I whip up when my brain’s scattered and dinner plans have totally vanished. We’ve all had that ‘oh no, what’s in the fridge?’ moment. This recipe is my weeknight savior: fast, super cozy, absolutely doable even if you barely know which way to hold a spatula. When I get tired of the usual, it turns out so much tastier than takeout and honestly, it feels kinda special. If you love a good quick meal like my favorites, you’ll probably also wanna peek at this creamy Tuscan chicken soup or maybe even your new comfort dish, creamy spaghetti squash alfredo. Both are simple, flavorful, and total crowd-pleasers.
Deliciously Easy Creamy Dijon Chicken for Any Night

Key Benefits of the Topic

So, why should anyone care about creamy dijon chicken? For starters, it tastes like something you’d order at a fancy spot (I said what I said) but is almost foolproof. The main thing I adore: it goes from zero to dinner on the table in about 30 minutes. Not every recipe can brag like that, you know? You aren’t stuck using boneless chicken breasts either; thighs? Sure thing. Less fuss, still juicy. The sauce itself is rich but the mustard adds a nice uptick of zip—like, your tastebuds will wake up after one bite. And don’t even get me started about the cleanup. One pan. You’re done. If you have picky eaters or won’t-touch-a-veggie folks in your house, let them try this. I swear it disappears faster than dessert most nights. Bonus? Leftovers reheat well if you’re lucky enough to have them.
Deliciously Easy Creamy Dijon Chicken for Any Night

Common Misconceptions About the Topic

People seem to think creamy dijon chicken is this fancy, intimidating dish that’ll have them scrambling for exotic ingredients. Honestly, that’s nonsense. Here’s the reality: it’s just basic pantry stuff. Dijon mustard, a splash of cream, maybe a few herbs if you’re feeling extra. Some folks worry it’ll taste too “mustardy.” Nope. It’s subtle, promise. You’re not eating a hotdog at the ballgame. I used to roll my eyes at cream sauces—was sure they’d be heavy or just not ‘healthy enough’ for regular nights. But most versions aren’t loaded with a bucket of butter or a gallon of cheese. The flavors blend so smooth that nobody ends up with puckered lips. So, if you’ve skipped over this dish out of fear or just misunderstandings about what’s in it—trust me, it’s easier and friendlier than most folks expect.

The first time I made creamy dijon chicken, I was amazed at how simple and delicious it was. Now it’s a staple in our house!

Deliciously Easy Creamy Dijon Chicken for Any Night

Practical Tips for Implementing the Topic

One major tip: start with dry chicken. Pat it down before cooking, or you’ll get soggy, sad skin. A hot pan is your best friend, too—you want a bit of golden color going on for max flavor. Add the cream and mustard after the chicken’s cooked through, and don’t rush it. Give it a quick simmer. You don’t need fancy equipment, pinky swear. If you’re not sure if it’s done, just slice the chicken to check. Nothing worse than rubbery meat (blech). Oh! If the sauce gets too thick, just splash a little more broth or cream in until it looks right. I like mine a little runny for, you know, lots of dipping opportunities. And serve it over literally anything. Mashed cauliflower, rice, noodles, heck even a slice of bread if you’re in a hurry—it’ll be good.

Expert Opinions or Case Studies

It’s not just me hyping up creamy dijon chicken. Chef pals and family foodies all say the same thing: it’s a back-pocket dinner and a reliable hit for all ages. Nutritionists even like it since you control the ingredients. Want more protein? Use extra chicken. Want it richer? Slightly more cream, easy as pie. There are about a million versions out there, from blogs to cookbooks. Some swap the cream for plain yogurt or even coconut milk—yep, it’s possible if dairy’s not your thing. I read an article last month where a chef compared it to a “flavor bomb” and that’s honestly true. Whenever I bring leftovers to work, people peek over their desks trying to catch a whiff. No shame, I’d ask too. If you’re staring down dinner and feeling lost, just know—this recipe has passed way more real-life tests than most.

Resources for Further Learning

The fun part is once you’ve got creamy dijon chicken down, you’re basically set to riff on all sorts of cozy, creamy dinners. If you’re in a chicken mood, don’t sleep on this keto chicken alfredo dish, or maybe those keto chicken nuggets (great for picky kiddos, or, you know, adults who act like kiddos). There are online communities, cookbooks, and tons of step-by-step videos if you want to see it in action. Feeling brave? Try swapping in turkey or shrimp to shake things up. Hungry yet?

Common Questions

Q: Can I use chicken thighs instead of breasts?
Absolutely. They stay juicy and work great in creamy dijon chicken. Sometimes, even better!

Q: What if I don’t have heavy cream?
Go ahead and use half-and-half or even milk, though the sauce won’t be as thick or rich. It’ll still taste good.

Q: Is this recipe gluten-free?
It usually is, but always double-check your mustard and broth for hidden gluten if you’re sensitive.

Q: Can I make creamy dijon chicken ahead?
Yep, just keep it in a sealed container in the fridge. Reheat gently—don’t let the sauce boil or it might separate.

Q: How spicy will this be?
It’s not spicy at all (unless your mustard is wild). More zippy than hot.

Let’s Eat: Why You’ll Want This in Your Rotation

Creamy dijon chicken isn’t just another weeknight meal; it’s seriously reliable, crazy tasty, and feels kind of fancy without all the kitchen drama. I honestly crave it all the time. When you’re ready for more quick meals, check out external favorites like Creamy Dijon Chicken from Budget Bytes or classic takes like this Creamy Dijon Chicken Recipe. Give this dish a go, and I bet it’ll sneak into your regular rotation before you know it. Whether you’re cooking for yourself, your family, or that random neighbor who happened to pop in, you’re covered. If you try it out, let me know how it turned out for you—honestly, I love hearing all the little kitchen wins from folks who thought “nah, that sounds too hard” and ended up making something awesome.

Creamy Dijon Chicken

A quick, cozy, and flavorful dish that brings a touch of fancy to your weeknight dinners, ready in just 30 minutes!

Main Ingredients

  • 4 pieces boneless chicken thighs or breasts (Chicken thighs work well for juiciness.)
  • 1 cup heavy cream (Can substitute with half-and-half or milk for a lighter option.)
  • 3 tablespoons Dijon mustard (Adjust based on taste preference.)
  • 1 tablespoon olive oil (For cooking the chicken.)
  • 1 teaspoon salt (To taste.)
  • 1 teaspoon black pepper (To taste.)
  • 1 cup chicken broth (For deglazing the pan and aiding sauce consistency.)

Preparation

  1. Pat the chicken dry with paper towels and season with salt and pepper.
  2. Heat olive oil in a large pan over medium-high heat.
  3. Cook the chicken for about 5-7 minutes on each side until golden brown and cooked through.
  4. Remove the chicken from the pan and set aside.

Making the Sauce

  1. Lower the heat and add the chicken broth to the same pan, scraping up any bits stuck to the bottom.
  2. Stir in the Dijon mustard and heavy cream, mixing well.
  3. Allow the sauce to simmer for a few minutes until slightly thickened.
  4. Return the chicken to the pan and coat it with the sauce.

Serve over mashed cauliflower, rice, noodles, or with bread. This dish reheats well for leftovers.

Dinner, Main Course
American, Comfort Food
Comfort Food, Creamy Dijon Chicken, Easy Recipes, One Pan Meal, Quick Dinner

Deliciously Creamy Cottage Cheese Egg Salad You’ll Love

Bowl of creamy cottage cheese egg salad made with boiled eggs and fresh herbs.

Cottage Cheese Egg Salad. Now, tell me, has there ever been a lunch or snack you craved that felt both rich and super light at the same time? Here’s the snag – most salads leave you hungry, and I don’t know about you, but who wants to eat again in a couple hours? That’s why I swear by this one. It keeps me full, it’s simple, and my picky-eater friend (let’s call him Dan) actually asked for seconds. If you’re ever in a rut after making something like Keto Philly Cheesesteak Casserole or need something easy after your Keto Eggplant Parmesan flopped (it happens, let’s be real), this one’s a life-saver.

Cottage Cheese Egg Salad

Key Benefits of the Topic

Let’s just talk honest facts for a second. Why even bother with cottage cheese egg salad? First of all, it’s packed with protein. Not just a teensy bit – like, you’ll be surprised how much muscle food is in there. That’s probably why some folks say it’s as satisfying as a steak, which feels a bit dramatic, but hey, I respect strong opinions. Second thing is, it’s due to cottage cheese, there’s way less fat but still all that creamy feeling. I mean, you really get that “hmm, velvety” moment in your mouth (totally didn’t expect that the first time). Plus, eggs themselves? Filling. Sometimes I eat this salad after a rough morning and my mood just, I dunno, perks up.

You won’t need weird, fancy ingredients either. Most of what goes in is already knocking around in the back of that fridge of yours. If you’re into meal prep magic, doubling up this recipe is your ticket – keeps in the fridge, totally low fuss. It’s an upgrade from other cold salads, especially if mayo isn’t your thing but you still love creamy. For more creative ways to use cottage cheese in your keto meals, check out this complete Keto Cottage Cheese Guide packed with tips and recipes.

If your usual go-to is just plain eggs or something like an old-school tuna salad, this, my friend, is a major glow-up. Speaking of egg salads, if you prefer a more traditional approach, you’ll love this Delicious Keto Egg Salad that’s equally simple and satisfying.

“I never thought I’d actually enjoy cottage cheese until I tried this egg salad. Now I keep a container in my fridge just for this recipe!” — Monica, actual real-life cottage cheese convert

Deliciously Creamy Cottage Cheese Egg Salad You’ll Love

Common Misconceptions About the Topic

Alright, elephant in the room here: doesn’t cottage cheese taste weird? Or will it make my food all watery? I asked myself those same things. People seem to think it’s bland, sometimes “too lumpy” (yes, a quote from my brother), or simply too diet-y. None of that’s true if you do it right.

What surprised me most? It’s not an acquired taste when you add a little seasoning and mix it with eggs. The combination gets rich and savory, but not heavy like mayo-based salads. Also, cottage cheese won’t make your salad sad and soggy – but, honestly, drain off any extra liquid first.

Also, just so you hear it from a real person, you definitely don’t need some special brand of eggs or fancy cottage cheese. Store brand is fine. Organic if you’re feeling it, but not necessary at all.

One more thing: people think all protein salads are bland. Not this time. The tang from cottage cheese gives a fresh bite. It totally makes the salad “pop” in a way that classic egg salad just can’t.

Cottage Cheese Egg Salad

Step-by-Step Guide to Understanding the Topic

Let’s get to the nitty-gritty, the actual hands-in-the-bowl action. You only need five things, give or take: eggs, cottage cheese, some kind of mustard, scallions, salt, and pepper. Okay, that’s six, but who’s counting?

Boil your eggs – don’t overthink it. I like ‘em on the hard, sturdy side (nothing worse than a runny egg in salad, ew). Peel, then chop them pretty chunky. Cottage cheese? A few big spoonfuls right on top. Add a squirt of mustard for a zingy kick. Salt and pepper – go with your heart, I’m not judging. Scallions are optional, but add a green snap; I absolutely love.

Gently… and I mean gently… fold it all together. You want chunks, not mush. Taste-check it. Maybe add a sprinkle of paprika – that’s my secret move. Refrigerate for ten or so minutes if you want it cold, but if we’re being honest, I eat it right away most days.

This is what I do for a quick lunch, but you can double it if you’re a meal-prep hero or just naturally chaotic like me.

Expert Tips for Success in the Topic

Here’s the rundown you wish someone had told you earlier. Use small-curd cottage cheese if you want things to stay chunky – big curd is fine, but just looks kind of, I don’t know… odd? And always drain the cottage cheese if it seems really watery.

Add a dash of smoked paprika. Makes me feel like a five-star chef, even when I’m in sweats. And chop the eggs after cooling – warm eggs will melt the cottage cheese and turn it weird. Oh, and don’t store it for more than two days. Learned that the hard way… don’t ask.

One random trick? Mix in a few chopped pickles or capers for tang. And, if you’re feeling extra, a squeeze of lemon juice wakes up the whole thing.
For real, try serving this next to your Keto Eggplant Parmesan on a summer night. Your friends will be shocked when it all disappears.

Those little switches turn a humble cottage cheese egg salad into, honest-to-goodness, a family-favorite situation.

Serving Suggestions and Fun Twists

  • Spoon it on crunchy lettuce for a keto-friendly wrap – actually tastes better than bread, not kidding.
  • Tuck it in a low-carb pita, or pile it high on a crisp rice cake if you just don’t care about the low-carb thing.
  • Smash some avocado on toast, then mound the salad on top for a killer breakfast.
  • Oh! It also makes a good “dip” for carrot sticks or snap peas when you want snacky, deconstructed action.

Real-World Examples and Case Studies

I’ll cut to the chase. My neighbor, Sarah, once swore she’d never touch cottage cheese again after a weird diet in college. I handed her a scoop of this salad, and she texted the recipe to her mom before she finished eating (cue shocked emoji face).

Another friend of mine, obsessed with all things Keto Philly Cheesesteak Casserole, started packing this instead for her work lunches. She told me, “I’m saving money, feeling full, and weirdly, my kids like it too.” Pretty sure that counts as a legit case study, right?

Heck, just last week I made a big bowl for a lake picnic. Black pepper, a sprinkle of smoked salt, a tiny bit of fresh dill, and, not exaggerating, the whole group polished it off before the sandwiches. It’s the random crowd-pleaser nobody expects.

People pop in saying, “no thanks” – then, hmm, end up scooping double helpings. Makes you wonder why you didn’t try it sooner. If you’re looking for more high-protein cottage cheese ideas, these High-Protein Cottage Cheese Breakfast Tacos are another game-changer for meal prep.

Common Questions

Is this cottage cheese egg salad actually filling or will I need a second lunch?
You’d be surprised! It sticks with you for a while – protein power, seriously.

Do I need fancy cottage cheese?
Nope. Any supermarket variety is good. I use whatever’s on sale, honestly.

Can I make it ahead of time?
Sure can. Just keep it in the fridge and eat within a couple of days for the best taste.

Is this okay for keto or low carb?
Yes. Totally fits keto goals and tastes way better than some sad lettuce wrap.

Will kids actually eat this?
Shockingly, yes – especially if you skip the green onions or add a bit of cheddar.

The Easiest Upgrade to Your Lunch Routine

Honestly, cottage cheese egg salad is just that good. It’s light, protein-rich, and way more interesting than plain old egg salad. Whether you’re into meal prep or need something last-minute, this has you covered.
And for those who want more ideas, both these pages have inspired me: Cottage Cheese Egg Salad (High Protein) – The Balanced Nutritionist and Cottage Cheese Egg Salad – Healthyish Foods.
Just give this one a whirl. You might even find yourself side-eyeing those “fancier” recipes you used to make!

Cottage Cheese Egg Salad

A light and protein-packed egg salad made with cottage cheese, perfect for a satisfying lunch or snack.


Main Ingredients

  • 4 pieces eggs, hard boiled (Boil until firm.)
  • 1 cup cottage cheese (Use small-curd for better texture.)
  • 1 tablespoon mustard (Use your favorite type for flavor.)
  • 2 tablespoons scallions, chopped (Optional for a fresh crunch.)
  • to taste salt and pepper (Adjust according to preference.)
  • optional smoked paprika (Adds a nice flavor boost.)

Preparation

  1. Boil the eggs until hard and firm, then peel and chop them into chunky pieces.
  2. In a mixing bowl, combine the chopped eggs with cottage cheese.
  3. Add mustard, salt, and pepper to taste.
  4. Gently fold the ingredients together to keep chunks intact.
  5. Refrigerate for about 10 minutes for a chilled salad, or serve immediately.

For added flavor, mix in chopped pickles or capers. Serve on lettuce for a low-carb option or with rice cakes.

Lunch, SnackAmericanCottage Cheese, Egg Salad, Low-Carb, Meal Prep, Protein Salad

Deliciously Moist Banana Nut Bread Greek Yogurt Recipe

Moist and fluffy Banana Nut Bread made with Greek Yogurt and walnuts.

Banana Nut Bread Greek Yogurt. That’s what I always crave when three sad bananas stare back at me from the counter. So, you’ve got mushy bananas and you want to bake something quick, not fussy, and definitely not dry or bland. I’ve been there—more times than I care to share. If you’re interested in jazzing things up and maybe sneaking some extra protein into snack time, uh, this is your cozy-day hero. And you know what pairs perfectly while that bread’s in the oven? Checking out how to make keto stuffed peppers without rice for a savory dinner, or peeking at another easy Greek yogurt recipe.
Banana Nut Bread Greek Yogurt

Recipe Variations for Greek Yogurt Banana Bread

Let’s be honest—it’s impossible to leave a recipe alone every single time. This isn’t some strict, fancy baking operation. Try swapping walnuts for pecans, or toss in a handful of dark chocolate chips if your sweet tooth’s hollering. I sometimes throw in a sprinkle of cinnamon or a dash of nutmeg just because it smells nostalgic. Got dietary needs? You can definitely use oat flour (not always my favorite texture, but it works) or even make it gluten-free.

Feeling wild? Throw in shredded coconut, dried cranberries, or even a swirl of peanut butter across the top before it bakes. Friends have tried it with honey instead of sugar and swore it turned out great. Some folks skip nuts altogether (my kid refuses “crunchy bread,” so sometimes I cave).

Just don’t be afraid to let your mood lead. Banana Nut Bread Greek Yogurt is forgiving—almost too forgiving.

This bread has saved my breakfast life more than once. I change up the mix-ins every time and it hasn’t flopped yet. — Jamie T.

Deliciously Moist Banana Nut Bread Greek Yogurt Recipe

Tips for the Best Greek Yogurt Banana Bread

Here’s the thing: you don’t have to be a kitchen wizard to nail banana bread, but a few tricks help:

Don’t overmix. Like, seriously—once the wet and dry stuff are barely mixed, STOP. Your crumb will thank you. Use super-ripe bananas. Not pretty ones. Like, the “should I compost this?” ones.

If your Greek yogurt is real thick, thin it a bit with a splash of milk. Quick tip: sift your flour if you can. It just works. Oh, make sure your baking soda isn’t ancient. Old leavener = sad, flat loaf.

Deliciously Moist Banana Nut Bread Greek Yogurt Recipe

Nutritional Benefits of Using Greek Yogurt

You might think Greek yogurt is just there to make Banana Nut Bread Greek Yogurt nice and moist (which, yes), but it sneaks in some health perks, too. Guess what, Greek yogurt ups the protein, so this bread’s not just a carb bomb. It’s got some calcium, too, and a tang that cuts the sweetness. Oh, and compared to using a ton of butter or oil, yogurt lightens things up a bit without losing that rich flavor. If you’re watching sugar, you can use less because the bananas and yogurt make it taste sweet on their own.

So yeah, it’s banana bread you can almost feel virtuous eating… until you’ve had, like, three slices at once (I’ve been there).

Common Mistakes to Avoid

Okay, so let’s spare you some heartache.

The main thing? Overbaking. Banana Nut Bread Greek Yogurt dries out fast if it’s in the oven too long. Keep an eye the last 10 minutes and poke it with a toothpick right in the center. If you see wet batter, bake a tad longer. Still gooey inside? Give it another five minutes and check again, but don’t just walk away and hope for a miracle.

Another one: skimping on bananas, or using not-ripe ones. Unripe bananas = zero flavor.  Oh, and don’t forget the salt, even a pinch matters.
A little too much flour can wreck the whole loaf; don’t scoop directly from the bag—spoon and level it off.
Finally, don’t try slicing the bread hot. It needs a tiny nap out of the oven or it’ll crumble everywhere.

Storage and Freezing Instructions

Let’s talk leftovers (if you have any). Here’s how I keep Banana Nut Bread Greek Yogurt fresh:

  • Wrap cooled loaf in plastic or foil, makes it last nearly a week at room temp
  • For longer storage, pop slices in a freezer bag and tuck in the freezer
  • Thaw in fridge overnight or—real talk—the microwave for 20 seconds works in a pinch
  • Toast leftovers for extra yum

Bread never sticks around long at my place, but freezing makes it so handy for grab-and-go breakfasts during wild weeks.

Common Questions

Q: Can I use plain yogurt instead of Greek yogurt?
A: Yep! The texture changes ever-so-slightly, but it totally works.

Q: Should I mash bananas super smooth or leave ‘em chunky?
A: Honestly, it’s up to you. I leave a few soft lumps so you get tiny banana pockets.

Q: Can this be made vegan?
A: Substitute flax eggs and dairy-free yogurt. It’s not totally identical, but it holds up.

Q: Why did my Banana Nut Bread Greek Yogurt sink in the middle?
A: Usually too much mixing or baking soda that’s past its prime.

Q: Can I double the recipe?
A: Sure can—just bake in two pans and maybe rotate halfway so everything browns up even.

The Perfect Excuse to Bake Today

There you go, you’ve got the secrets and tips for making Banana Nut Bread Greek Yogurt that’s tastier than a five-star bakery’s (I said what I said). Got bananas getting old? You know what to do now. Give this wholesome, moist loaf a try next time you need a cozy treat—or just want something more fun than cereal. Need more inspiration? Check out these helpful recipes at Greek Yogurt Banana Bread – Just a Taste and Greek Yogurt Banana Bread – Lovely Little Kitchen to mix things up even more. Honestly, once you make this, you’ll find reasons to let bananas go brown every week. Happy baking!

Banana Nut Bread with Greek Yogurt

A moist and nutritious banana bread made with Greek yogurt, perfect for using up overripe bananas.

Wet Ingredients

  • 3 pieces Ripe bananas (Must be very ripe for optimal flavor.)
  • 1 cup Greek yogurt (Use full-fat for a richer taste; can thin with milk if too thick.)
  • 1/2 cup Honey or sugar (Honey can be used as a substitute.)

Dry Ingredients

  • 1 cup All-purpose flour (Sift before measuring for better results.)
  • 1/2 teaspoon Baking soda (Ensure it is fresh for proper rising.)
  • 1 teaspoon Salt (Even a pinch matters for flavor.)

Optional Mix-ins

  • 1/2 cup Chopped nuts (walnuts or pecans) (Optional, can skip for a smoother texture.)
  • 1/2 cup Dark chocolate chips (For a sweeter version.)
  • 1 teaspoon Ground cinnamon (Adds a warm flavor.)

Preparation

  1. Preheat your oven to 350°F (175°C) and grease a loaf pan.
  2. In a large bowl, mash the ripe bananas and mix in the Greek yogurt and honey/sugar until combined.
  3. In another bowl, combine the flour, baking soda, and salt.
  4. Gently fold the dry ingredients into the wet ingredients until just combined. Do not overmix.
  5. If using, fold in any optional mix-ins.

Baking

  1. Pour the batter into the prepared loaf pan and smooth the top.
  2. Bake in the preheated oven for 50 minutes, checking in the last 10 minutes with a toothpick.
  3. If the toothpick comes out clean, the bread is done. Let it cool for a few minutes before removing from the pan.

Store leftovers tightly wrapped at room temperature for up to a week. For longer storage, freeze slices in a freezer bag.

Breakfast, Snack
American
Baking, Banana Bread, Easy Recipe, Greek Yogurt, Healthy Snack

Savor the Flavor with Easy Keto Taco Cups Delight!

Keto Taco Cups with cheese shell filled with seasoned taco meat

Keto taco cups. If you’re like me, you want easy, crave-worthy dinners that won’t blow your carb limit or steal your entire evening. The struggle? Taco cravings hit hard, and all those crispy taco shells are basically off the table (bye, tortillas). My brain instantly thought, wait—why not make taco cups with cheese? And guess what, it actually works. I legit broke my own “no-mess weeknight” rule the first time because it’s so dang simple. By the way, if you’re ever digging for more low-carb dinner ideas, check out these dinner keto recipes that always save my week.
keto taco cups

Keto Taco Cups Ingredients

You barely need any fancy stuff for this one. Honestly, you might have the basics already chilling in your fridge. The secret is cheese. Cheese is magic. Here’s what I use every time:

  • Shredded cheese: Cheddar is boss, but pepper jack or Colby work fine too.
  • Ground beef: Or turkey, or chicken, but beef brings big taco flavor.
  • Taco seasoning: Make your own or grab a packet (double-check for hidden sugars though).
  • Toppings: Sour cream, lettuce, avocado, salsa—even jalapeños if you’re wild like me.

That’s it, no oddball ingredients or stuff you’ll never use again. Swapping in what you have is totally fine (I swapped sausage once and, honestly, wasn’t mad at it).

keto taco cups

How to Make Keto Taco Cups

Alright, listen, because I nearly messed this up the first time. Start with shredded cheese. You pile little mounds onto a lined baking sheet and bake until bubbly. Here’s where it gets a bit weird—the cheese goes from oozy to perfect in seconds, so don’t walk away.

As soon as those cheese circles turn golden, peel them off (use a spatula, not your fingers, unless you secretly like pain) and press gently into a muffin tin. That’s your “cup.” Let ‘em cool for a few minutes or they’ll flop.

While that’s happening, brown your ground beef in a skillet with taco seasoning. Give it a taste. I always sneak a bite (or three). Spoon the meat into your cheese cups and it’s basically done. Don’t forget the toppings—my kid piles on EVERYTHING. Gotta love that enthusiasm.

Seriously, it’s almost fun how fast it comes together. You’ll think you’re a five-star chef for like twenty minutes.

keto taco cups

I served these at a soccer night and every person asked for the recipe—even the “I don’t do keto” crowd! Literal win.

How Many Net Carbs in Taco Cups?

Here’s the best part for keto folks: keto taco cups are super low in carbs. Like, a cup or two isn’t going to stack your numbers high. On average, each taco cup runs around 2 to 3 net carbs, but this totally depends on the cheese and seasonings.

Double-check your taco seasoning—some sneak in more carbs than you expect. Swap in more veggies if you want even fewer. I keep a tiny notebook (yeah, nerd alert) and jot down net carbs so I can track without guessing.

Fat is your friend here. These are filling, so you probably won’t eat too many regardless. Toss the guilt, seriously.

What to Serve with Taco Cups

Alright, if you want a full meal and not just taco bites, you’ve got easy choices. Honestly, I get bored fast so rotating sides keeps things fresh. I’ll say this—these are fun to build around.

  • Fresh chopped salad: Toss in whatever greens you have, done.
  • Cauliflower rice: Trust me, it soaks up any taco juice.
  • Spicy roasted veggies: Broccoli or bell peppers are stars.
  • Guacamole: Always extra, always worth it.

Try serving with this cheesy spaghetti squash keto casserole a family-friendly dinner, especially for hungry people who need more than just a bite.

Can You Meal Prep Taco Cups?

One word—YES. To be honest, keto taco cups are my new lunchbox heroes. Make a batch, cool them off, pop them into containers, and stash in the fridge. Reheat gently (like, not with a volcano setting) because too much heat makes the cheese rubbery.

I think they’re best eaten within three days, but my partner swears they last longer (I doubt it). If you love prepping ahead, get a couple varieties going with different proteins. Freezer? Eh, I don’t love how the cheese texture changes so I’d stick to the fridge.

Common Questions

Q: Can I use parchment paper to bake the cheese cups?
A: Yup, parchment is the way to go. Cheese slides right off and cleanup’s a breeze.

Q: What cheese works best for keto taco cups?
A: Sharp cheddar melts well and holds its shape. I’ve tried mozzarella, but honestly, it gets too stringy. Pepper jack for a kick is fun.

Q: Frozen or fresh ground beef?
A: Both, but if you forgot to thaw—microwave it a tad, break it up, and cook. No one’s judging.

Q: Can I make this vegetarian?
A: For sure! Go beans (if you keep those on keto), or try a tofu crumble or even spiced cauliflower.

Q: Will kids eat these or is it too odd?
A: Kids love ‘em. They’re like taco night and cheese pizza had a baby. Just go easy on the spice.

Try These Next for More Keto Fun!

There you have it—keto taco cups are hands down one of my easiest, tastiest weeknight hacks. No one misses tortillas, not for one second. Just crisp cheese, hearty filling, and flexible toppings—the best combo for busy nights or fun weekends. Grab yourself some inspiration from Easy Keto Cheese Shell Taco Cups – Hey Keto Mama or get wild with variations like Easy Keto Taco Cups – The Best Keto Recipes. And for extra sneaky tips, I learned a few magic tricks from Keto Taco Low Carb Cups Recipe – Kasey Trenum. I’m telling you, just make them. Your next taco craving? Sorted, for good.

Keto Taco Cups

These Keto Taco Cups are a delicious low-carb alternative to traditional tacos, made with crispy cheese cups filled with flavorful ground beef and topped with your favorite ingredients.

Main Ingredients

  • 2 cups shredded cheese (cheddar, pepper jack, or Colby) (Cheddar is recommended for best flavor.)
  • 1 lb ground beef (Can substitute with ground turkey or chicken.)
  • 1 packet taco seasoning (Check for hidden sugars if using store-bought.)

Toppings

  • 1/2 cup sour cream (Add more to taste.)
  • 1 cup lettuce, chopped (Any type of lettuce can work.)
  • 1 medium avocado, sliced (Optional, for added creaminess.)
  • 1/2 cup salsa (Choose your favorite type.)
  • to taste jalapeños, sliced (For those who enjoy some heat.)

Preparation

  1. Preheat your oven to 375°F (190°C). Line a baking sheet with parchment paper.
  2. Pile little mounds of shredded cheese onto the lined baking sheet.
  3. Bake until the cheese is bubbly and golden, about 5-7 minutes. Stay close as it can change quickly.
  4. Remove from the oven and use a spatula to gently peel off the cheese circles and press into a muffin tin to form cups.
  5. Allow to cool for a few minutes to firm up.

Cooking

  1. In a skillet, brown the ground beef over medium heat.
  2. Add taco seasoning to the meat and mix well. Taste and adjust seasoning if desired.

Assembly

  1. Spoon the ground beef mixture into each cheese cup.
  2. Top with your choice of toppings such as sour cream, lettuce, avocado, salsa, and jalapeños.

Keto Taco Cups can be meal prep-friendly. Store them in an airtight container in the fridge and enjoy within three days. Reheat gently to maintain the cheese texture.

Dinner, Snack
Keto, Mexican
Cheese Cups, Easy Dinner, Keto Meals, Keto Taco Cups, Low-Carb Tacos

Deliciously Easy Ham and Cheese Egg Cups for Your Breakfast!

Delicious Ham and Cheese Egg Cups made with eggs, ham, and cheese for a healthy breakfast.

Okay, picture this: you’re running late, the toaster isn’t working for the third time this week, and someone (it was definitely the dog, right?) ate all the bagels. Ham and cheese egg cups to the rescue! Forget sad cereal. Whip up these beauties ahead of time, and you’ll never do the “I forgot breakfast” panic again. Plus, if you’re feeling fancy, check out this killer keto eggplant parmesan for dinner ideas. Seriously, mornings can be good.


ham and cheese egg cups


The perfect make ahead breakfast recipe

Here’s the truth. Mornings are chaos. These ham and cheese egg cups are my go-to because I can bake a batch and eat all week. I get bored pretty quickly with cold yogurt or granola bars anyway. Besides, these things actually fill you up.

I’ve tested a huge list of grab-and-go breakfasts, but nothing beats this one for taste, plus how stinkin’ easy it is. You toss a handful of ingredients into a muffin tin, boom, done. I’m talking five-star restaurant results straight out of your oven. On Monday, you feel like a meal prep champ. By Friday, you are still eating like one (or, more likely, you already ate them all, but you get the idea).

My kid only eats the ones with extra cheese, and my husband insists on calling them “eggs in disguise.” Whatever gets them eaten, right? If you’re looking for another baked egg dish that’s equally easy, try this Ham and Spinach Quiche for weekend brunches.

“These egg cups actually saved our mornings during back-to-school chaos. They freeze well and taste great with salsa too!” — Justine W.

Deliciously Easy Ham and Cheese Egg Cups for Your Breakfast!


Ingredient swaps & additions to Egg Breakfast Cups

Let’s be real. Sometimes the fridge is empty except for weird leftovers, but don’t let that stop you. You have options! If ham is a no-go, try turkey or cooked bacon. Craving extra veggies? Toss in spinach, bell peppers, or even a handful of mushrooms. Sky’s the limit (unless you’re out of eggs, then you’re on your own).

Love cheese, but lactose is not your friend? Use a sprinkle of dairy-free cheddar instead. I’ve also added chopped tomatoes or green onions, and once… left out the cheese by accident. Was it as good? Meh, but it worked. Just don’t overthink it. The recipe’s forgiving. Picky eaters? Trick them by calling it a “breakfast cupcake” (seriously, it works wonders).

Frozen veggies in the back of your freezer? Yup, those too. Thaw, drain, and toss ‘em in. It’s about getting breakfast done, not winning a cooking contest. For a veggie-packed alternative, check out these Baked Eggs and Zoodle Bundles that sneak in extra nutrition.

ham and cheese egg cups


How to make Ham & Cheese Egg Cups

Okay, let’s cut to the chase. You want details, here’s my full (not-so-secret) playbook for ham and cheese egg cups:

  • Preheat your oven to 350°F. Don’t skip this or you’ll wait forever.
  • Grease a muffin tin or use paper liners if you hate cleanup (me, always).
  • Layer diced ham and a generous handful of cheese into each muffin slot. I like sharp cheddar, but you do you.
  • Crack eggs into a bowl. Add a splash of milk (makes them fluffy, trust me), plus salt and pepper. Whisk it good.
  • Pour egg mix over the ham and cheese. Fill nearly to the top, but save a little room.
  • Bake 18-20 minutes until set. Listen, your oven might be a liar, so check early.
  • Cool before popping them out. If you burn your fingers here, I warned you.

That’s it. Honest to goodness, this is it. Mix, pour, bake… eat breakfast like a legend.


Freezing Egg Muffins

I always get asked: Can you save these for later? Heck yes. They’re born to be stashed away. Just cool your ham and cheese egg cups all the way (don’t rush this part or they get soggy). Then wrap each in cling film or foil and toss them in a freezer bag.

Taking them with you? A quick zap in the microwave (like 45 seconds, sometimes less) makes them steamy and ready for chow-time. Some folks swear by reheating in the oven for a crispy edge. I like both, but who has patience every day? If you’ve got more quick ideas, check out this keto Philly cheesesteak casserole for a great lunch option!

I did once forget about a batch in the freezer for, oops, three weeks. Still tasted perfect. Don’t know if that’s science, but it worked.


Other Quick Breakfast Recipes

If you’re looking for alternatives to ham and cheese egg cups, there are plenty out there. I’m always on the hunt for those “just throw it together” kind of meals.

  • Oatmeal in a mug takes like two minutes. Toss in some peanut butter, and it gets super filling.
  • Chia pudding, if you’re into that sort of healthy thing. Prep at night and grab in the morning. Speaking of chia, this Keto Chia Pudding is perfect for busy mornings.
  • Low-carb ideas? You could try low-carb spaghetti squash and meatballs, another fun meal prep if you’re off the bread train.
  • Avocado toast with everything bagel seasoning, but add a hard-boiled egg for bonus power.

Sometimes I’ll switch it up and use leftover roast veggies from dinner in my egg cups, just for a twist. If you want to simplify even more, try these Cheesy Scrambled Eggs protein-packed breakfast. And for those who need something even more portable, these Cheesy Frico Fried Egg Tostadas are another fun option. Basically, the more you experiment, the less boring breakfast gets.


Common Questions

Can I make ham and cheese egg cups ahead of time?
Absolutely! Make a batch Sunday night and eat all week. They store well in the fridge.

How do you keep egg muffins from sticking?
Grease the muffin tin really well, or line it with paper cups. I’ve had a few disasters where half the muffin stayed behind (sad times).

Is it possible to use egg whites instead of whole eggs?
You bet. Just use the equivalent amount and maybe add a touch more cheese for flavor.

Do these freeze well?
Yes. Once cooled, wrap and freeze individually. Reheat as needed.

Any tips for making them extra fluffy?
Adding a splash of milk or cream helps a lot, and don’t forget the whisking step.


Your new favorite breakfast starts here

So if you’re tired of boring, run-of-the-mill breakfasts, these ham and cheese egg cups are your golden ticket. Trust me, even picky eaters love them. Make a batch now, set yourself up for success in the morning, and enjoy a legit meal every day without fuss.

Psst—if you want even more ideas, the folks at Wellness by Kay, Simple Joy, and Inside BruCrew Life have tasty spins on these too. You’ve got this—now go make breakfast awesome!

Ham and Cheese Egg Cups

These ham and cheese egg cups are a perfect make-ahead breakfast option that you can prepare in advance and enjoy all week long.

Main ingredients

  • 12 large eggs (Use whole eggs or egg whites as preferred.)
  • 1 cup diced ham (Can use turkey or cooked bacon as alternatives.)
  • 1 cup shredded cheese (Sharp cheddar is recommended; dairy-free alternatives can be used.)
  • 1/4 cup milk (Splash of milk for fluffiness.)
  • to taste salt and pepper (Adjust seasoning to preference.)

Preparation

  1. Preheat your oven to 350°F.
  2. Grease a muffin tin or use paper liners.
  3. Layer diced ham and a generous handful of cheese into each muffin slot.
  4. In a bowl, crack the eggs and add milk, salt, and pepper. Whisk until combined.
  5. Pour the egg mixture over the ham and cheese in the muffin tin, filling nearly to the top.

Baking

  1. Bake in the preheated oven for 18-20 minutes until set.
  2. Cool the egg cups before removing them from the tin.

These egg cups freeze well. Cool completely before wrapping individually to store in the freezer. Reheat in the microwave or oven for a crispy edge.

Breakfast, Brunch
American
Breakfast Recipe, Egg Muffins, Ham and Cheese Egg Cups, Make Ahead Breakfast, Quick Breakfast

Warm Up with This Irresistibly Spicy Cabbage Soup Recipe

Bowl of spicy cabbage soup filled with vibrant vegetables and spices.

Spicy Cabbage Soup is exactly what I crave when the weather gets weird, or I just can’t decide what to make for dinner. I mean, you know when you open the fridge and it’s a bunch of leftover roasted veggies, maybe a half head of cabbage, and the same old pack of chicken sausage? That was me last week. I wanted something warm, a little fiery, not the same old “blah” soup—so I landed on Spicy Cabbage Soup and wow, my kitchen smelled amazing. Actually, if you want a whole bunch of soup inspo, check out these soup keto recipes too, they’re a gold mine. Anyway, let’s get into this recipe, because I promise, it’ll become your go-to rescue meal.
Spicy Cabbage Soup

Process & Tips

Making this Spicy Cabbage Soup is super straightforward, even if you’re not exactly a whiz in the kitchen. First, chop your cabbage nice and chunky. (Don’t dice it to mystery bits, nobody wants lost cabbage.) Sauté onion and garlic in olive oil, the old classic—let that smell hit you, it means it’s working. Toss in your cabbage, whatever spicy pepper or crushed red pepper you’ve got handy, and stir it around with love. Add great broth, tomatoes, salt, pepper. Not rocket science, promise.

Let it simmer gently—maybe 20 to 30 minutes. Enough time to do a little kitchen dance or scroll your phone. Taste it! Is it spicy enough? Maybe it could use a splash of vinegar or a smidge of extra salt. Taste and fix as you go.

<
blockquote>
“I never thought cabbage soup could be craveable, but this one totally changed my mind. I made it with what I had on hand and it turned out seriously delicious!”

Don’t overthink it. This soup forgives mistakes. If the cabbage gets a little too soft, honestly, it still slaps. I always say, if you like it a little chunky or a little stewy, you do you.
Warm Up with This Irresistibly Spicy Cabbage Soup Recipe

Make it With Sausage

Here’s a sneaky tip: add sausage and you basically have a five-star restaurant meal (well, in your living room, anyway). Slice up some spicy or mild sausage—chicken, pork, even veggie sausage totally works. Heat it up in your pot before adding your veggies, let it get that glorious browning on the edges. Adds so much flavor, I can’t even lie.

Honestly, this is how I win over folks who “don’t like cabbage.” The sausage magic just works. And if you’re wondering what to pick, go for something smoky or with a little fennel. Even leftover grilled brats are fair game! I made it once with spicy Italian sausage and my friend almost proposed to me on the spot. Not even joking.

If you want more dishes with cabbage and protein, try this keto stuffed cabbage recipe—total crowd-pleaser.
Warm Up with This Irresistibly Spicy Cabbage Soup Recipe

Make it A Spicy Vegetarian Cabbage Soup

You don’t need meat, not one bit. This Spicy Cabbage Soup gets awesome with veggie broth. Drop in white beans—something about creamy beans and spicy broth, chef’s kiss. Or lentils, if you want more hearty stuff. Skip the sausage, double the peppers, maybe add smoked paprika if you like things extra.

Literally, I made a big pot of this for a vegan potluck and there was not a single spoonful left. If you’re watching your carbs, you can add in chopped zucchini or cauliflower rice. If you’re not, a handful of corn is tasty. Nutritional yeast trick: sprinkle some in before serving for that secret umami. Tastes kinda cheesy.

You can let it simmer longer; the beans get softer and soak up that flavorful, spicy broth. Do what works for you.

Customize the Spice Level

Here’s the fun part, and maybe the most personal: the spice!

  • Like it super mild? Skip the hot peppers, use smoked paprika for flavor, or dairy like a splash of cream at the end.
  • Can’t feel your face? Add a few dashes of your favorite hot sauce plus extra chili flakes.
  • In-between? One or two fresh jalapeños, seeded, makes for a gentle background heat. Dice fine!
  • Want a glow? Fresh ginger slices dropped in with the broth give warmth without all-out burn.

Every time I make this, the level of fire changes—depends on who’s eating, how much I want to clear my sinuses that day, etc. Taste before serving. That’s the whole key.

Storing & Freezing Leftovers

This soup is the champion of make ahead meals, for real. It actually tastes better the next day—no idea why, just trust the process. Cool it down, pop it into a lidded container, and the fridge is your friend for up to 5 days.

Freezer? Absolutely yes. Pour it into quart containers or even big zip-top bags, lay them flat. It freezes beautifully and thaws in a snap for quick lunches or lazy dinners. Sometimes the cabbage softens up even more, but that’s not a bad thing.

When you reheat, toss in a splash of broth or water if it looks thick, give it a minute or two longer on the stove or even nuked in the microwave. I stand by this: always make more than you think you’ll want. The leftovers get eaten, promise.

Common Questions

Can I use other greens instead of cabbage?
Totally. Kale, collards, or even bok choy work. The vibe will be a bit different, but still great.

What can I serve with spicy cabbage soup?
Crusty bread, simple salad on the side, or even rice. If you’re into keto, just enjoy it straight or with a chunk of cheese.

How do I cool it down if it’s too spicy?
Add a little cream, coconut milk, or plain yogurt. Even just some extra broth helps mellow it out.

Can I use pre-shredded cabbage or coleslaw mix?
Heck yes. Anything to make it faster is fine. Might cook a little quicker, so keep an eye on it.

How long does it last in the fridge?
Easy answer. Four or five days. Maybe freeze if you won’t finish by then.

A Bowl of Heat for Every Day

Honestly, there aren’t many recipes as flexible as Spicy Cabbage Soup. It fits whatever you feel like, spice-wise, and works for meaty cravings or plant-based nights. It’s cheap, filling, (sneakily healthy), and perfect for crazy weeknights. Want more ideas, check out Spicy Cabbage Soup – Real Food Whole Life, Spicy Vegetarian Cabbage Soup – Gimme Some Oven, or get a flavorful detox boost with the Spicy Cabbage Detox Soup – This Savory Vegan. Try this out next time you need a kick or you’re just not sure what to make—let me know how yours turns out!

Spicy Cabbage Soup

A warm and hearty Spicy Cabbage Soup packed with flavors, perfect for using up leftover veggies and customizable to your spice preference.

Main Ingredients

  • 1 head cabbage (Chopped into chunky pieces)
  • 1 cup onion (Chopped)
  • 3 cloves garlic (Minced)
  • 2 tbsp olive oil (For sautéing)
  • 4 cups vegetable or chicken broth (For liquid)
  • 1 can diced tomatoes (Added for flavor)
  • 1 tbsp salt
  • 1 tbsp black pepper

For Added Spice

  • 1 cup spicy peppers or crushed red pepper (To taste)
  • 1 cup sliced sausage (Optional: chicken, pork, or veggie sausage)

Preparation

  1. Chop cabbage into chunky pieces and set aside.
  2. In a large pot, heat olive oil over medium heat and sauté onion and garlic until fragrant.
  3. Add chopped cabbage and spicy peppers, and stir well.
  4. Pour in vegetable or chicken broth, add diced tomatoes, salt, and pepper, and stir to combine.

Cooking

  1. Bring the mixture to a simmer and let it cook gently for 20 to 30 minutes.
  2. Taste the soup and adjust seasoning or add more spice if desired.

This soup can be stored in the fridge for up to 5 days or frozen for later use. Reheat with a splash of broth if it seems thick.

Main Course, Soup
American, Comfort Food
Easy Soup Recipe, Healthy Soup, One-Pot Meal, Spicy Cabbage Soup, Vegetable Soup

Delicious Gluten-Free Keto Pumpkin Pie Your Taste Buds Will Love!

Slice of gluten-free keto pumpkin pie on a plate with a fork.

Gluten-free keto pumpkin pie is hands down the trickiest fall treat to master. Everyone wants that classic pumpkin pie taste, but the moment you mention “keto” and “gluten-free,” people back away awkwardly (trust me, even my own family). If you’ve ever found yourself wishing you could just eat a slice without breaking out in a carb sweat, you’re in good company.

I totally get those doubts. I’ve had more kitchen fails than I care to admit. If you can nail an easy dinner like this cheesy spaghetti squash keto casserole and crave something sweet after, stick around. Or check out the full dessert keto category if you want more ideas. Anyway, let’s get to the good stuff.

gluten-free keto pumpkin pie

Key Ingredients for Keto Pumpkin Pie

Alright, before you dash to the kitchen, let’s cover the basics. For gluten-free keto pumpkin pie, you’ll need a few superstar ingredients. The crust is crucial and can absolutely make or break your pie. Almond flour is my go-to, mostly because it gives that nutty crunch without much fuss. If you’re new to baking with almond flour, check out these Easy Almond Flour Bagels to get familiar with the texture.  You need some butter, eggs (yep, fresh are best), and a pinch of salt. For a sweetener, I recommend sticking with erythritol or monk fruit — they both play nice with pumpkin, and won’t give you that weird aftertaste thing.

Now, as for filling, grab a can of pure pumpkin puree (not pumpkin pie filling, yikes, the sugar in that!). Then you’re gonna want some heavy cream or coconut cream if you want dairy-free. Warm spices like cinnamon, ginger, nutmeg, and cloves? Absolutely. Don’t be shy with them, either. A little vanilla extract goes a long way. It’s basically autumn in a bowl.

If you’re the type who likes to swap things out, you can use pecan or coconut flour instead of almond. I sometimes throw in a shake of pumpkin pie spice, just depending on my mood. It isn’t rocket science, but you need the basics to start.

gluten-free keto pumpkin pie

Step-by-Step Instructions for Making Keto Pumpkin Pie

This is where it can get a little wild. So, follow me here. First up: preheat the oven. Have you ever forgotten that? Happens way too often to me, so set it before you do anything.

Get your almond flour, melted butter, a beaten egg, your sweetener, and salt together. Mix them up good. Don’t overthink it – just get everything combined till crumbly. It should look a little rough, not totally perfect. Press it out in a pie plate, but don’t stress about edges being Pinterest-level beautiful (mine are always kind of lopsided).

Bake that crust for about 10 minutes. You want it barely golden, not brown. Meanwhile, you’ll whisk up your pumpkin puree, eggs, heavy cream (or coconut cream), your favorite keto-friendly sweetener, vanilla, cinnamon, and any other spices you’re feeling. Pour that right in the shell.

Then pop it in the oven, usually for 40–50 minutes. I’d check at 40. My oven is moody, yours might be too. It should be set but a little jiggly in the middle.

Allow it to cool completely (my big weakness, I always want to cut in early – it falls apart if you do). Pop in the fridge for at least 2 hours. Alright, that’s it. Simple enough, but every step really matters.

I tried making this keto pumpkin pie for Thanksgiving and even my skeptical brother loved it. The crust was just the right amount of crisp and the filling had that perfect “real pie” feel. – Amanda, Dallas

Delicious Gluten-Free Keto Pumpkin Pie Your Taste Buds Will Love!

Tips for Perfecting Your Pumpkin Pie

Okay, some practical secrets. If your almond flour is super coarse, blend it up a bit fo r a finer texture. Trust me, it makes the crust hold together better and gives a lighter bite. For more almond flour baking tips, these Almond Flour Blueberry Muffins use similar techniques.

Don’t under-sweeten. Keto sweeteners can sometimes taste less sweet after baking, so always taste your filling mixture before you pour it into the crust. Adjust on the fly.

Always line the bottom of your pie pan with parchment paper. Nightmare scenario? Pie stuck so bad you have to eat it with a spoon straight from the tin (and while some people might call that “rustic,” it’s just a mess).

If you want a super glossy pie (looks like five-star restaurant stuff), brush a little melted butter on the filling in the last ten minutes. Magic, I swear.

Lastly, don’t skip cooling time. Gooey pie is annoying to cut and really does not look nice on a plate. Learned that one the hard way.

Variations: Making it Dairy-Free and Vegan

Lots of folks ask about a dairy-free or even vegan version of this gluten-free keto pumpkin pie. And the answer is… yes, you can totally do it. Coconut cream is your hero here. It gives that same creamy vibe you get from heavy cream, but keeps it dairy-free.

For the crust, swap the butter for coconut oil. Some people even use plant-based “butter,” but I like coconut oil for the flavor. To make it vegan, you’ll need to use a flax egg instead of real eggs. It’s not quite the same, but it’ll get you close without totally wrecking the pie structure. Sometimes, if I’m making this for the company, I’ll double down on the vanilla and spices so nobody notices the tweaks.

Side note – not all sweeteners are vegan. If that’s important for you, check the labels. It can be tricky, but most brands are getting better about marking clearly.

Honestly, the coconut flavor makes it kind of special. If you’re not coconut-crazy, almond milk with dissolved gelatin works too (not vegan, but dairy-free). Play around. Recipes are a guideline, not a prison.

Serving Suggestions

  • Dust with extra cinnamon, or a tiny bit of powdered keto sweetener, if you like it fancy.
  • Pair a slice with a mug of coffee or hot chai on a chilly evening. My absolute favorite.
  • A small dollop of homemade whipped cream (or coconut whip), and suddenly it’s holiday-special.
  • Try a slice paired with air fryer spaghetti squash for a surprisingly satisfying meal combo.
  • For more sweet keto treats to serve alongside, try these Keto Cinnamon Rolls for a complete brunch spread or this Keto Blueberry Bread for another seasonal baked good.cvb

Common Questions About Gluten-Free Pumpkin Pie

Can I freeze this gluten-free keto pumpkin pie?
You can! Just wrap tightly, freeze, then thaw overnight in the fridge.

Do I have to use almond flour for the crust?
Nope. Coconut flour or a blend works. But the texture will shift a bit. Still good, though.

What if my pie cracks on top?
Don’t freak out. It happens. Cover it with whipped cream or a sprinkle of cinnamon and pretend it never happened.

Is canned pumpkin okay, or should I use fresh?
Honestly, canned is just easier and works perfectly. If you’re feeling fancy, roast your own, but I usually don’t bother.

Can I make this ahead?
Absolutely. It tastes even better the next day and slices way easier.

Go Bake the Best Pie of Your Keto Life!

Alright, let’s be real. Gluten-free keto pumpkin pie can sound a bit intimidating, but with some basics and a dash of persistence, you’ll totally crush it. The key is good ingredients, patience, and a willingness to eat even the less-than-perfect slices. If you’re ready to tackle more savory meals, check out this keto meat pie or explore keto dinners that will keep everyone full. Some of my favorite resources for pumpkin pie perfection include this Best Keto Pumpkin Pie from gnom-gnom and also Keto Pumpkin Pie on Plating Pixels. What are you waiting for? Your kitchen awaits, and so does that pie!

Keto Pumpkin Pie

A delicious gluten-free and keto-friendly pumpkin pie that captures the essence of fall with its rich spices and creamy texture.

For the crust

  • 2 cups Almond flour (A nutty base for the crust.)
  • 1/2 cup Butter, melted
  • 1 large Egg, beaten (Fresh eggs are best.)
  • 1/4 teaspoon Salt
  • 1/4 cup Keto sweetener (erythritol or monk fruit) (Adjust sweetness as needed.)

For the filling

  • 1 can Pure pumpkin puree (Do not use pumpkin pie filling.)
  • 2 large Eggs
  • 1/2 cup Heavy cream or coconut cream for dairy-free (Coconut cream maintains a creamy texture.)
  • 1 teaspoon Vanilla extract
  • 1 teaspoon Cinnamon
  • 1/2 teaspoon Ginger
  • 1/2 teaspoon Nutmeg
  • 1/4 teaspoon Cloves

Preparation

  1. Preheat your oven to 350°F (175°C).
  2. In a mixing bowl, combine almond flour, melted butter, beaten egg, sweetener, and salt. Mix until crumbly.
  3. Press the mixture into a pie plate, ensuring even coverage.
  4. Bake the crust for about 10 minutes until barely golden, then set aside.

Filling Preparation and Baking

  1. In another bowl, whisk together pumpkin puree, eggs, heavy cream (or coconut cream), sweetener, vanilla, and spices.
  2. Pour the filling into the baked crust.
  3. Bake for 40-50 minutes, checking at 40 minutes. The filling should be set but slightly jiggly in the middle.
  4. Allow the pie to cool completely and refrigerate for at least 2 hours before serving.

Use parchment paper at the bottom of the pie pan for easy removal. Adjust sweetness according to taste before pouring the filling. A little melted butter brushed on top before the end of baking adds shine.

Dessert, Pie
American
Dairy-Free Options, Fall Dessert, Gluten-Free Dessert, Keto Pumpkin Pie, Low-Carb Pumpkin Pie

Savory Keto Shrimp Enchiladas with Creamy Avocado Sauce

Delicious keto shrimp enchiladas topped with creamy sauce and filled with shrimp and veggies.

Keto shrimp enchiladas are the answer when you’re craving something cheesy, flavorful, and low-carb but tired of eating the same old boring chicken dinners (can I get an amen?). I’ve been on a hunt for dinner that feels like real comfort food, but also doesn’t make me need a nap at 8pm. That’s where these hit. You wouldn’t know it’s healthy by the taste, I swear! Also, if you love Tex-Mex, check out this incredible keto shrimp enchiladas with green sauce recipe for a different flavor twist—so. darn. good.
keto shrimp enchiladas

Keto Shrimp & Greens Enchiladas With Jalapeo ‘Cream’ Sauce

Okay, let’s talk details. I started making my own version of keto shrimp enchiladas after falling for a shrimp and spinach combo at a five-star restaurant (at least, in my mind). The shrimp cooks up juicy and fast, the greens add some actual vitamins, and then we go wild with a creamy avocado sauce that tastes like it came from a taco truck. The jalapeo “cream” sauce isn’t really cream (no heavy dairy), just blended avocado, lime, and a little Greek yogurt or coconut cream. Kick of spice, loads of flavor, and pretty much a showstopper for ANY weeknight dinner.

I love it even more because it checks all my boxes: ready in about 40 minutes if you don’t dilly-dally, minimal weird ingredients, and it actually fills you up without all the carb crash after. Also, this recipe is super forgiving if you mess up the rolling part…nobody cares, just drown it in sauce and call it a day.

“I couldn’t believe how quick these keto shrimp enchiladas were to make—and my kids didn’t even know they were healthy! The creamy avocado sauce is unreal.” – Krissy H.

keto shrimp enchiladas

Paleo & Keto Tortilla Options

Here’s the not-so-secret part: the tortilla makes or breaks your keto shrimp enchiladas. If you’re paleo or strict keto, skip store-bought. Trust me. Some of those market “low-carb” tortillas taste like what I imagine cardboard would be like (yikes). I’ve nailed it down to two favorite options.

First, try homemade almond flour tortillas or coconut flour versions. They roll pretty well without crumbling, and they soak up that sauce just right. If you’re in a rush, big sheets of grilled zucchini or cooked cabbage leaves actually work in a pinch. Not traditional, sure, but when you’re eating shrimp enchiladas that hit this good, honestly, who’s judging? Another cheeky option: if you’re adventurous, you could wrap your filling in thin sliced deli turkey for an extra protein boost. Not classic…but it works!

“Your almond flour tip saved me SO much hassle—store tortillas never fit my macros. Homemade wins.” – Devin S.

keto shrimp enchiladas

More Healthy Tex-Mex Recipes You’ll Love

Now that you’re on the keto shrimp enchiladas train, let me steer you toward some other Tex-Mex recipes worth your time. I can’t help myself—I love a good Mexican-inspired meal. Try this cheesy spaghetti squash keto casserole for something hearty and cheesy that won’t weigh you down. If you’re like me and want side dishes with your main, the air fryer spaghetti squash makes a crispy, low-carb base for any Mexican bowl situation.

But hey, don’t just stop there. Tex-Mex flavors are made for tweaking—toss in extra cumin, try a different salsa, or swap in chicken or beef if you want. (You do you.) Family always comes running when they smell those spices, I swear it’s like a dinner bell went off.

“Made the spaghetti squash casserole you mentioned! My carb-loving husband had thirds. Game changer.” – Lindsey M.

Tips for Making Low-Carb Enchiladas

Here’s where I spill my kitchen secrets. Keeping keto shrimp enchiladas low in carbs is surprisingly easy when you’ve got a few habits down. Wanna know my favorite tricks? Here you go:

  • Use plenty of shredded cheese or your favorite dairy-free cheese for meltiness and flavor without the extra carbs.
  • Don’t overstuff the tortillas, or your enchiladas explode like a bad science experiment (been there).
  • Bake covered for most of the time to keep things tender, then uncover just at the end for maximum golden edges.
  • Serve with chopped cilantro, avocado slices, and a big squeeze of lime for brightness that cuts the richness.

Bonus: Get creative with your garnishes! Nobody hates extra flavor on their plate.

Ingredient Substitutions for Shrimp Enchiladas

Now, not everyone in my house likes shrimp…it’s wild, but it happens. Good news is, these keto shrimp enchiladas are endlessly adaptable. Swap out shrimp for diced chicken breast or even leftover rotisserie (nice shortcut, honestly). Crumbled tofu works if you’re plant-based, as long as you load up on those spices. If you’re low on avocado, some dairy-free sour cream or a quick salsa verde can do the job for your sauce. And if greens aren’t your jam? Use bell peppers, mushrooms, even a handful of spinach straight from the freezer. There’s no wrong way, just smarter, tastier ways.

Common Questions

Are these keto shrimp enchiladas really that low in carbs?
You bet! If you use homemade tortillas and go easy on beans or starchy veggies, you’ll stay keto-friendly.

I hate cilantro. Can I skip it?
Totally fine! Try parsley or just more lime—no one will notice.

Can I prepare these ahead for meal prep?
Yep! Assemble, cover, and refrigerate. Pop in the oven when you’re ready to roll.

What if I don’t have avocado for the sauce?
Go for a dollop of Greek yogurt, or check your fridge for salsa or sour cream.

How can I make this family-sized?
Double up the filling and line a big casserole dish. It reheats surprisingly well for leftovers.

The Easiest Tex-Mex Dinner You’ll Want to Make Again

So, that’s my take on keto shrimp enchiladas. Don’t let the fancy restaurant vibes fool you—they’re way easier than you’d think, fast to figure out, and you can totally freestyle based on what’s lingering in your fridge. If you want more inspo, here are some great ideas: try out these Low-carb Shrimp Enchiladas, or if you fancy something with a bit more green, Keto Shrimp and Greens Enchiladas With Jalapeño “Cream” Sauce has a killer variation. And if you want to see a dairy-friendly spin, this Creamy Shrimp Enchiladas will rock your dinner lineup.

Go on—get messy, toss on some extra cheese, and make Tex-Mex night officially awesome. Don’t forget, recipes just like this can spark brand new dinner traditions (hopefully less boring, always tasty).

Keto Shrimp & Greens Enchiladas

These keto shrimp enchiladas are flavorful, cheesy, and low-carb, perfect for a satisfying weeknight dinner.

For the Enchiladas

  • 1 lb shrimp, peeled and deveined (Juicy and quick-cooking)
  • 2 cups fresh spinach (Provides vitamins)
  • 1 cup shredded cheese (For meltiness and flavor)
  • 4 pieces paleo tortillas (Homemade almond or coconut flour tortillas recommended)

For the Jalapeño ‘Cream’ Sauce

  • 1 large avocado (Blended for creaminess)
  • 1 tbs lime juice (For flavor)
  • 1/2 cup Greek yogurt or coconut cream (Optional for creaminess)
  • 1 medium jalapeño, diced (Adds spice to the sauce)

Preparation

  1. Preheat the oven to 350°F (175°C).
  2. In a skillet, cook the shrimp until pink and opaque.
  3. Add the spinach to the skillet and sauté until wilted.
  4. In a blender, combine avocado, lime juice, Greek yogurt (or coconut cream), and jalapeño; blend until smooth.

Assembly

  1. Fill each tortilla with the shrimp and spinach mixture.
  2. Roll up the tortillas and place them seam-side down in a baking dish.
  3. Pour the jalapeño cream sauce over the enchiladas.

Baking

  1. Cover the dish with foil and bake for 20 minutes.
  2. Uncover and bake for an additional 5 minutes to brown edges.

For a meal prep option, assemble and refrigerate before baking. Serve with chopped cilantro and avocado slices for extra flavor.

Dinner, Main Course
Mexican, Tex-Mex
Healthy Tex-Mex, Keto Enchiladas, Low-Carb Dinner, Shrimp Enchiladas

Savor This Hearty Beef Heart Stew Keto Recipe You’ll Love!

Delicious beef heart stew keto recipe with rich flavors and low-carb ingredients.

Ever stare at your fridge like, “What even is this cut of meat—how do I use it?” My first time tackling the beef heart stew keto recipe, I was honestly a bit nervous. What if it ended up chewy or, y’know, tasted weird? But here’s the deal: beef heart is an underrated hero for keto folks craving something hearty, budget-friendly, and loaded with nutrients. Turns out, making a killer stew with it isn’t rocket science. Want the shortcut? You can check out the full easy breakdown right here: beef heart stew keto recipe. Now let’s get cozy with this comfort food adventure.
Savor This Hearty Beef Heart Stew Keto Recipe You’ll Love!

Ingredients and Variations

So, let’s get these ingredients squared away. You might roll your eyes, but beef heart actually shows up at my local butcher. Just ask—they usually toss it in back for dog food (crazy, right?) but it’s so good for a stew.

For the basic beef heart stew keto recipe, here’s what you’ll need:

  • About 2 pounds beef heart (trimmed and cut into cubes)
  • One big onion, diced
  • 3 garlic cloves (because one is never enough)
  • 2-3 carrots (if you want—skip for stricter keto, or sub in parsnip)
  • Celery. At least a couple stalks, sliced
  • Beef broth or bone broth (aim for low sodium)
  • Your fave herbs: bay leaf and thyme are never wrong
  • Olive oil, salt, and pepper (simple, classic)

Now, if you’re feeling wild, try tossing in mushrooms or a splash of red wine. Don’t be scared of spice—paprika gives depth and a bit of smoky flavor. If you’re mad about more keto ideas, peep at this keto beef back ribs for another win at dinnertime.

This stew made my whole house smell like a five-star restaurant—and my family had zero clue they were eating heart. Absolute win. –Jen, fellow keto cook

beef heart stew keto recipe

Instructions: Slow-Cooked Version

Okay, into the nitty gritty. My lazy-day go-to is the slow-cooker version. You can set it and forget it while pretending you have your life together. Start by heating up a little olive oil in a skillet—trust me, browning your beef heart chunks before slow-cooking is the move. They get this irresistible outer crust. Add those to your slow-cooker.

Next, toss your onions, garlic, carrots, and celery right in. Pour enough beef broth in to nearly cover those goodies. Chuck in your bay leaf and maybe a handful of fresh thyme. Season with salt and pepper. Put the lid on and let it do its thing, low for eight hours or high for four. By the end, everything’s melt-in-your-mouth tender, and the flavors, oh man, they kinda knock you back.

Can’t commit to a whole day? You can totally make this in a pressure cooker for quicker results. It’s forgiving, promise.
Savor This Hearty Beef Heart Stew Keto Recipe You’ll Love!

Instructions: Pan-Fried Version

So maybe you hate slow-cookers. Been there. The pan-fried version is punchier and more rustic, if you ask me (I love that word, rustic). Start by trimming the heart extra well—more on this weird-yet-key step in a sec! Heat a generous splash of olive oil in your favorite wide-bottomed pan.

Working in batches, brown the cubes on all sides. Toss them out on a plate. Add onions, let them get a little golden and soft, then the garlic, celery, and any extras you’ve dreamed up (zucchini, anyone? It works). Once things are smelling like you wanna dive in with a fork, return the beef heart to the pan. Pour in broth, enough to make things stew-ish without drowning it.

Simmer, low and slow, lid on, for like an hour—stir sometimes so nothing clings to the pan. It’ll thicken naturally. If you like a soupier vibe, add more broth toward the end. Taste before you finish and adjust salt or pepper. So simple, but so flavorful.

Recipe Tip: Trimming the Heart

Okay, real talk: If you don’t trim the heart well, things get rubbery. No one wants to chew forever, right? Beef heart has some tough white bits. Use a sharp knife (this matters!) and take a few extra minutes to cut away those wiry pieces and any visible fat.

Funny story, the first time I made this, I left in waaay too much connective tissue. My husband was gnawing like he had gum in his stew. Lesson learned.

The trick is to cube it evenly and not make ’em too huge, maybe 1-inch pieces. It honestly makes the stew taste and feel a level above. Plus, it looks less like you’re serving mystery meat to picky eaters.

Serving Suggestions

Time for the fun part. How to serve this legendary beef heart stew keto recipe so it looks (and tastes) worthy? Here’s a few ideas:

  • Spoon it over a heap of cauliflower mash for true “comfort food on a chilly night” energy.
  • Top with chopped fresh parsley or chives for a little green pop.
  • Pair with a crisp salad and your favorite keto bread or cloud bread—soak up all that broth goodness!
  • Add avocado slices for extra creaminess, trust me, it works.

Keep it chill or dress it up. Honestly, you can make it look fancy, or just plop a big bowl down and go for it.

Wanna flex your keto dinner muscles more? Give this easy keto beef enchilada casserole recipe a go—you’ll feel like you made Tex-Mex at home without the carbs.

Common Questions

Is beef heart tough or chewy?
If you trim it well and cook it low and slow, it’s actually crazy tender—think pot roast, not shoe leather.

Does beef heart taste gamey?
Surprisingly, no. It’s beefy but mild. With seasonings and veggies, it’s just rich and savory.

Can I swap beef heart for regular stew beef?
Sure, but it’ll lose the “hidden superfood” perks and unique flavor. Plus, beef heart is budget gold for keto folks.

Do kids notice it’s heart?
Not if you chop it nice and small and slather with plenty of broth and veg. Pinky promise.

How should I store leftovers?
Fridge for 3 days, or freeze in meal-prep containers for up to three months. Better the next day, honestly.

Why You’ll Crave This Hearty Stew Again

Here’s the bottom line: Once you taste this beef heart stew keto recipe, you’ll wonder why you waited so long to go nose-to-tail. It’s wallet-smart, loaded with iron, and delivers all the cozy flavors of old-school comfort food—without the carb crash. For a little more inspiration, here are three links I keep coming back to: the slow-cooked or pan-fried beef heart ideas from Healthy Recipes Blog, the zippy Thai Lime keto beef heart satay from Culinary Lion, or maybe you wanna try an amazing keto beef stew from Low Carb Maven.

It’s totally doable, even for kitchen newbies. Give it a try, swing by your butcher, and don’t be surprised if you put this stew on repeat all winter.

Beef Heart Stew

A hearty and budget-friendly beef heart stew that’s perfect for keto lovers, loaded with nutrients and comforting flavors.

Main Ingredients

  • 2 pounds beef heart (trimmed and cut into cubes) (Make sure to trim well for tenderness.)
  • 1 big onion, diced
  • 3 cloves garlic (More garlic for extra flavor.)
  • 2-3 carrots (optional, or sub in parsnip) (Can be skipped for stricter keto.)
  • 2 stalks celery, sliced
  • 4 cups beef broth or bone broth (low sodium) (Aim for low sodium for better health.)
  • 1 bay leaf
  • 2 sprigs fresh thyme
  • 2 tablespoons olive oil (For browning the meat.)
  • to taste salt and pepper (Adjust according to personal preference.)

Additional Variations

  • mushrooms and/or a splash of red wine (For a more robust flavor. Can be added to the stew.)
  • paprika (For depth and smoky flavor.)

Slow-Cooked Version

  1. Heat olive oil in a skillet and brown beef heart chunks for added flavor.
  2. Transfer browned beef heart to the slow cooker.
  3. Add onions, garlic, carrots, and celery to the slow cooker.
  4. Pour in beef broth until it nearly covers the ingredients.
  5. Add bay leaf and thyme, season with salt and pepper.
  6. Cover and cook on low for 8 hours or high for 4 hours.
  7. Serve once everything is melt-in-your-mouth tender.

Pan-Fried Version

  1. Trim the heart and heat olive oil in a wide-bottomed pan.
  2. Brown the cubes in batches and set aside.
  3. In the same pan, add onions until golden, then garlic and celery.
  4. Return beef heart to the pan and add broth, enough to make it stew-like.
  5. Simmer with the lid on for about an hour, stirring occasionally.
  6. Adjust soupiness with broth toward the end and season to taste.

Trim the heart well to avoid rubbery texture. Store leftovers in the fridge for 3 days or freeze for up to 3 months. This stew is better the next day as flavors meld.

Dinner, Main Course
American, Comfort Food
Beef Heart, Budget-Friendly, Hearty Meal, Keto Recipe, Stew