Comforting Mediterranean Soup Recipes You’ll Love to Make

Bowl of Mediterranean soup filled with beans, vegetables, and herbs for a healthy meal.

Mediterranean soup hits different after a bonkers long day. You know those evenings when you want something comforting, healthy, but don’t want to wrestle 20 ingredients at the stove? Yup, same here. That’s how I landed deep into the world of Mediterranean soup. Honestly, there are so many easy ways to prep these bowls of goodness, you’ll wonder why you ever fussed with anything else. By the way, if you get bored with tomato stuff, you’ve got to check out this Creamy Tuscan Chicken Soup. Or poke around the soup keto recipes category if you’re ever looking for low-carb ideas. Food that’ll hug your insides and save your sanity.
Comforting Mediterranean Soup Recipes You’ll Love to Make

Benefits of Mediterranean Soup

Let’s get real. Mediterranean soup is honestly a game-changer for healthy eating (I have tried more diets than coffee shops in my city). It’s packed with fresh vegetables, lean proteins, and loads of herbs that make your taste buds go wild. Studies keep saying the Mediterranean diet helps your heart and keeps you full without emptiness later. Plus, these soups usually skip heavy cream and processed nonsense. They just use simple stuff from your pantry.

On cold days, the warmth from a bowl of chickpea and veggie soup is pure bliss. Salty olives, bright lemon, silky spinach—it’s like sunshine from the coast in your kitchen. Good for the soul, and maybe your cholesterol (hey, priorities). The best part? It feels luxurious and tastes like a five-star restaurant dinner, but you can make it while wearing pajamas. Not even exaggerating.

“I started eating Mediterranean soup once a week, and even my stubborn meat-loving husband asks for seconds. It’s become our coziest dinner ritual.” — Sam R.

Mediterranean soup

Alright, here’s where things get deliciously specific. Chickpea soup might be my all-time favorite. It’s full of garlic, tomatoes, and a little squeeze of lemon for that whoa flavor. Lentil soup is another classic. Sometimes, I add spinach to sneak in more greens, and nobody complains.

Have you ever had avgolemono? It’s a lemony Greek chicken rice soup, creamy but there’s no actual cream. Genius. Then there’s minestrone, which is basically a veggie party in a bowl, tomatoes, beans, whatever you’ve got hanging in your fridge. Oh! Don’t skip a spicy twist with keto chicken tortilla soup. It’s not strictly traditional, but I love to mess with recipes. Crusty whole-grain bread on the side? Perfection.

Sometimes, I’ll toss in shredded leftover chicken (keeps it easy, less waste). Mediterranean soup works for vegetarians and big meat eaters alike. No matter which direction you go, there are serious flavor bombs in every bowl.
Comforting Mediterranean Soup Recipes You’ll Love to Make

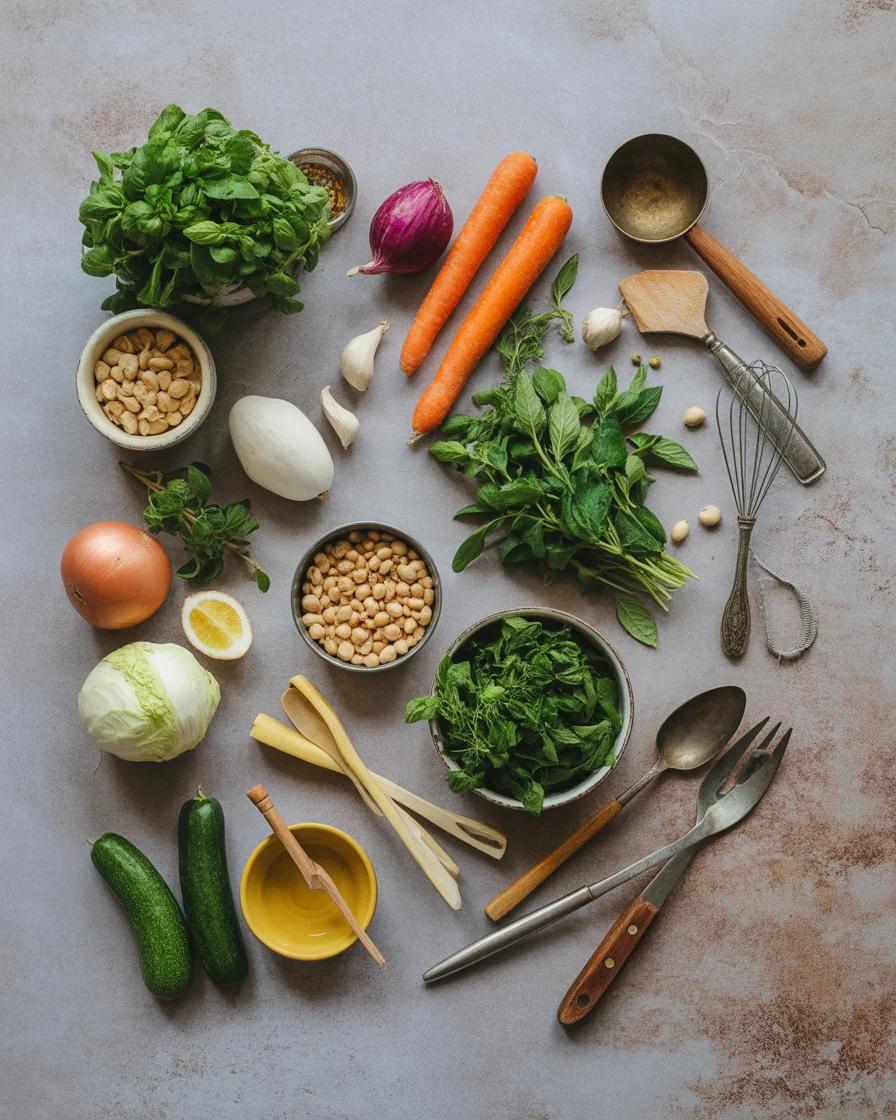
Tips for Making Soup with Chickpeas

If you haven’t cooked with chickpeas, hang on, you’re in for a treat. First off, canned chickpeas are your best friend. No shame at all. Rinse them well or you’ll get weird foam (not my favorite). They’re soft enough to add right at the end. If you’re a purist and use dried chickpeas, soak overnight and cook ‘em until tender. I’ve botched the timing many times, so start early or you’ll be eating crunchy soup.

Little hack: smash a handful before tossing them in; it’ll thicken the soup and make it all creamy without dairy. Definitely taste as you go—sometimes a pinch more salt or lemon really brightens up Mediterranean soup. I often throw in whatever herbs I have lying around. Dill, oregano, parsley? All winners. Don’t stress about being perfect here—chickpeas are very forgiving.

By the way, Mediterranean soup gets better as it sits. Leftovers (if any) taste way richer the next day. It’s practically like the magic trick of kitchen life.

Storage and Leftover Guidelines

Alright, let’s talk about what to do when you can’t finish the whole pot. Personally, I almost wish for leftovers with Mediterranean soup. Pop it in a sealed container and stick it in the fridge—good for up to four days. The flavor keeps building overnight. If you don’t plan to eat it soon, freezing is absolutely fine. Just cool it first and use a container that won’t crack with liquids.

Reheating? I like the stove, but the microwave saves time if you’re working-from-home-hangry. Stir occasionally so you don’t get hot spots. Avoid adding pasta or rice before freezing; it turns mushy. Add that fresh when you serve.

For those who meal prep, this is a winner. Soup is easy to portion. Keep an emergency container in the freezer, seriously—you’ll thank yourself when you catch a cold or have a busy week. No need for a fancy system, just label it with a sharpie if you’re forgetful like me.

Customization Options for Mediterranean Soups

Here’s where you get to play “choose your own adventure.” I like recipes that let you shake things up—Mediterranean soup is champion at this. Vegetarian? Skip the meat, heck, even toss in tofu. Want more protein? Rotisserie chicken or turkey, done.

You need extra punch? Drizzle a little hot sauce or add chili flakes. Sometimes, I go wild with greens—arugula, kale, spinach, all work. If dairy’s your jam, crumble a chunk of feta on top (my guilty pleasure).

And for fancier nights? Stir in a beaten egg while you whisk to make it velvety. Swap regular potatoes for sweet potatoes if you’re feeling daring (totally changes things, trust me). Life’s too short for boring soup. So, use whatever you’ve got in your kitchen and make it your own.

Serving Suggestions

Here’s my go-to way to serve Mediterranean soup (it’s got a little flair, trust me):

  • Spritz some fresh lemon juice just before eating.
  • Top each bowl with a handful of chopped herbs, like dill or parsley.
  • Always, always serve it with a chunk of crusty bread (bonus points if you toast it).
  • Side of olives? Why not.

Common Questions

Q: Can I use canned beans instead of chickpeas?
Yes, absolutely. White beans or cannellini work great for Mediterranean soup. Just rinse them well, and you’re good to go.

Q: What’s the easiest way to make it low-carb?
Honestly, skip the pasta and potatoes. Load up with extra leafy greens or use cauliflower instead. You can also find a bunch of options here in the soup keto recipes.

Q: How do I keep the veggies from turning mushy?
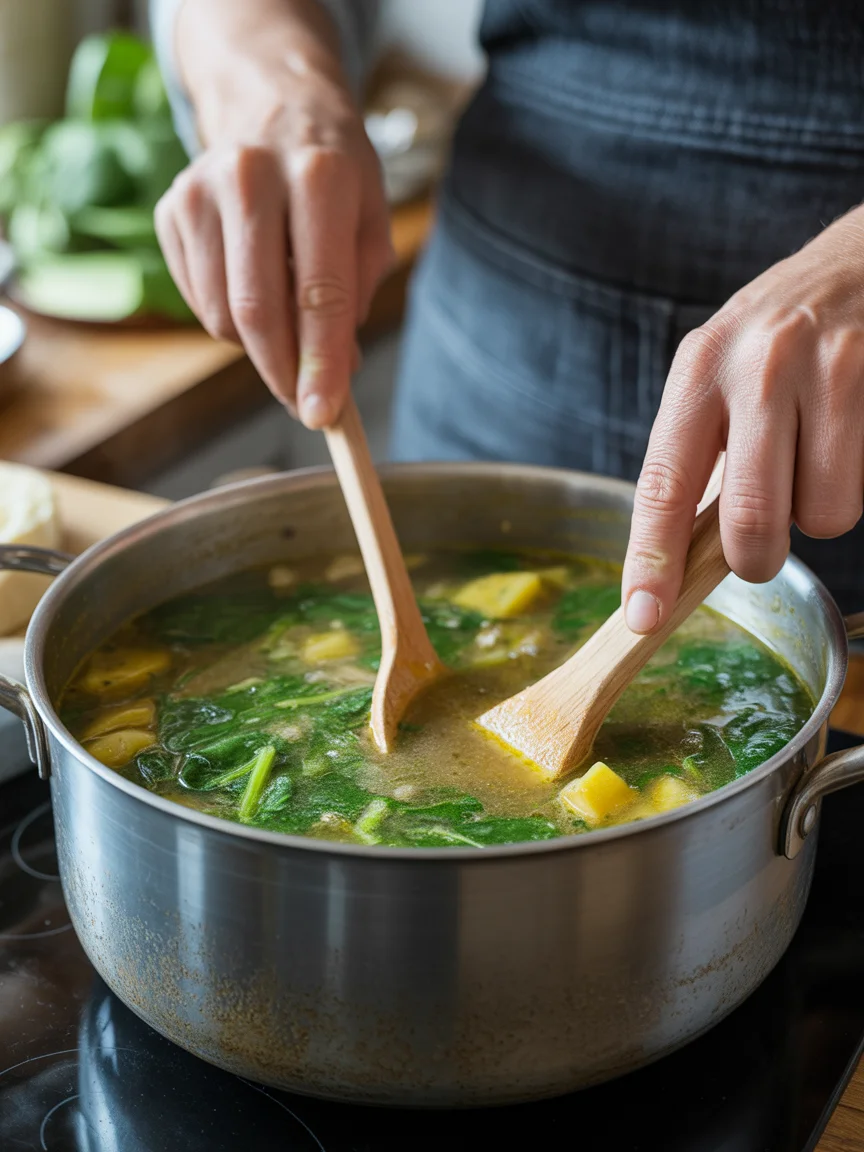
Don’t overcook! Add them later if you like some crunch left, especially stuff like spinach or zucchini.

Q: My soup tastes flat. What am I missing?
Go big with acidity. Try another squeeze of lemon, or add a splash of vinegar. It’ll wake things up, promise.

Q: Can I double the recipe for a crowd?
Yes! Mediterranean soup is ace for meal-prepping or feeding a whole soccer team. Double up, freeze what’s left, and future-you will be so grateful.

Soup Night Will Never Be Boring Again

Mediterranean soup really does make life easier. Just a few smart swaps, some cozy ingredients, and you’ve got dinner—and probably lunch for tomorrow too. If you’re craving more ideas, check out these 7 favorite Mediterranean soup recipes or grab inspiration from this healthy Mediterranean soup recipe (genuinely tasty, I tried it during my “soups for every season” phase). And oh, you’ve got to see this easy Mediterranean chickpea soup with vegetables for another yummy twist.

So go on, pull out that pot and get cooking. You won’t regret it—your kitchen will smell unreal, and you might just find your new favorite comfort bowl.

Mediterranean Chickpea Soup

A comforting Mediterranean soup packed with fresh vegetables and chickpeas for a healthy, flavorful dinner.

Main Ingredients

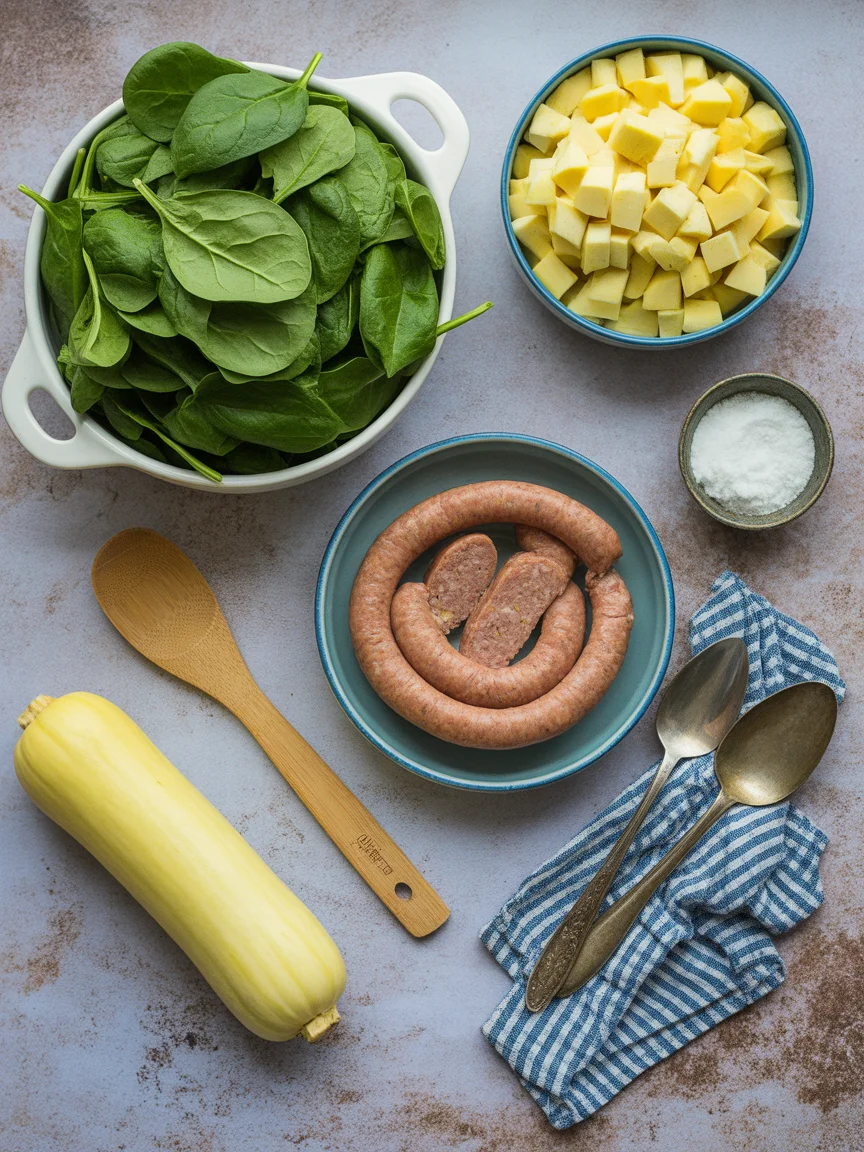
  • 2 cups canned chickpeas, drained and rinsed (Or use dried chickpeas soaked overnight.)
  • 1 medium onion, diced
  • 2 cloves garlic, minced
  • 1 can diced tomatoes
  • 4 cups vegetable broth
  • 2 cups fresh spinach (Or other leafy greens.)
  • 1 lemon for juice and zest (Adds brightness to the flavor.)
  • 1 tbsp olive oil (For sautéing.)

Seasoning

  • 1 tsp salt (Adjust to taste.)
  • 1/2 tsp black pepper
  • 1 tbsp dried oregano (Or fresh, if available.)
  • 1 tbsp fresh parsley, chopped (For garnish.)

Preparation

  1. In a large pot, heat olive oil over medium heat.
  2. Add diced onion and minced garlic, sauté until softened.
  3. Stir in diced tomatoes and cook for another 5 minutes.

Cooking

  1. Add vegetable broth, chickpeas, salt, pepper, and dried oregano.
  2. Bring to a boil, then reduce heat and simmer for 20 minutes.
  3. Add spinach and lemon juice, cooking until greens are wilted.

Serving

  1. Ladle soup into bowls, add a sprinkle of fresh parsley and additional lemon zest if desired.
  2. Serve hot with crusty bread and a side of olives.

Soup flavors improve after sitting; store leftovers in the fridge for up to four days or freeze for future meals.

Dinner, Soup
Mediterranean
Chickpea Soup, Comfort Food, Healthy Soup, Mediterranean Soup, Vegetarian Soup

Healthy Donut Chaffle

Healthy donut chaffle recipe for a guilt-free sweet treat

Healthy Donut Chaffle


Are you looking for a fun and healthy treat? The Healthy Donut Chaffle is the perfect solution! This delightful recipe combines the goodness of almond flour with the fluffiness of traditional donuts, giving you a tasty snack that you can enjoy guilt-free. These chaffles are not only easy to make but also incredibly versatile, allowing you to customize them to fit your flavor preferences.

Why Make This Recipe

Making Healthy Donut Chaffles is a great choice for several reasons. First, they are low in carbs and high in protein, making them suitable for various diets, including keto. Second, they are quick to prepare, perfect for a busy morning or a sweet afternoon treat. Lastly, you can add your favorite flavors to make them unique, whether you like a hint of cinnamon or a sprinkle of nutmeg. You’ll enjoy a delicious and satisfying snack that helps you stay on track with your health goals.

How to Make Healthy Donut Chaffle

Ingredients:

  • 1 cup almond flour
  • 2 large eggs
  • 1/2 cup shredded mozzarella cheese
  • 1 tsp baking powder
  • 1 tsp vanilla extract
  • Sweetener of choice to taste
  • Pinch of salt
  • Optional: cinnamon or nutmeg for flavor

Directions:

  1. Preheat your waffle maker.
  2. In a mixing bowl, combine the almond flour, baking powder, and salt.
  3. In another bowl, whisk the eggs, then add the shredded mozzarella, vanilla extract, and sweetener. Mix until well combined.
  4. Gradually add the dry ingredients to the wet mixture and stir until everything is combined.
  5. Grease the waffle maker with a bit of oil spray. Pour the batter into the waffle maker and cook until golden and cooked through.
  6. Carefully remove the chaffle and let it cool slightly before serving. Optionally, sprinkle with cinnamon or nutmeg.

How to Serve Healthy Donut Chaffle

You can serve Healthy Donut Chaffles in many ways! They are delicious on their own and perfect for a quick snack. For a special treat, try adding some toppings like fresh fruits, yogurt, or sugar-free syrup. You can also serve them with a side of nuts or a dollop of nut butter for added flavor and texture.

How to Store Healthy Donut Chaffle

To store your Healthy Donut Chaffles, let them cool completely, then place them in an airtight container. You can keep them in the refrigerator for up to three days. For longer storage, you can freeze them for up to a month. Just reheat in the toaster or microwave when you’re ready to enjoy!

Tips to Make Healthy Donut Chaffle

  • Make sure to grease your waffle maker well to prevent sticking.
  • Don’t overmix the batter; just stir until combined for a lighter texture.
  • Experiment with different spices like pumpkin spice or cocoa powder for varied flavors.
  • For a sweeter chaffle, try adding chocolate chips or dried fruits.

Variation

You can easily customize your Healthy Donut Chaffle by adding different flavors. Consider using flavored extracts like almond or coconut, or mixing in some shredded coconut or nuts for added crunch. You can also make them chocolatey by incorporating unsweetened cocoa powder into the batter.

FAQs

1. Can I use a different type of flour instead of almond flour?
Yes, you can try using other types of flour, but it may change the texture and taste. Coconut flour or a gluten-free flour blend could be good alternatives.

2. How can I make these chaffles sweetened naturally?
You can mash a ripe banana or add applesauce to the batter for natural sweetness. However, adjust the other wet ingredients accordingly.

3. How do I know when my chaffle is done cooking?
Your chaffle is done when it turns golden brown and no longer appears wet in the center. Each waffle maker is different, so keep an eye on it as it cooks.

Healthy Donut Chaffle

A fun and healthy treat that combines almond flour and fluffiness for a guilt-free snack, perfect for low carb diets.

Main ingredients

  • 1 cup almond flour (Use finely ground almond flour for best results.)
  • 2 large eggs (Room temperature eggs work best.)
  • 1/2 cup shredded mozzarella cheese (Shredded cheese is recommended for melting.)
  • 1 tsp baking powder
  • 1 tsp vanilla extract (Pure vanilla extract is preferred.)
  • to taste Sweetener of choice (Use your preferred sweetener.)
  • a pinch salt (Enhances flavor.)
  • optional cinnamon or nutmeg (For additional flavor.)

Preparation

  1. Preheat your waffle maker.
  2. In a mixing bowl, combine the almond flour, baking powder, and salt.
  3. In another bowl, whisk the eggs, then add the shredded mozzarella, vanilla extract, and sweetener. Mix until well combined.
  4. Gradually add the dry ingredients to the wet mixture and stir until everything is combined.

Cooking

  1. Grease the waffle maker with a bit of oil spray.
  2. Pour the batter into the waffle maker and cook until golden and cooked through.
  3. Carefully remove the chaffle and let it cool slightly before serving.
  4. Optionally, sprinkle with cinnamon or nutmeg.

Serve Healthy Donut Chaffles on their own or with toppings like fresh fruits, yogurt, or sugar-free syrup. Store in an airtight container in the refrigerator for up to three days or freeze for a month.

Breakfast, Snack
American
Almond Flour Recipe, Guilt-Free Dessert, Healthy Donut Chaffle, Keto Snacks, Low Carb Treat

Keto Oreo Cheesecake Bars

Delicious Keto Oreo Cheesecake Bars on a dessert plate

Keto Oreo Cheesecake Bars


If you love cheesecake and are on a keto diet, you’re in for a treat! Keto Oreo Cheesecake Bars mix the rich taste of cheesecake with a chocolatey Oreo crust. These bars are perfect for satisfying your sweet tooth without sacrificing your health goals. They are easy to make and oh-so-delicious!

Why Make This Recipe

Creating these Keto Oreo Cheesecake Bars allows you to enjoy a classic dessert while sticking to your keto lifestyle. With low-carb ingredients, you won’t have to worry about wrecking your diet. Plus, they are great for sharing with friends or for satisfying a late-night craving. Anyone can enjoy these bars, whether you are on a keto diet or not!

How to Make Keto Oreo Cheesecake Bars

Making these yummy bars is simple and fun! Just follow the steps below, and you will have a delightful dessert ready in no time.

Ingredients:

Keto Oreo Cookie Crust:

  • 1 1/4 cups cocoa powder (120 g)
  • 1 cup coconut flour (112 g)
  • 1 cup powdered monkfruit/erythritol sweetener (192 g)
  • 1 tbsp arrowroot starch (optional, 7 g)
  • 1 tsp xanthan gum (optional)
  • 1 tsp baking soda
  • 1/4 tsp salt (1/2 tsp if using unsalted butter)
  • 1 cup salted butter, softened
  • 1-1.5 tsp black food coloring (optional)
  • 1/4 tsp vanilla extract

Sugar Free Cheesecake Filling:

  • 1 x 8 oz brick cream cheese, softened
  • 11 tbsp powdered monkfruit/erythritol sweetener (130 g)
  • 1 tsp vanilla extract
  • pinch of salt
  • 1 egg

Directions:

  1. Preheat the oven to 350°F (177°C).
  2. In a bowl, mix all dry crust ingredients (cocoa powder, coconut flour, monkfruit/erythritol, arrowroot starch, xanthan gum, baking soda, salt).
  3. Add the softened butter and vanilla extract, and mix until a thick dough forms. If you want, mix in the black food coloring until well blended.
  4. Line an 8×8 or 9×9 inch pan with parchment paper and lightly grease it.
  5. Press 1/2–3/4 of the crust into the bottom of the pan. Put the remaining crust aside for later.
  6. For the filling, beat the softened cream cheese, powdered sweetener, vanilla extract, and salt until smooth. Add the egg and mix until just combined.
  7. Pour the cheesecake filling over the crust in the pan. Crumble the remaining crust over the top and gently press pieces into the filling.
  8. Bake for 25–30 minutes, or until the edges are lightly browned and the center is set. If the center looks too soft, turn off the oven and leave it in for another 5 minutes.
  9. Let it cool on a wire rack for about 20 minutes, then refrigerate until fully chilled (around 1 hour).
  10. Slice into bars and serve. You can store them in an airtight container in the fridge for up to 6 days or freeze for up to 2 months.

How to Serve Keto Oreo Cheesecake Bars

These bars are best served cold. You can enjoy them straight from the fridge or let them come to room temperature for a few minutes before eating. They are great on their own or paired with a dollop of sugar-free whipped cream on top.

How to Store Keto Oreo Cheesecake Bars

Store any leftovers in an airtight container in the refrigerator for up to six days. You can also freeze these bars for future treats, and they will stay good for up to two months. Just thaw them in the fridge when you are ready to enjoy again.

Tips to Make Keto Oreo Cheesecake Bars

  • Make sure your cream cheese is softened; it blends better and creates a smoother filling.
  • If you want a richer chocolate flavor, add a little more cocoa powder to the crust.
  • For an extra touch, sprinkle some chopped nuts or sugar-free chocolate chips on top before baking.

Variation

You can make these bars into a chocolate swirl by adding a few tablespoons of unsweetened cocoa powder to the filling. Swirl it before baking to get a marble effect. Substitute different low-carb sweeteners if you prefer, but make sure they measure similarly to monkfruit/erythritol.

FAQs

Can I make this recipe ahead of time?
Yes! These bars can be made a day in advance and stored in the refrigerator until you’re ready to serve them.

Is it necessary to use black food coloring?
No, the black food coloring is optional. It just gives the crust a more Oreo-like appearance.

Can I use different sweeteners?
You can use other low-carb sweeteners, but be sure to check the conversions as some sweeteners may have different sweetness levels compared to monkfruit/erythritol.

Enjoy making and tasting these delightful Keto Oreo Cheesecake Bars! They are surely a treat you won’t feel guilty about indulging in.

Keto Oreo Cheesecake Bars

Delightful Keto Oreo Cheesecake Bars featuring a rich cheesecake filling atop a chocolatey Oreo crust, perfect for satisfying your sweet tooth while staying healthy on a keto diet.

Keto Oreo Cookie Crust

  • 1 1/4 cups cocoa powder
  • 1 cup coconut flour
  • 1 cup powdered monkfruit/erythritol sweetener
  • 1 tbsp arrowroot starch (optional)
  • 1 tsp xanthan gum (optional)
  • 1 tsp baking soda
  • 1/4 tsp salt (1/2 tsp if using unsalted butter)
  • 1 cup salted butter, softened
  • 1-1.5 tsp black food coloring (optional)
  • 1/4 tsp vanilla extract

Sugar Free Cheesecake Filling

  • 1 x 8 oz brick cream cheese, softened
  • 11 tbsp powdered monkfruit/erythritol sweetener
  • 1 tsp vanilla extract
  • 1 pinch salt
  • 1 large egg

Preparation

  1. Preheat the oven to 350°F (177°C).
  2. In a bowl, mix all dry crust ingredients (cocoa powder, coconut flour, monkfruit/erythritol, arrowroot starch, xanthan gum, baking soda, salt).
  3. Add the softened butter and vanilla extract, and mix until a thick dough forms. If desired, mix in the black food coloring until well blended.
  4. Line an 8×8 or 9×9 inch pan with parchment paper and lightly grease it.
  5. Press 1/2–3/4 of the crust into the bottom of the pan. Set the remaining crust aside for later.

Making the Filling

  1. For the filling, beat the softened cream cheese, powdered sweetener, vanilla extract, and salt until smooth.
  2. Add the egg and mix until just combined.
  3. Pour the cheesecake filling over the crust in the pan. Crumble the remaining crust over the top and gently press pieces into the filling.

Baking

  1. Bake for 25–30 minutes, or until the edges are lightly browned and the center is set. If the center looks too soft, turn off the oven and leave it in for another 5 minutes.

Cooling and Serving

  1. Let it cool on a wire rack for about 20 minutes, then refrigerate until fully chilled (around 1 hour).
  2. Slice into bars and serve, optionally with a dollop of sugar-free whipped cream.

Store any leftovers in an airtight container in the refrigerator for up to six days. You can also freeze these bars for future treats, and they will stay good for up to two months.

Dessert
American
Cheesecake, Chocolate Dessert, Keto, Keto Dessert, Low-Carb

Delicious Guacamole Chicken for a Quick Weeknight Dinner

Delicious Guacamole Chicken Salad with Avocado and Seasoned Chicken

Guacamole Chicken is what every busy weeknight cries out for. We all know the feeling—you stroll in late from work, stomach growling, and the very last thing you want is to mess around with complicated steps or turn your kitchen into a disaster zone. Trust me, I’ve been there more times than I care to admit. Even though I’m a fan of this easy Keto Chicken Enchilada Casserole and sometimes crave a steaming bowl of Creamy Tuscan Chicken Soup, some nights, I just want something fast, super tasty, and, y’know, not boring. That’s where this little miracle dish comes in. Let’s stop overthinking dinner—seriously, Guacamole Chicken to the rescue!
Delicious Guacamole Chicken for a Quick Weeknight Dinner

Understanding the Importance of the Topic

So, why am I borderline obsessed with Guacamole Chicken for weeknights? Well, it’s not just about speed (even though you can basically make it while texting your friends and yelling at your dog to get off the counter). The combo of juicy chicken, creamy guac, and a hit of spice checks almost every box: easy, healthy, crazy flavorful. Plus, you control what goes in—no hidden weirdness like in those store-bought microwave deals.

Here’s my actual hot take: this is the kind of recipe that makes you look like you know what you’re doing, even when you barely have any groceries at home. It’s endlessly customizable. Toss in some extra veggies, throw cheese over the top, or keep it simple and classic. No judgment! Trust me, trying Guacamole Chicken just once will make you rethink those “fast food night” plans for good.

“I’ve always struggled to get a healthy meal done quick until I found this. The Guacamole Chicken is so fast and you barely need to wash any dishes! My kids eat every single bite and ask for more.” — Jess H.

Delicious Guacamole Chicken for a Quick Weeknight Dinner

Common Misconceptions Explained

Let’s knock out a few Guacamole Chicken myths. First up: no, you don’t have to be some kind of kitchen genius to make this. It’s not restaurant-fancy (even though it kinda tastes like a five-star restaurant came to your fridge). Second thing—people assume guac gets weird and gross with hot chicken, but it actually gets creamier, almost melts over the top. It’s pure magic.

Another one: is it bland or boring? Nope. Honestly, Guacamole Chicken hits you with flavor right in the face, in the best possible way. It soaks up the guac, blends with all those spices, and somehow feels lighter than those heavy casseroles. And despite what folks might tell ya, this dish is great for meal prep—just keep the guacamole fresh and add it when ready.

People sometimes ask if this is for keto folks only. Absolutely not! Guacamole Chicken doesn’t care what diet trend you’re into, it just wants to feed you.
Guacamole Chicken

Step-by-Step Guide to Achieve Desired Outcomes

Alright, let’s get you cooking. Ready? Here’s what you do.

First, grab your chicken breasts—boneless, skinless, easy-peasy. Pound them kinda flat (skipping this part means it won’t cook evenly, trust me, I’ve been burned). Sprinkle with salt, pepper, paprika—or that taco seasoning you found in the pantry.

Pop those in a skillet with a little oil, medium-high heat. Wait for that sizzle! Cook about 5-7 minutes, flip, finish cooking the other side. No need to overthink—just poke the thick part, if it’s not pink, you’re golden.

Now make the guacamole: scoop some ripe avocados, squeeze lime, toss in a pinch of salt, chopped onion, cilantro, and tomato—mash with a fork (or your hand if you’re wild). Pile that guac right on top of each chicken breast. Add a sprinkle of shredded cheese if you want ‘melty’. Done. Dinner is served. Feel free to steal ideas from my Keto Chicken Nugget cravings when you want to add a side.

Tips and Tricks for Success

Sometimes, honestly, the best flavor comes from those little tweaks and slip-ups. Here’s what works for me every time:

  • Pound the chicken evenly. (It cooks way faster and stays juicy!)
  • Use super ripe avocados for the guac—green rocks, brown blocks.
  • Add lime at the last moment for an ultra-fresh, zippy vibe.
  • You can broil the chicken with the cheese on top for that gooey, “fancy” result.

Don’t stress about looks. Even if your guacamole slides all over, it’s all going to the same place! And hey, if you’re wondering about another crowd-pleaser, this Keto Chicken Alfredo always saves the day.

Resources for Further Learning

This is barely scratching the surface of delicious, easy and fast chicken ideas. There’s a whole world out there for you—the foodie rabbit hole never ends! My favorite nights are when I poke around online and find stuff like the legendary Keto Chicken Tortilla Soup or that surprisingly healthy Keto Orange Chicken Recipe. No shame in copying and hacking all sorts of ideas.

Oh, before I forget, Guacamole Chicken also goes wild with different sides—think tacos, lettuce wraps, or just with a big crunchy salad. Get creative. I know you will.

Common Questions

Q: Can I use leftover chicken?
A: Absolutely. Just shred it, warm in the skillet, and top with guacamole.

Q: Will store-bought guac work?
A: Sure thing. It’s faster, and no one’s judging (but homemade is magic).

Q: How do I keep my guacamole from turning brown?
A: Squeeze in extra lime and cover tightly with plastic wrap.

Q: Can I bake instead of pan-fry the chicken?
A: Yup. Bake at 400°F for about 20 minutes—just check the thickest piece is done.

Q: Is Guacamole Chicken good for meal prep?
A: It sure is, just keep the guac separate until serving.

Try This for Your Next Dinner Win

If you’re looking for a way out of your weeknight dinner rut, this Guacamole Chicken delivers in every possible way. It’s faster than takeout, way tastier, and even fits low-carb lifestyles if you’re into that—kinda like this Guacamole Chicken Melt Recipe if you want to get fancy, or Guacamole Chicken Salad for a fresh summer twist. Dive in, make mistakes, have fun with it, and your kitchen will smell like happiness before you know it.

Guacamole Chicken

A quick, tasty, and customizable dish perfect for busy weeknights, combining juicy chicken with creamy guacamole and spices.

For the Chicken

  • 4 pieces boneless, skinless chicken breasts (Pounded flat for even cooking)
  • 1 teaspoon salt (To taste)
  • 1 teaspoon pepper (To taste)
  • 1 teaspoon paprika (Or taco seasoning)
  • 1 tablespoon oil (For cooking)

For the Guacamole

  • 2 pieces ripe avocados (Super ripe for best flavor)
  • 1 tablespoon lime juice (Squeezed fresh)
  • 1 pinch salt (To taste)
  • 1/4 cup chopped onion
  • 1/4 cup chopped cilantro
  • 1/2 cup diced tomato

Optional Toppings

  • 1 cup shredded cheese (For a melty topping)

Cook the Chicken

  1. Pound the chicken breasts to an even thickness.
  2. Season with salt, pepper, and paprika.
  3. Heat oil in a skillet over medium-high heat.
  4. Cook the chicken for 5-7 minutes on one side, then flip and cook until no longer pink.

Make the Guacamole

  1. In a bowl, scoop out the avocados.
  2. Add lime juice, salt, onion, cilantro, and tomato.
  3. Mash everything together to desired consistency.

Assemble

  1. Top each piece of chicken with guacamole.
  2. Sprinkle shredded cheese over the top if desired.

Pound chicken evenly for best results. Use very ripe avocados for flavor. Can broil with cheese on top for a ‘fancy’ result.

Dinner, Main Course
American, Mexican
Easy Chicken Recipes, Guacamole Chicken, Keto Recipes, Quick Meals, Weeknight Dinner

Savory Tortilla Egg Bake: A Simple Breakfast Delight

Delicious Tortilla Egg Bake with eggs, vegetables, and cheese baked in a crispy tortilla shell.

Tortilla Egg Bake is my not-so-secret fix for mornings when eggs alone feel too plain, but I seriously don’t have the time or mental energy to deal with a sink full of dishes. Has anyone else ever fallen into that rut where breakfast looks the same day after day? Yeah, guilty. Then I stumbled across the idea—somewhere between searching for a fun twist like Keto Chicken Tortilla Soup and planning dinner with Keto Eggplant Parmesan. Total game changer. Whether you’ve got picky eaters or just need to shake things up, this easy recipe does the trick and then some.

Tortilla Egg Bake

Key Concepts and Terminology

So, what actually is a savory Tortilla Egg Bake? Well, it’s comfort food. Think layers of tortillas, scrambled eggs, and whatever tasty bits you’ve got lying in your fridge. It sounds fancy, but really, if you can make a sandwich, you can whip this up blindfolded. The tortilla? It turns soft and a bit crispy. The eggs puff up all fluffy. And if you toss in some veggies, cheese, or leftover meat, you’ve just upgraded breakfast—without a speck of culinary school.

Honestly, sometimes I even call it “lazy breakfast lasagna.” Is that technically correct? Probably not. But it’s stuck with me. Some might confuse it with a frittata or quiche, which, nope, is not quite the same. Here we’re layering everything right into a baking dish instead of mixing it up first or fretting over perfect whisks. You’ll love these Ham and Cheese Egg Cups that offer individual portions with similar ease.

“I never imagined my kids would ask for seconds of something with spinach and peppers, but this Tortilla Egg Bake wins the morning every time.” – Jess, fellow breakfast lover

Savory Tortilla Egg Bake: A Simple Breakfast Delight

Benefits and Uses

Why am I borderline obsessed with this? For starters, the Tortilla Egg Bake saves my mornings. It’s like “meal prep light.” I make it ahead sometimes, cut it into squares, and microwave those on wild school days. Easy peasy. Plus, it’s forgiving. Forgot to thaw your bacon? Skip it! Need more veggies in your life? Empty that crisper drawer, friend.

Leftovers last a few days in the fridge. Great for brunch, a quick lunch, or even just a snack when I’m too lazy to make anything else. It also doubles as a protein bomb, so the inevitable midmorning hunger monster gets tamed. And honestly, I’ve tricked myself into eating more greens this way than in salads. For another vegetable-packed egg option, try these Baked Eggs and Zoodle Bundles that sneak in even more nutrition.

Another surprising use? Bring it to a potluck—it holds up warm or room temperature. Friends act like you brought a five-star restaurant dish, but you secretly spent ten minutes on it. That’s a win where I come from.

Savory Tortilla Egg Bake: A Simple Breakfast Delight

Common Misconceptions

Oh, the rumors I’ve heard about Tortilla Egg Bake. First: “Isn’t it just a weird breakfast enchilada?” Sorry, but nope, you don’t need fancy sauces or rolling anything. Then there’s the old “Tortillas in the oven just get soggy.” Actual myth. If you layer right, you get crisp edges and a chewy middle—the good stuff.

Some folks think you need precise measurements or specific ingredients, but honestly, recipes don’t rule here. You can substitute gluten-free or low-carb tortillas, swap out dairy, or even leave out meat. It’s naturally flexible, and unless you char it black, it’s tough to ruin.

People also ask if it’s worth the fuss. Yes! Compared to omelets or scrambled eggs, this actually sits around longer without getting rubbery. Speaking of scrambled eggs, if you want to perfect your basic egg technique, check out these Mouthwatering Cheesy Scrambled Eggs for a simpler morning option.

“Tortilla Egg Bake is my new go-to. Used to think it’d taste like mush, but now I crave those chewy corners.” – Ben T.

Advanced Techniques

Alright, for those looking to level up their savory Tortilla Egg Bake—pay attention to these hacks. Sometimes I toast the tortillas in the oven for a couple of minutes first. Not too crispy, just enough to give them backbone. Then, to get more flavor, I whisk in a splash of salsa or chipotle sauce with the eggs. Try stirring in herbs like cilantro or a pinch of smoked paprika. Sounds fancy, right? Not really—just tastes like it.

If you want to make it a real showstopper, sprinkle cheese between every layer, not just the top. For breakfast parties (is that a thing?), prep the bake the night before to let the flavors mingle in the fridge, then bake it off fresh. If you’re planning a brunch gathering, consider pairing this with a Delicious Ham and Spinach Quiche for variety.  Last tip: experiment with non-traditional fillings. I tossed in roasted sweet potato cubes last weekend. Maybe weird, but it disappeared in record time.

Expert Tips and Best Practices

Let me hand over my “breakfast wisdom” to you, friend. Here are a few tidbits that make this savory Tortilla Egg Bake go from meh to memorable:

  • Don’t skimp on seasoning your eggs. Salt, pepper, maybe garlic powder, do wonders.
  • Let it sit for a few minutes after baking before slicing. The pieces come out cleaner, trust me.
  • If you want extra crunch, add some tortilla chips on top.
  • Serve it with a dash of hot sauce or fresh salsa for a real morning wake-up.

Common Questions

Q: Can I use corn tortillas instead of flour ones?
A: You sure can. The taste and texture change a bit, but honestly, both rock.

Q: How long does it keep in the fridge?
A: Up to three days. Just cover it, and reheat slices as needed.

Q: What’s the best cheese to use?
A: I throw in cheddar, Monterey Jack, or whatever scrap of cheese is hiding in the cheese drawer. They all melt fine.

Q: Can I make this dairy-free?
A: Swap in plant-based milk or cheese, or just skip the cheese. Still comes out tasty.

Q: How do you tell when it’s done baking?
A: The eggs puff up and the edges get a little golden. Jiggle the pan gently—if the center doesn’t wobble wildly, you’re good.

Give Your Mornings a Happy Twist

If your breakfast or any other meal honestly needs a little spark, give the Tortilla Egg Bake a real try. It’s easy, forgiving, and makes mornings a heck of a lot less stressful. For even more inspiration, peek at the Baked Egg Tortilla (Viral TikTok Recipe) and see a fresh spin on this dish. There are numerous ways to riff on this, such as the Easy Cheesy Tortilla Egg Bake: The Perfect Breakfast, if cheese is your thing.

If you’re looking for more egg-based breakfast ideas, don’t miss these Cheesy Frico Fried Egg Tostadas that bring Mexican-inspired flavors to your morning. And for a crispy side to serve alongside, these Low-Carb Keto Hash Browns are the perfect complement.

Promise, once you try this, you’ll wonder how you survived sad scrambled eggs for so long. Get creative, don’t stress about perfection—sometimes the best breakfasts are the easiest ones.

Tortilla Egg Bake

An easy, comforting breakfast that layers tortillas, scrambled eggs, and your favorite veggies or meats for a delicious start to the day.

Main Ingredients

  • 6 large eggs (Whisked and seasoned)
  • 6 medium tortillas (Use gluten-free or low-carb if desired)
  • 1 cup cheese (Shredded, use cheddar or Monterey jack)
  • 1 cup vegetables (Such as bell peppers and spinach, chopped)
  • 1 cup leftover meat (Optional, like cooked bacon or chicken)
  • 1 teaspoon seasoning (Salt, pepper, garlic powder to taste)

Preparation

  1. Preheat your oven to 375°F (190°C).
  2. In a large bowl, whisk together the eggs with salt, pepper, and any desired seasonings.
  3. Layer tortillas in a greased baking dish, overlapping them slightly.
  4. Pour a portion of the egg mixture over the tortillas.
  5. Add a layer of cheese, vegetables, and optional meat.
  6. Repeat the layers, finishing with the remaining egg mixture on top.

Baking

  1. Bake in the preheated oven for 30 minutes or until the eggs are set and the top is slightly golden.
  2. Let it cool for a few minutes before slicing into squares.

For an added crunch, top with tortilla chips before baking. Leftovers can be refrigerated for up to three days and reheated as needed.

Breakfast, Brunch
American, Mexican
Comfort Food, Easy Breakfast, Flexible Recipe, Meal Prep, Tortilla Egg Bake

Savory Turkey Taco Lettuce Wraps You’ll Love to Make

Delicious turkey taco lettuce wraps served with fresh toppings and cilantro lime crema.

Turkey taco lettuce wraps used to sound a bit fussy to me if I’m honest. But after trying them one hectic Wednesday (when my fridge looked like a sad parade of leftovers), I totally get it now. They’re easy. Like, really easy. Plus, tasty enough that my picky cousin actually asked for seconds. If you’re bored of the standard taco night, trust me—this recipe is about to be your new best friend. And hey, if you’re curious about alternatives, check out these healthy turkey recipes too.
Savory Turkey Taco Lettuce Wraps You’ll Love to Make

How to Make Taco Lettuce Wraps

Let’s break it down. These wraps are simple, fast, and you don’t need any fancy chef skills. I start by browning ground turkey in a big pan—don’t walk away or it might stick. Drop in a mix of taco spices (store-bought is fine if you’re in a rush) and a splash of water, just to get things sauce-y.

While that simmers, wash up some crisp lettuce leaves. Romaine works best, honestly, because they don’t wilt like a sad salad. Don’t fuss about presentation; just pile the turkey mixture in, sprinkle on the cheese, a little salsa, maybe some chopped onions if you’re feeling extra. Seriously—easy as pie, but, well, this is way healthier than pie.

I usually let everyone build their own. Makes dinner feel a little like a party. Once you get the hang of these, you can really start playing with extras. Jalapeños, sour cream, sliced radishes—sky’s the limit.

“My family keeps asking for turkey taco lettuce wraps every week now. I swapped in Greek yogurt and they barely noticed—it was still delicious!” — Jen, Oklahoma City

turkey taco lettuce wraps

Tips and Tricks For Making Turkey Taco Lettuce Wraps

Okay, confession: I’ve messed these up a couple times. The trick is in the details. Make sure to drain your turkey well. Extra grease and water just turns your lettuce soggy, and nobody wants a drippy mess on taco night. Don’t overload the wraps. More is not always better here, weirdly enough. It just gets sloppy.

If you want to stretch the turkey, stir in a handful of black beans or even corn while cooking. Adds flavor, a little color, and makes the meal last longer, which is total magic when you’re feeding a crowd. Oh, and chop your toppings ahead. Trying to do it while the turkey cooks is a recipe for kitchen chaos. Trust me… I’ve got stories.

Honestly, you can play with the spice level too. My brother douses his in hot sauce, but a squeeze of lime and a bit of mild salsa is perfect for me. Keeps everybody happy.

Savory Turkey Taco Lettuce Wraps You’ll Love to Make

Great for Meal Prep!

Here’s a trick I learned after too many lazy Mondays: these turkey taco lettuce wraps are meal prep gold. Make a big batch of the turkey filling on Sunday. Stick it in the fridge. When you’re hungry (or running late), just warm it up, grab your lettuce leaves, and boom, lunch or dinner is ready.

If you’re taking them to work or school, pack the lettuce and filling separately. (No one likes wilted, sad lettuce.) Assemble when you’re about to eat. Even toss in a small container of salsa or avocado, if you want to jazz it up. They stay fresh for about three days, which is just about perfect for most folks who get tired of leftovers after a week.

Seriously, give it a try—makes busy days so much easier.

More Lettuce Wrap Recipes

Obsessed with these turkey taco lettuce wraps? Oh, join the club. If you want to change things up, there are tons of lettuce wrap recipes you can check out for a similar burst of flavor without all the bread.

One of my favorites: Asian-inspired chicken lettuce wraps. Little bit of hoisin, handful of chopped water chestnuts, done and done. You could also do shrimp with mango salsa. My pal Sam swears by a veggie-only version with quinoa and spiced black beans. I say, experiment until you find your “holy moly, this is awesome” combo.

For another lettuce wrap meal that’s perfect for family dinner, check out my post on it. Lettuce wraps really are the unsung heroes of easy meals.

More Taco Recipes You’ll Love

If I could eat tacos every day, seriously, I would. Honestly, with the twists you can put on tacos, you’re never bored. Turkey taco lettuce wraps are a winner, but you should try switching it up with shrimp tacos, maybe even cauliflower for a meat-free Monday.

Another fun one: breakfast tacos. Scramble some eggs, cook up a little chorizo, and you have brunch magic. My favorite way to shake up taco night? Add roasted sweet potatoes into the mix. Sweet and spicy—everybody’s happy.

If you’re a taco fanatic like I am, keep playing with new fillings. The toppings make it fun, too. No taco night ever has to be boring again.


Common Questions

Can I use a different meat?
Absolutely. Ground chicken or even crumbled tofu works if you’re not feeling turkey.

What’s the best lettuce for wraps?
Romaine or butter lettuce are my go-to. Iceberg is okay, but it’s a little flimsy sometimes.

How do I keep the wraps from falling apart?
Don’t overstuff ’em and pick the sturdiest leaves. Hold them like a little taco boat.

Can you freeze the turkey filling?
For sure. Just freeze the cooked meat, not the lettuce. Thaw, reheat, and serve—easy peasy.

Are turkey taco lettuce wraps spicy?
That’s totally up to you! Use mild taco seasoning if you’re heat-shy, or pour on the hot sauce if you’re brave.


Why I’ll Never Get Bored of These Wraps

So, if you haven’t hopped on board, now’s the perfect time to try these turkey taco lettuce wraps. They’re fast, versatile, and a lifesaver during busy weeks—really, it feels like something from a five-star restaurant, minus all the hassle. Check out these other takes, like Turkey Taco Lettuce Wraps from Cooking Classy or maybe Ground Turkey Taco Lettuce Wraps if you want different flavors. Honestly, recipes like the one from Eat Yourself Skinny might just convince you to ditch regular taco shells for good! Give it a shot; your future self (and your stomach) will thank you.

Turkey Taco Lettuce Wraps

These easy and delicious turkey taco lettuce wraps are a healthy alternative to traditional tacos, perfect for busy weeknights and meal prep.

Turkey Filling

  • 1 lb ground turkey (Make sure to drain well to avoid sogginess.)
  • 1 tbsp taco seasoning (Store-bought or homemade.)
  • 1/4 cup water (Just enough to create a sauce.)
  • 1/2 cup black beans (Optional, can be added for more servings.)
  • 1/2 cup corn (Optional, for flavor and color.)

Toppings

  • 8 leaves romaine lettuce (Best choice for wrapping.)
  • 1 cup shredded cheese (Cheddar or your favorite type.)
  • 1/2 cup salsa (To taste.)
  • 1/4 cup chopped onions (Optional for extra flavor.)
  • 1 each fresh lime (For squeezing on top.)
  • to taste hot sauce (Optional for heat.)

Prepare the Filling

  1. Heat a large pan over medium heat and add the ground turkey.
  2. Brown the turkey, breaking it apart as it cooks. Do not walk away or it might stick.
  3. Once browned, add taco seasoning and a splash of water. Stir and let simmer until sauce thickens.

Assemble the Wraps

  1. Wash and prepare romaine lettuce leaves.
  2. Fill each leaf with the turkey mixture.
  3. Add toppings such as cheese, salsa, and onions.
  4. Allow each person to build their own wrap.

Great for meal prep – make the turkey filling ahead of time and store in the fridge. Assemble just before eating.

Dinner, Main Course
Mexican
Healthy Tacos, Meal Prep, Turkey Taco Lettuce Wraps

Delicious Cauliflower Pizza Crust You Can Easily Make at Home

Crispy cauliflower pizza crust topped with cheese, tomatoes, and herbs.

Cauliflower pizza crust is my new weeknight obsession, but I know what you’re probably thinking. Is this really pizza? Trust me, if you’ve ever stood in your kitchen, holding that sad, soggy store-bought crust and wondering how on earth people make it crisp, you’re not alone (been there, got the T-shirt). Making it yourself, though, is surprisingly easy once you get the basics down. Stick with me while I walk you through everything: how to choose cauliflower, the steps that actually work, and all the tasty twists you can try. It’s actually easier than you’d think and perfect for anyone who wants pizza on a weeknight without the post-pizza nap. For more healthy twists, check out my cauliflower fried rice recipe—a true midweek lifesaver.
Delicious Cauliflower Pizza Crust You Can Easily Make at Home

What Is the Best Cauliflower to Use?

Picking the right cauliflower matters. Here’s the deal: freshness is king. I always look for heads that feel heavy and tight, not those funky, wilted ones hanging around in the back of the bin. Color? Stick with white. Those deep purple or green varieties are cool for salad but honestly, with pizza, you want classic white for a neutral flavor.
Bagged pre-riced cauliflower from the store is tempting, but only use it if you have zero patience for chopping. I swear, freshly grated at home tastes better and feels crispier. Oh – organic or regular? No life-or-death difference in taste. Use what’s easiest on your wallet.

I tried making cauliflower pizza crust with purple cauliflower once—my nephew called it “alien pizza” and refused a single bite.

Delicious Cauliflower Pizza Crust You Can Easily Make at Home

How to Cook Each Type of Cauliflower

OK, so you picked your head of cauliflower (or grabbed a bag of riced if it’s a Monday and you’re tired). Now what?
First off, don’t skip microwaving or steaming your cauliflower. Raw just won’t work. You want to cook it just enough so it gets soft but not mushy.
For heads, chop into florets, pulse in the food processor a bit so it looks like rice. Five minutes in the microwave usually does the trick. Let it cool or your hands will regret it. Then squeeze out the extra water—seriously, as much as you can.
Pre-riced? Even easier—same process, but skip the food processor. If you don’t drain all that water, the pizza crust will end up floppy and a little sad.
A weirdly helpful note: using a clean kitchen towel is better than paper towels for squeezing. You’ll thank me.

cauliflower pizza crust

Toppings Ideas for Cauliflower Pizza Crust

This is where you can go absolutely wild, honestly. There’s no “right” way to top a cauliflower pizza crust, but I’ll toss out some of my crowd-pleasers.
Start classic: mozzarella, tomato sauce, maybe some pepperoni (my brother’s favorite).
Feeling bold? Goat cheese, arugula, and roasted red peppers are epic together.
Kids in the house? Tiny meatballs or just plain cheese works wonders.
Vegetarian night? Pile on mushrooms, onions, and maybe a little pesto if you’re feeling fancy.
Don’t go super heavy with sauce. Cauliflower crusts love less moisture.

“I was totally shocked how crispy the edges came out. Even my picky five-year-old asked for seconds! New family go-to.” — Renee B.

Tips for Best Results

Let’s get real about what makes cauliflower pizza crust work (or.. totally flops it). If you want the crispiness, these are musts:
First, squeeze out every bit of moisture. Seriously, keep squeezing till your arms are tired. This changes everything.
Mix in one egg for binding, a small handful of shredded cheese (parmesan is delightfully salty), plus salt and pepper. I always throw in a dash of garlic powder.
Bake on parchment paper. Nothing sticks, crust gets golden. Bake first, add toppings second, then bake again. Don’t skip this double-bake step or the crust just isn’t the same.
If your crust breaks? No worries. Call it “rustic flatbread” and act mysterious.

How to Freeze It

Good news—cauliflower pizza crust freezes like a dream. If you want to make a batch ahead and save yourself some weekday work, here’s how I do it:
Let the crust cool completely after baking (don’t top it yet!).
Wrap with plastic wrap, then foil.
Toss in the freezer.
To eat later, thaw in the fridge, bake a few minutes just to crisp up, then top and bake as normal.
Frozen crusts are often even easier to crisp than fresh-made. I love pulling one out for instant “homemade” pizza night.
Serving Suggestions:

  • Top with leftover roasted veggies from the night before.
  • Try BBQ sauce and grilled chicken for a change.
  • Serve in wedges with a salad—you’ll hardly miss regular dough.
  • Drizzle with a little olive oil before throwing on cheese, it takes it up a notch.

Common Questions

Q: Does cauliflower pizza crust actually taste like pizza?
A: Kinda! It’s got a nutty vibe, but with cheese and sauce on top most people forget it’s made from a veggie.

Q: Is this good for low-carb diets?
A: For sure! Cauliflower pizza crust is my backup carb-saver when I’m cutting back.

Q: Can I make it vegan?
A: Yep! Just swap the egg for a flaxseed egg and skip cheese in the mix. Still holds up pretty well.

Q: Why is my crust falling apart?
A: Too much moisture or not enough binder. Squeeze the cauliflower and don’t skip the egg.

Q: Can I use frozen cauliflower?
A: Absolutely. Thaw it, wring out that water, and proceed as normal.

Your New Favorite Pizza Night

By now, you probably know way more about cauliflower pizza crust than you ever wanted to. And hey, if I convinced you to put down the store-bought version and try it yourself, I count that as a win. It’s easy, flexible, perfect for picky eaters, and honestly, way better than people expect. If you want even more tricks to nail it every time, check out this great guide on How to Make Cauliflower Pizza Crust over at Detoxinista, or browse creative spins at Foolproof Cauliflower Pizza Crust from iFoodReal.com. And when you’re ready to get next-level, don’t miss the Best Cauliflower Pizza Crust Recipe by Delish for wild topping ideas. Promise, you’ll never look at sad frozen pizzas the same way again. Give homemade a shot and let me know what wild combo you end up loving!

Cauliflower Pizza Crust

A healthy, easy-to-make alternative to traditional pizza crust using cauliflower, perfect for weeknight dinners.

Main Ingredients

  • 1 head Cauliflower, medium-sized (Use classic white for best flavor.)
  • 1 large Egg (For binding.)
  • 1/2 cup Shredded cheese (Parmesan recommended for its salty flavor.)
  • 1 tsp Salt
  • 1/2 tsp Pepper
  • 1 tsp Garlic powder (Optional, for added flavor.)

Cooking Materials

  • 1 sheet Parchment paper (To prevent sticking.)

Preparation

  1. Preheat oven to 400°F (200°C).
  2. Chop the cauliflower into florets and pulse in a food processor until it resembles rice.
  3. Microwave the riced cauliflower for 5 minutes until soft. Let it cool.
  4. Squeeze out excess moisture using a clean kitchen towel.

Mixing

  1. In a bowl, mix the squeezed cauliflower with egg, shredded cheese, salt, pepper, and garlic powder until well combined.

Baking

  1. Spread the mixture onto a lined baking sheet into a circle, about 1/4 inch thick.
  2. Bake for 20 minutes until golden and crisp.

Finishing Touches

  1. Remove from oven, add desired toppings, and bake for an additional 5-10 minutes.

For best results, avoid adding too much moisture from toppings. Crust can be frozen after baking and cooling; wrap in plastic and foil.

Dinner, Main Course
Healthy, Italian
Cauliflower Pizza Crust, Healthy Pizza, Low-Carb Recipe, Vegetable Crust, Weeknight Dinner

Mouthwatering Cheesy Frico Fried Egg Tostadas You’ll Love

Cheesy frico fried egg tostadas topped with pico de gallo for a delicious breakfast.

Cheesy frico fried egg tostadas. Just saying those words out loud makes me hungry all over again (honestly, it happens every time). So here’s the deal: I used to think making breakfast exciting was some kind of full-time job. Toast gets dull (fast). And pancakes? Too sweet sometimes. But once I stumbled on these glorious cheesy frico fried egg tostadas, it kinda changed everything. Turns out, crispy cheese and runny eggs are just what lazy mornings cry out for. And get this—if you’re into family-friendly comfort food, this cheesy spaghetti squash is another easy winner.

Mouthwatering Cheesy Frico Fried Egg Tostadas You’ll Love

Frico Eggs: Crispy Fried Cheesy Eggs

I know, frico sounds a little fancy, right? But really, all it means is cheese crisped up in the pan. That’s what makes these tostadas wild—so much flavor for honestly not much effort. You just grab a big handful of shredded cheese (cheddar or pepper jack hit different, but pick your favorite), throw it right in a hot pan, and let it get bubbly. The cheese melts into a golden, crispy disk. Then—here’s my favorite part—you crack an egg right on top. The egg cooks nestled in that cheesy blanket, and the bottom gets all lacy and crunchy. It’s a little ridiculous how good it is.

Smack that masterpiece on a warm corn tortilla, and boom, breakfast is now wild. My one warning: don’t walk away once the cheese starts cooking. It’ll go from zero to super crispy in about thirty seconds flat. Some friends think it looks like something from a five-star diner…but it’s seriously easy! If you prefer a simpler, cheesy egg approach, these Cheesy Scrambled Eggs are just as satisfying with less drama.

Actually, one of my buddies had a bite and said,

“I never thought cheese could be so crunchy and perfect with eggs. I make it every weekend now!”

cheesy frico fried egg tostadas

Nutrition Facts

Let me be real. If you’re watching carbs, cheesy frico fried egg tostadas are a pretty awesome option. Each one gives you good protein from the eggs, and if you use corn tortillas, the carbs stay reasonable compared to bread. Cheese adds calcium, and those salt hits that make your taste buds dance (unless you’re dairy-free, then…maybe try a good vegan cheese). For fat, yes, it’s there, but the kind that keeps you full until lunchtime. Sometimes I even sneak in diced avocado or fresh salsa on top for bonus fiber.

If you want to let it fit into the keto universe, swap the corn tortilla for a chaffle or eat the cheese-egg disk solo (that’s honestly delicious too). Speaking of low-carb sides, these Low-Carb Keto Hash Browns make the perfect accompaniment. It’s comfort food, but you don’t need to feel weighed down or guilty after.

Mouthwatering Cheesy Frico Fried Egg Tostadas You’ll Love

Related Video: Steak and Eggs

Alright, maybe I get too excited, but if you’ve got a few minutes, check out this video on steak and eggs. While it isn’t the same as cheesy frico fried egg tostadas, it’s the same magic—crunchy edges, tender egg, piles of flavor with just a skillet and a bit of confidence. Trust me, it’s worth the mini detour on your breakfast journey.

Breakfast & Brunch Headquarters

I gotta say, this is a power move for brunch. Invite friends over and pile up a platter of cheesy frico fried egg tostadas, and you’re officially the hero. It’s a wild upgrade from the ol’ soggy omelet. Pair them with a little fruit and coffee or, heck, maybe a Bloody Mary. These tostadas also work great for quick weekday mornings—I’ve got it down to under ten minutes, even when I’m half-awake.

Oh, and you could totally make a breakfast bar thing. Set out toppings like black beans, salsa, crumbled bacon, or that sneaky hot sauce (my family’s addicted, no shame). For another Mexican-inspired breakfast option, try these High-Protein Cottage Cheese Breakfast Tacos that work great alongside these tostadas. It’s hands-on and messy in the best way possible.
Not gonna lie, people will ask for your “secret.” My answer? Cheese and more cheese.

Tips for Perfecting Frico Eggs

Now, don’t overthink it—but here’s how you ace it every darn time:

  • Use a nonstick or well-seasoned skillet so the cheese lifts right off. If it’s sticking, it’s not ready.
  • Let the cheese melt and get golden before you add the egg. If it looks pale, wait another minute.
  • Medium heat is your friend. Too hot and the cheese might burn fast. Too low, the cheese just sits there and sweats, which is, ugh, a sad business.
  • Try with different cheeses for surprises—Mexican blend makes things wild, while Swiss gives a deeper nutty flavor.

Common Questions

Can I make cheesy frico fried egg tostadas ahead of time?
Not really. They’re best fresh, since the cheese gets chewy if you let them sit. If you gotta prep ahead, keep the toppings ready and pan-fry the eggs last minute. For make-ahead options, check out these Ham and Cheese Egg Cups that freeze beautifully.

What are some fun topping ideas?
Fresh salsa, sliced avocado, pickled onions, a handful of cilantro, even a scoop of leftover chili. Go wild!

Can I use flour tortillas instead of corn?
You can, but corn is sturdier with the gooey cheese and egg mess. Flour gets a bit floppy. If you don’t mind that, go forth!

Is this recipe good for keto?
Ditch the tortilla or use a low-carb one. The cheese and egg alone are basically keto dreams, like this keto eggplant parmesan idea I tried once—super on point.

Can I make this dairy-free?
Use an allergy-friendly cheese alternative, but know the “frico” crispiness may be less dramatic.

Frico Eggs

Crispy cheese and runny eggs come together in these Cheesy Frico Fried Egg Tostadas, creating a delicious breakfast treat that’s both simple and satisfying.

Main Ingredients

  • 1 cup shredded cheese (cheddar or pepper jack) (Use your favorite type of cheese.)
  • 2 large eggs (Fresh eggs work best.)
  • 2 pieces corn tortillas (Corn tortillas are sturdier than flour.)

Optional Toppings

  • 1/2 cup diced avocado (For added fiber.)
  • 1/2 cup fresh salsa (Choose your preferred salsa.)
  • to taste hot sauce (Ideal for those who enjoy spice.)

Preparation

  1. Preheat your nonstick or well-seasoned skillet over medium heat.
  2. Spread shredded cheese in an even layer in the hot pan.

Cooking

  1. Let the cheese melt and get golden, then crack an egg on top of the melted cheese.
  2. Cook until the egg white is set but the yolk is still runny.
  3. Carefully lift the cheese and egg disk from the pan and place it on a warm corn tortilla.

Serving

  1. Top with optional toppings like diced avocado or salsa.
  2. Serve immediately and enjoy your cheesy frico fried egg tostadas!

Best enjoyed fresh as the cheese can become chewy if left to sit. You can prepare toppings ahead of time for a quick assembly in the morning.

Breakfast, Brunch
American
Breakfast Tostadas, Cheesy Eggs, Comfort Food, Easy Breakfast, Frico Eggs

Deliciously Creamy Keto Italian Sausage Soup You’ll Love

Bowl of creamy Keto Italian sausage soup filled with vegetables and spices.

keto Italian sausage soup is what you think about when your stomach rumbles and outside is so cold you can see your own breath. Honestly, have you ever stood in your chilly kitchen—wondering what’s both comforting and friendly for your carb count? I’ve been there, staring into my fridge, hoping some magic answer pops out. That’s how I ended up obsessed with this soup. If you like the idea of warming your bones and your taste buds, check out more cozy keto soup recipes too.
keto Italian sausage soup

Cold day keto soups

Soup just hits different when the wind is howling or maybe you’re just feeling one of those “need a hug in a bowl” days. You could make any old soup, sure. But keto Italian sausage soup is a serious cozy-maker. I’ve done the whole “just broth” route, and wow, that gets boring so fast.

The magic here? This soup’s got a rich, creamy feeling but still fits snugly into a keto lifestyle. No guilt. All that flavor. The sausage spices perk things up, while heavy cream adds—what’s the word—luxury? Yes, actual five-star restaurant vibe. Plus, when you make your own soup, you control every single thing in the pot. Salt level, fat level, spiciness… go wild or keep it mellow.

My go-to move is doubling the batch (pro tip). Freeze half for some future day when you feel too lazy to cook or, heck, you just want dinner in five minutes. Trust me, one spoonful and winter feels less gloomy.

“Made the soup for lunch and even my none-to-keto partner got up for seconds. Absolutely delicious!” – Shellie P.

keto Italian sausage soup

Equipment for keto sausage soup

Don’t worry—no fancy stuff needed here. Biggest thing? Grab a big soup pot or heavy-bottomed Dutch oven, if you have one. That’s about it. I stick with a wooden spoon (so I don’t go scraping up my favorite pan) and a sharp knife for chopping veggies.

Cutting board, obviously. If you have a ladle, it makes serving prettier and easier. That’s basically my full setup. Oh, a measuring cup doesn’t hurt if you want it to taste exactly the same each time. But honestly, most of the time I’m just pouring and eyeballing it (oops).

Cooktop works better than anything automatic, in my opinion. You can ramp up the heat, simmer down low, or just sneak a tiny sample without bothering with programmable gadgets. Makes it more personal. People get scared to make soup from scratch, but really—if you can stir and simmer, you’ve got this.

Deliciously Creamy Keto Italian Sausage Soup You’ll Love

Top tips

So. Want your keto Italian sausage soup perfect every time? Here’s the stuff I’ve messed up and learned from (because hey, we all make weird soup now and again):

  • Brown the sausage well. It’s what boosts the taste big-time.
  • Don’t drown it in liquid. Add broth slowly; too much and goodbye creamy feel.
  • Season as you go. Tasting early is not cheating—it’s survival.
  • Stir in cream at the end. Otherwise it might, uh, curdle and look funky.

Usually I toss in some kale or spinach right before the end. Wilts fast, adds color. Also, I let it sit a few minutes before diving in—it gets thicker and tastier. There’s no real downside unless you eat it straight away and burn your tongue, which… been there.

Variations

This soup is sort of a blank canvas for flavor. If you’re a wild child with your food, go ahead and shake things up. I’ve swapped sausage types—hot Italian, sweet, even turkey—and each gives a different kick. If you’re not about dairy, coconut cream can sneak in as a sub, with a tiny change in taste.

Got leftover veggies? Zucchini or peppers work just fine. Some folks like to add a splash of tomato puree for a tangy bite. Mushrooms, too, if you’re that kind of person. Making it spicy? Hit it with more red pepper flakes. Oh, and if you want other cozy keto dinners, that cheesy spaghetti squash keto casserole also rules.

Serve it different every time—you get variety but the same cozy spirit. Sometimes new favorites happen by accident!

What to serve with Italian sausage soup?

Honestly, this keto Italian sausage soup kind of owns the meal all by itself. Still, sometimes you want a little something extra to round things out. Here’s what I like:

  • Parmesan chips for crunch (they’re easy if you bake cheese on parchment).
  • Simple salad dressed with olive oil and lemon, for some zing.
  • Keto garlic bread if you’re feeling ambitious.
  • Or just a warm cup of black tea, especially if you’re chilly!

Trust me, the soup’s the star. Everything else is just backup singers. If you want dessert, by the way, there’s a whole trove of low-carb sweet treats out there after dinner.

Common Questions

Can I freeze keto Italian sausage soup?
Absolutely. Just let it cool fully, store in a zip bag or container, and freeze. When you reheat, do it slowly so the cream doesn’t separate.

Is heavy cream necessary?
Nope. You can use coconut cream or even almond milk, but expect a little change in taste and texture.

What sausage works best?
I prefer spicy Italian, but any uncooked sausage with lots of flavor does the trick.

How long will it keep in the fridge?
Usually about 3-4 days, if you don’t gobble it all up first.

Can I make it dairy-free?
Yep, coconut cream’s your friend here. Just double-check your sausage isn’t hiding any lactose.

This soup makes winter actually fun

The bottom line? Keto Italian sausage soup is honestly my winter miracle. You get warm, full, and happy without backtracking on your keto goals. If you like this one, maybe peek at recipes from Creamy Keto Italian Sausage Soup – Explorer Momma for more spins and ideas. Or, you might want to try The Best Keto Creamy Italian Sausage Soup – Thinlicious, which gives a totally different sausage vibe. And don’t forget Italian Sausage Vegetable Soup – Keto – All Day I Dream About Food for even more keto twists. Grab your spoon, toss some sausage in the pot, and make a batch—you’ll be glowing from the inside out.

Keto Italian Sausage Soup

A rich and creamy keto Italian sausage soup perfect for cold days, packed with flavor and low on carbs.

For the soup

  • 1 lb Italian sausage (Spicy or sweet according to preference)
  • 1 onion, diced (For flavor base)
  • 3 cloves garlic, minced (Add for additional flavor)
  • 4 cups chicken broth (Add gradually to control creaminess)
  • 1 cup heavy cream (Can substitute with coconut cream for dairy-free)
  • 2 cups kale or spinach, chopped (Add just before serving for color and nutrition)
  • 1 tsp red pepper flakes (Adjust based on spiciness preference)
  • Salt to taste Salt (Season to preference)

Preparation

  1. In a large pot, brown the Italian sausage over medium heat.
  2. Add in diced onion and garlic, cooking until softened.

Cooking

  1. Gradually stir in chicken broth and let it simmer.
  2. Slowly add the heavy cream, stirring continuously to avoid curdling.
  3. In the last few minutes, incorporate the chopped kale or spinach.
  4. Season with salt and red pepper flakes to taste.

Serving

  1. Let the soup sit for a few minutes before serving to thicken and enhance flavors.
  2. Serve hot with optional Parmesan chips or keto garlic bread.

This soup freezes well; store cooled soup in zip bags or containers. For dairy-free options, use coconut cream. Can substitute sausage types for varying flavors.

Main Course, Soup
Italian
Comfort Food, Italian Sausage Soup, Keto Soup, Low Carb Soup, Winter Recipes

Delicious Keto Protein Shake Recipes You’ll Love

Keto protein shake with 20g protein and low net carbs for a delicious, healthy drink.

Ever made a promise to eat right, but then your stomach starts yelling by 10 a.m.? Yeah, keto protein shake is pretty much my rescue plan. If you ever got stuck eyeing the office donuts, just wishing your “low carb” breakfast tasted good… well, same. After lots of tweaking, I finally landed on shakes I actually look forward to, not just tolerate. And hey, these shakes can be as satisfying as this air fryer spaghetti squash I posted last week or even the bold flavor from that beef heart stew keto recipe that kinda shocked me (in a good way!). Trust me, getting enough protein—and actually enjoying it—can be way simpler than it sounds.

Delicious Keto Protein Shake Recipes You’ll Love

Top Benefits of Keto Protein Shakes

Let’s just say I was always the person who wanted breakfast fast but hated eggs by Thursday. Keto protein shake swooped in and saved my mornings. What’s the big deal? First off, high protein means your belly isn’t growling at noon. I feel more full, longer. Protein shakes also keep me from sneaking chips from my kid’s lunchbox (parents, you know).

If you’re also clumsy at meal prepping, shakes fix that. No cooking. No sticky cleanup. I always have energy to get outside or, honestly, just finish work without the whole “afternoon fade.” My skin even got glowier—random, but true. Swapping in a keto protein shake trimmed down the carbs, too, but, surprise, I never miss bread. Who knew?

If you’re curious, here’s something random: compared to a regular sugary shake, it’s pretty much the difference between a quick walk and running a whole marathon—one’s just way better for your health in the long run.

“I was skeptical about keto protein shake. Now, it’s honestly the fastest way I keep on track—and kind of the tastiest. Even my husband drinks mine when I’m not looking!” – Amanda P.

Delicious Keto Protein Shake Recipes You’ll Love

Key Ingredients to Look for in Keto Protein Shakes

Let’s crack open the fridge, shall we? When I first started eyeing those keto protein shake powders, labels looked like gibberish. So, here are my favorite finds—no science degree needed.

First, always check for a protein source you actually recognize. Whey, egg, or pea protein are my go-tos. If “hydro-who-knows-what” pops up, I skip it. Net carbs—make sure it’s under four grams. Too many sneaky carbs, and you’ll be hungry soon after.

Watch out for sugar alcohols, but don’t panic—erythritol is mostly fine in my (totally un-professional) opinion because I never get that weird aftertaste! Hey, I’ve even found a few brands using coconut or MCT oil, which gives this creamy vibe that almost tricks me into thinking I’m drinking a milkshake from a five-star restaurant (total exaggeration, but still).

Last bit: real flavors, always. Chocolate, vanilla, peanut butter—I’ll take ‘em all, but only if there’s nothing funky like “birthday cake blast.” I still have flashbacks from trying that flavor. Yikes.

Delicious Keto Protein Shake Recipes You’ll Love

You know those times you stand in front of the protein powder shelf, eyes glazing over because—wow—there’s just way too many choices? Been there. I set out to taste-test every keto protein shake I could find (well, not all, but enough to drive my family nuts).

My personal top picks: a smooth vanilla from one brand (rhymes with “bulletproof”) that blends up so thick, it’s like a dessert. Chocolate is usually safe, especially from reputable lines you spot in health food stores. Price does matter a bit—some shakes really are better at $2 a serving than $7.

A few brands make “ready to drink” keto protein shakes, too, which are life-saving on hectic workdays. They’re not as thick, but no mixing, no fuss. If your blender is hiding in the back of the cupboard, you’ll want these.

Heads up—always check those carb counts and whether they use funky sweeteners. Reviews help, but taste is always personal. If you don’t love it, you’re not gonna drink it. Sadly learned this after enthusiasm-shopping and some cash down the drain.

Nutritional Information You Need to Know

So, “Is this shake really keto?” That’s probably the big question. Here’s my cheat sheet for keto protein shake: most should give you at least 15 grams of protein per scoop (some closer to 25), 2-4 grams net carbs, and maybe 1-8 grams fat.

A good shake bridges breakfast and lunch—no hangriness in sight. Fiber’s a bonus if you tolerate it. I once chugged a shake with too much MCT oil, though, and let’s just say I was extra “regular” for a few days. Balance is key.

Watch out for sneaky stuff—added sugar, maltodextrin, and anything ending in “-ose.” Not your friend if you’re staying truly low carb. Nutrition panels help, but confession: I still pick flavors first if the macros are close.

Tips for Incorporating Keto Protein Shakes into Your Diet

Sometimes I hear, “But aren’t shakes boring?” Nope. There are a million ways to make a keto protein shake taste new. Here are a few hacks that saved my sanity (and taste buds):

  • Blend half an avocado in your shake for a creamy texture.
  • Stir in a spoonful of nut butter—almond is delicious.
  • Add a few drops of natural extract (like peppermint, if you’re wild).

You can also pour it over ice and eat with a spoon. Top with unsweetened coconut flakes and berries for a treat. Some folks even use shakes as a base for smoothies or low-carb “desserts.” If those ideas don’t jazz you up, peek at this dessert keto section or even something savory, like dinner keto, for later.

Common Questions

How many times a day can I drink these shakes?
I usually stick to once or twice max, so I don’t get bored. Listen to your body, though.

Can I meal prep shakes?
Absolutely! I throw dry ingredients in little jars for the week, just add liquid and go.

Any side effects to watch for?
If you’re not used to protein or MCT, start slow, or your stomach might rebel.

Are the ready-made ones as good as homemade?
Honestly, close enough for busy days. Homemade feels fresher, but store-bought is a lifesaver sometimes.

What if I don’t like the taste?
Try a different brand! Or blend in cocoa, berries, and nut butter to mask it.

Time to Make Your Keto Breakfast Shine

There you go—my playbook for enjoying keto protein shakes the easy way. From glowing reviews to big flavor, these are honestly fuss-free and actually tasty. If you still need more ideas, check out the full Keto Protein Shake – Amazon.com selection or grab a Ready To Drink Protein Shake Keto bottle for mornings on the run. Don’t be afraid to experiment! Your blender (and your hungry self) will thank you.

Keto Protein Shake

A quick and satisfying way to enjoy breakfast without the carbs, packed with protein and flavor to keep you energized throughout the day.

Main Ingredients

  • 1 scoop Keto protein powder of your choice (Look for low-carb options with minimal ingredients.)
  • 1/2 medium Avocado (For a creamy texture.)
  • 1 tablespoon Nut butter (almond or peanut) (Adds flavor and richness.)
  • 1 cup Almond milk or coconut milk (Use unsweetened varieties.)
  • 1 teaspoon Natural extract (like vanilla or peppermint) (For added flavor.)
  • Ice (To chill your shake.)

Preparation

  1. Add one scoop of keto protein powder into a blender.
  2. Slice half an avocado and add it to the blender.
  3. Add one tablespoon of nut butter and one cup of almond or coconut milk.
  4. Pour in a teaspoon of your chosen natural extract and some ice.
  5. Blend until smooth and creamy.
  6. Serve immediately and enjoy your delicious keto protein shake!

Experiment with different flavors and ingredients to keep your shakes interesting. You can make a batch of dry ingredients for meal prep to simplify your mornings.

Breakfast, Snack
Keto, Low Carb
Healthy Breakfast, Keto Protein Shake, Low Carb Shakes, Nutritional Shake, Protein Smoothie